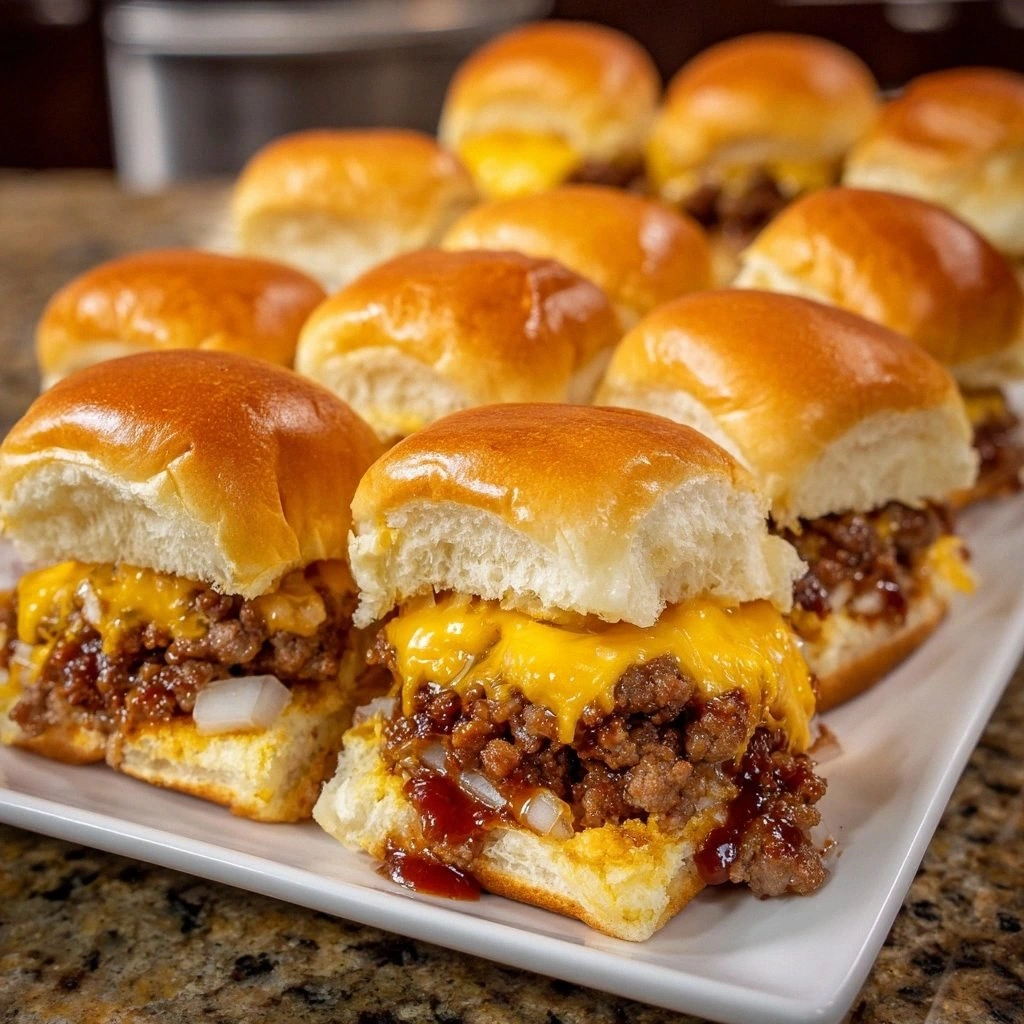
I remember that night when the kitchen felt like a war zone: a half‑cooked burger, a burnt sauce, and a stubborn craving that wouldn’t quit. I stared at the skillet, the scent of charred onions mingling with the faint promise of sweet smoke, and I whispered, “I’m going to make this right.” That single moment sparked a recipe that has become my secret weapon for parties, game nights, and any time you want to feel like a culinary hero. The combination of juicy ground beef, melty cheddar, smoky BBQ sauce, and a hint of diced onion creates a flavor symphony that lingers on the tongue. The texture—crisp edges, tender center, a buttery bun that doesn’t buckle—makes each bite a small triumph. I’ve tested it across seasons, with different brands of BBQ sauce, and even swapped in pepper jack for cheddar, and the result never disappoints. The best part? The technique is so simple that even a kitchen novice can pull it off, and the outcome is hands down the best version you’ll ever make at home. Let me walk you through every single step—by the end, you’ll wonder how you ever made it any other way.
What Makes This Version Stand Out
- Flavor: The BBQ sauce isn’t just a glaze; it’s a flavor backbone that turns ordinary ground beef into a smoky, slightly sweet masterpiece. The sauce coats the patties like velvet, sealing in juices and adding depth that’s impossible to replicate with plain ketchup.
- Texture: The buns are toasted just enough to stay soft inside while gaining a subtle crunch on the outside. That contrast keeps every bite exciting, preventing the sliders from becoming soggy.
- Simplicity: Six ingredients, one pan, and a handful of quick tricks—no fancy equipment, no complex steps. I dare you to taste this and not go back for seconds.
- Uniqueness: The diced onions add a sweet bite that cuts through the richness, and the shredded cheese melts into the beef, creating a gooey bridge that’s both comforting and indulgent.
- Crowd Reaction: Friends who’ve tried the classic version often complain about dryness or blandness. With this recipe, they’re left begging for the next batch.
- Ingredient Quality: Choosing a good quality beef with a 15–20% fat content ensures the patties stay juicy. The cheddar’s sharpness balances the sweetness of the BBQ sauce.
- Cooking Method: A single pan sear followed by a brief rest period locks in flavor and keeps the meat from drying out.
- Make‑Ahead Potential: The sliders can be assembled ahead of time and reheated with minimal loss of quality, making them perfect for busy days.
Alright, let’s break down exactly what goes into this masterpiece…
Inside the Ingredient List
The Flavor Base
Ground beef: The star of the show! Choose a good quality beef for juicy patties. A 15–20% fat content keeps the sliders moist; if you’re watching calories, a leaner cut will still work but may dry out faster. The beef forms the bulk of the flavor, absorbing the BBQ sauce and onions. If you skip it, you’re basically making a cheese‑only slider—fun, but not the same.
The Texture Crew
Slider buns: Soft and fluffy, these are the perfect vessel for your delicious patties. They should be fresh or toasted lightly to add a subtle crunch. Using a sturdy bun like a brioche or potato roll keeps the sliders from falling apart. If you’re in a pinch, a regular hamburger bun will do, but you might lose that buttery feel.
The Unexpected Star
Diced onions: A little crunch and sweetness to enhance the flavor of the beef. They add a fresh bite that cuts through the richness of the cheese and the BBQ sauce. If you’re not a fan of onions, try finely minced garlic or even a splash of Worcestershire sauce for a different twist. Skipping them will make the sliders feel a bit flat.
The Final Flourish
Shredded cheddar cheese: This melty goodness adds a rich flavor that pairs perfectly with BBQ. Sprinkle it over the patties in the last minute of cooking for a gooey, golden finish. If you want a smokier cheese, try smoked cheddar or pepper jack. If you skip the cheese, the sliders become less indulgent and lose that signature melt.
BBQ sauce: The tangy kick that brings everything together. Feel free to use your favorite brand or homemade version! The sauce coats the meat like a glaze, locking in juices and adding a sweet‑smoky flavor that’s impossible to replicate with ketchup alone. If you’re a fan of heat, add a dash of sriracha or chipotle powder to the sauce.
Salt and pepper: Essential seasonings to elevate the taste of your patties. A pinch of salt per patty brings out the beef’s natural flavor, while cracked pepper adds a subtle heat. If you’re watching sodium, use a low‑sodium BBQ sauce and reduce the added salt.
Everything's prepped? Good. Let's get into the real action…
The Method — Step by Step
- Prep the beef: In a large bowl, combine the ground beef with diced onions, salt, and pepper. Toss gently until the mixture is uniform. This step is crucial; over‑mixing can lead to tough patties. I always let the mixture rest for 5 minutes to allow the flavors to meld.
- Shape the patties: Divide the mixture into 8 equal portions and shape each into a thin patty, about ¾ inch thick. Make a slight indentation in the center of each patty with your thumb; this prevents the patty from puffing up during cooking. The indent also gives the cheese a place to melt into the meat.
- Heat the pan: Preheat a cast‑iron skillet or heavy‑bottom pan over medium‑high heat until it’s shimmering. Add a splash of oil—olive or avocado works best—to prevent sticking. When the oil starts to ripple, you’re ready to cook.
- Cook the patties: Place the patties in the pan in a single layer, being careful not to overcrowd. Sear for 3 minutes on the first side until a golden crust forms. Flip and cook for another 2 minutes. The goal is a caramelized exterior and a juicy interior.
- Add cheese: Sprinkle shredded cheddar over each patty immediately after flipping. Cover the pan with a lid for 30 seconds to allow the cheese to melt into the meat. The cheese should be gooey but not dripping.
- Apply BBQ sauce: Drizzle BBQ sauce over each patty, then let the sauce bubble and caramelize for 30 seconds. The sauce should coat the meat like a glossy glaze. The aroma will make you forget any lingering kitchen disasters.
- Rest the patties: Remove the patties from the pan and let them rest on a plate for 2 minutes. Resting allows the juices to redistribute, ensuring each bite is moist and flavorful.
- Toast the buns: While the patties rest, split the slider buns and toast them lightly on a separate pan or in a toaster oven until golden brown. A buttery, slightly crisp bun elevates the overall experience.
- Assemble the sliders: Place a patty on each bun, then add a spoonful of BBQ sauce on top. Add a few fresh onion slices if desired. Serve immediately while the buns are still warm and the cheese is melty.
That's it — you did it. But hold on, I've got a few more tricks that'll take this to another level…
Insider Tricks for Flawless Results
The Temperature Rule Nobody Follows
Many cooks think medium heat is safe, but the truth is a high, steady flame seals the outside while keeping the inside juicy. Set your stove to medium‑high and let the pan preheat until it’s almost smoking. The high heat creates a caramelized crust that locks in flavor and moisture.
Why Your Nose Knows Best
You’ll notice a sweet, smoky scent once the BBQ sauce hits the pan. That aroma signals the sauce is caramelizing correctly. If you don’t smell that, you’re probably cooking too low and the sauce will stay syrupy.
The 5‑Minute Rest That Changes Everything
After cooking, let the patties rest for exactly five minutes. The juices redistribute, preventing them from spilling onto the plate. It’s a small step that makes a huge difference in mouthfeel.
Cheese Placement Matters
If you want a cheese‑smothered experience, place the cheese on the patty before flipping. The cheese will melt into the meat, creating a seamless, gooey layer that’s hard to resist.
Onion Variations
Try caramelizing the onions before adding them to the meat. The caramelized onions bring a sweet depth that contrasts with the smoky sauce. If you’re short on time, use pre‑sliced onions to save prep time.
Keep the Buns Fresh
Store slider buns in a sealed plastic bag at room temperature for up to three days. If you’re making them in advance, wrap them in foil and toast them fresh just before serving.
Creative Twists and Variations
This recipe is a playground. Here are some of my favorite ways to switch things up:
Spicy Jalapeño Sliders
Add finely chopped jalapeños to the beef mixture and a dash of chipotle powder to the BBQ sauce. The heat pairs beautifully with the cheese, giving the sliders a fiery kick.
Mushroom Swiss Delight
Replace cheddar with Swiss cheese and sauté sliced mushrooms in the pan before adding the beef. The earthy mushrooms complement the smoky sauce for a sophisticated twist.
Bacon‑Wrapped Buns
Wrap each slider bun with a strip of bacon before toasting. The bacon crisps up, adding a salty crunch that contrasts with the sweet BBQ sauce.
Pineapple BBQ Fusion
Add diced pineapple to the beef mixture and use a tropical BBQ sauce. The pineapple’s natural sweetness balances the savory beef and cheese, creating a beach‑inspired flavor.
Herb‑Infused Beef
Stir in fresh thyme or rosemary into the beef before cooking. The herbs add depth and a fragrant aroma that elevates the entire dish.
Vegan Version
Swap the beef for a plant‑based crumbled tofu or tempeh, use dairy‑free cheese, and a vegan BBQ sauce. The result is a plant‑based slider that still delivers on flavor.
Storing and Bringing It Back to Life
Fridge Storage
Store assembled sliders in an airtight container for up to 2 days. Keep the buns separate until you’re ready to reheat to avoid sogginess. If you’re storing pre‑assembled, cover the buns with parchment paper to maintain crispness.
Freezer Friendly
Freeze assembled sliders in a freezer‑safe bag for up to 3 months. Thaw overnight in the refrigerator before reheating. Reheat in a toaster oven or on a skillet until the cheese is melty again.
Best Reheating Method
Reheat in a skillet over medium heat, adding a splash of water to create steam, then cover for 2 minutes. The steam helps the buns stay soft and the cheese re‑melts without drying out. Finish with a quick toast to regain that golden crunch.