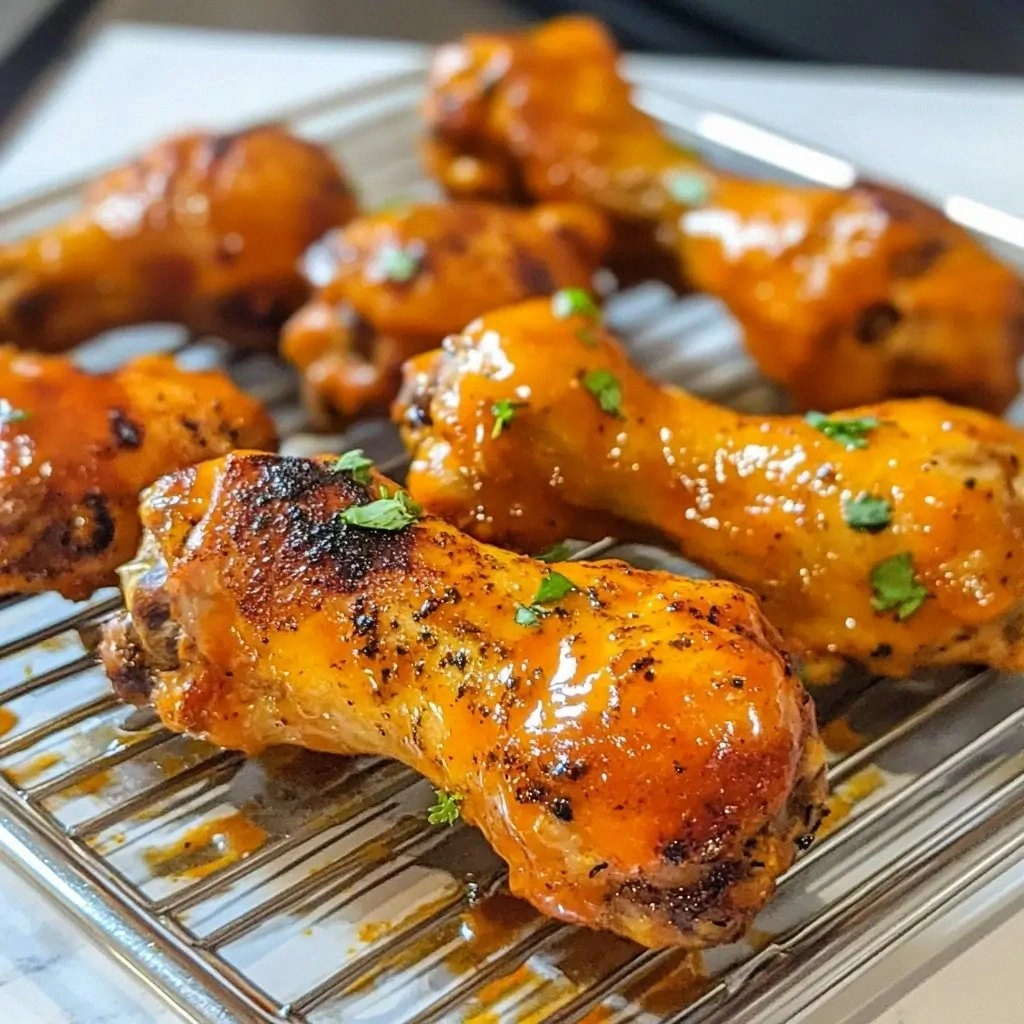
Picture this: it’s a rainy Saturday, the radio is blasting some old‑school rock, and I’m staring at a pile of chicken drumsticks that have been chilling in the fridge since last week. I’ve tried every “quick and easy” chicken recipe that promises a smoky, spicy finish, but they all end up either dry or overwhelmingly greasy. That night, my friend dared me to whip up a Buffalo chicken that would make even the most seasoned wing lover beg for the recipe. I laughed, grabbed my skillet, and decided that this was the moment to finally settle the debate.
The kitchen lights flickered, the scent of raw poultry hit my nose, and the sound of the stove’s hiss was the soundtrack to what would become a culinary revelation. I could almost taste the tangy heat that would coat each drumstick like a silky, fiery blanket. The sizzle that erupted when the meat hit the pan was a cue: this is where flavor meets texture in a dance that’s hard to resist. I knew, from that first crackle, that this version would outshine every other Buffalo chicken out there.
What makes this recipe stand out isn’t just the blend of hot sauce and butter; it’s the method that locks in moisture while creating a crisp, caramelized crust that crackles with every bite. I’ve spent months tweaking ratios, experimenting with different sauces, and discovering that a splash of vinegar balances the heat without diluting the flavor. And let’s not forget the final brush of blue cheese dressing that adds a creamy contrast, turning each bite into a harmonious explosion of heat and cool.
I’ll be honest—when I tasted the first drumstick, I almost dropped it on the floor. The flavor profile was so rich, so perfectly balanced, that I could feel the heat dancing on my tongue while the buttery finish soothed it. I dared you to try this and not go back for seconds, and trust me, you won’t. If you’ve ever struggled to make your Buffalo chicken taste like the restaurant version, you’re not alone—and I’ve got the fix.
What Makes This Version Stand Out
- Flavor Depth: The combination of Frank’s RedHot, butter, and a hint of vinegar creates a complex heat that lingers without burning. It’s not just spicy; it’s a layered experience that keeps you coming back for more.
- Crispy Perfection: The initial sear locks in juices, while a quick finish under the broiler gives the skin a crackle that’s impossible to resist. The result is a texture that ranges from buttery inside to blistered outside.
- Easy Prep: No pre‑marinades or overnight soaking required. This recipe is a one‑pan wonder that saves you time while delivering restaurant quality.
- Unforgettable Crowd Reaction: Friends and family who’ve tried this version say it’s the best Buffalo chicken they’ve ever tasted. The plate looks as impressive as it tastes.
- Ingredient Quality: Using fresh, high‑quality chicken and a premium hot sauce makes all the difference. The sauce’s natural vinegar base adds brightness that cheap alternatives lack.
- Make‑Ahead Friendly: You can prepare the sauce ahead of time and store it in the fridge, making this a perfect meal for busy evenings.
- Versatility: Swap the blue cheese dressing for ranch, or add a splash of honey for a sweet‑heat twist. The base is flexible enough to accommodate your cravings.
- Balanced Nutrition: With a moderate protein content and controlled fat, it’s a guilt‑free indulgence.
Inside the Ingredient List
The Flavor Base
At the heart of this dish lies the sauce—a marriage of Frank’s RedHot, melted butter, and a whisper of white vinegar. The hot sauce provides the signature heat, while the butter adds richness that coats the meat like velvet. The vinegar cuts through the fat, brightening the overall profile. If you’re watching calories, swap half the butter for Greek yogurt; the result is creamy but lighter.
The Texture Crew
The chicken drumsticks themselves are the foundation. Opt for fresh, bone‑in pieces to keep the meat juicy. A quick pat dry with paper towels before searing ensures a golden crust. If you’re a fan of extra crisp, finish the drumsticks under the broiler for a minute or two, watching the edges crackle like thin ice.
The Unexpected Star
Blue cheese dressing isn’t just a garnish; it’s a cooling agent that balances the heat. The creamy texture contrasts the spicy exterior, creating a harmonious mouthfeel. If you’re lactose intolerant, a light ranch or a simple squeeze of lime can substitute without compromising the balance.
The Final Flourish
A pinch of cayenne pepper adds depth, but it’s optional—tweak it to your heat tolerance. Freshly ground black pepper brings a subtle aroma that elevates the dish. Salt to taste is the last touch; remember, the sauce already carries a savory punch, so a light hand goes a long way.
Everything’s prepped? Good. Let’s get into the real action…
The Method — Step by Step
- Heat a large cast‑iron skillet over medium‑high heat until it shimmers. Add a tablespoon of olive oil, swirling to coat the bottom. The oil should be hot enough that a drop of water sizzles immediately. This high heat is crucial for a caramelized crust.
- Pat the chicken drumsticks dry with paper towels—this step is non‑negotiable. Moisture on the surface prevents proper browning. Sprinkle a pinch of salt and pepper over the drumsticks, letting the seasoning adhere. Place the drumsticks skin‑side down in the skillet, leaving space between each piece.
- Sear the drumsticks for 5 minutes until the skin turns a deep amber. Flip carefully with tongs, ensuring the skin stays intact. This initial sear locks in juices and creates the foundation for that coveted crunch.
- Reduce the heat to medium and pour in the butter. Let it melt completely, swirling the skillet to coat the chicken evenly. The melted butter will carry the hot sauce’s heat throughout the meat.
- In a small bowl, whisk together the hot sauce, vinegar, garlic powder, onion powder, and cayenne pepper (if using). Pour the mixture over the drumsticks, turning them to coat each piece. The sauce should coat the meat like a glossy glaze.
- Cover the skillet with a lid and let the drumsticks simmer for 15 minutes. The lid traps heat, allowing the sauce to penetrate the meat. The scent of simmering hot sauce will make you forget any kitchen mishaps.
- Preheat your oven’s broiler. Once the sauce has thickened, transfer the skillet to the oven and broil for 3-4 minutes. Watch closely—this is the moment of truth. The edges should blister and develop a caramelized finish.
- Remove the skillet, let the drumsticks rest for 5 minutes. This brief pause lets the juices redistribute, ensuring each bite is succulent. While resting, drizzle the blue cheese dressing over the drumsticks, allowing it to seep into the cracks of the sauce.
- Serve immediately with celery sticks and a side of ranch or extra blue cheese dressing for dipping. The contrast of hot, buttery chicken with cool, creamy sauce is a flavor revelation.
That’s it — you did it. But hold on, I’ve got a few more tricks that will take this to another level. You’ll wonder how you ever made it any other way.
Insider Tricks for Flawless Results
The Temperature Rule Nobody Follows
Many home cooks over‑cook their chicken, resulting in dry meat. The trick is to keep the skillet at a steady medium‑high heat during searing, then lower it for the simmer. This two‑phase approach ensures a juicy interior while the exterior stays perfectly crisp.
Why Your Nose Knows Best
Before you taste the first bite, pause and inhale the aroma. The scent of caramelized butter and hot sauce is a reliable indicator that the sauce has thickened and the chicken is ready. If it still smells raw, give it a few more minutes.
The 5-Minute Rest That Changes Everything
Resting the drumsticks after cooking lets the juices redistribute. Without this pause, the juices would rush to the surface, leaving the meat dry. A simple five‑minute rest is all it takes to elevate the flavor.
The Perfect Brush
Using a pastry brush to apply the sauce ensures even coverage. It also helps the butter mingle with the hot sauce, creating a silky glaze that clings to every crevice. A brush is far more precise than a spoon.
The Blue Cheese Balance
Blue cheese dressing isn’t just a garnish; it’s a flavor counterbalance. The tang cuts through the heat, while the creaminess softens the bite. If you’re not a fan of blue cheese, a light drizzle of ranch or a squeeze of fresh lime can serve as an alternative.
Creative Twists and Variations
This recipe is a playground. Here are some of my favorite ways to switch things up:
Honey‑Spice Fusion
Swap half the hot sauce for honey and reduce the cayenne pepper. The result is a sweet‑heat balance that pairs well with a side of coleslaw. Perfect for those who love a touch of sweetness.
Asian‑Inspired Kick
Add a splash of soy sauce and a pinch of sesame oil to the sauce. Finish with a sprinkle of toasted sesame seeds and chopped scallions. This variation brings an umami punch and a hint of nutty aroma.
Mediterranean Twist
Replace the hot sauce with a blend of roasted red pepper puree and a dash of lemon zest. Drizzle with olive oil and sprinkle oregano. The result is a mild, aromatic chicken that still carries a subtle heat.
Cheesy Overload
After broiling, sprinkle shredded cheddar or mozzarella over the drumsticks and let it melt. The gooey cheese adds a new dimension of richness and makes the dish feel like a comfort‑food masterpiece.
Vegan Buffalo Drumsticks
Use plant‑based chicken substitutes and a vegan hot sauce. Replace butter with coconut oil and blue cheese dressing with cashew‑based ranch. This version keeps the flavor profile intact while catering to plant‑based diets.
Breakfast Buffalo
Serve the drumsticks over a bed of scrambled eggs and toast. The combination of spicy chicken and creamy eggs is a breakfast that feels indulgent yet balanced.
Storing and Bringing It Back to Life
Fridge Storage
Cool the drumsticks to room temperature, then place them in an airtight container. Store in the refrigerator for up to 4 days. The sauce will thicken slightly, but the flavor remains robust.
Freezer Friendly
Wrap each drumstick individually in parchment paper before placing them in a freezer bag. Freeze for up to 3 months. When ready to eat, thaw overnight in the fridge and reheat as described below.
Best Reheating Method
Reheat in a preheated oven at 350°F (175°C) for 15 minutes, adding a splash of water before the last 5 minutes to keep the meat moist. Alternatively, use a microwave on medium power for 2 minutes, then finish under the broiler to revive the crispness.