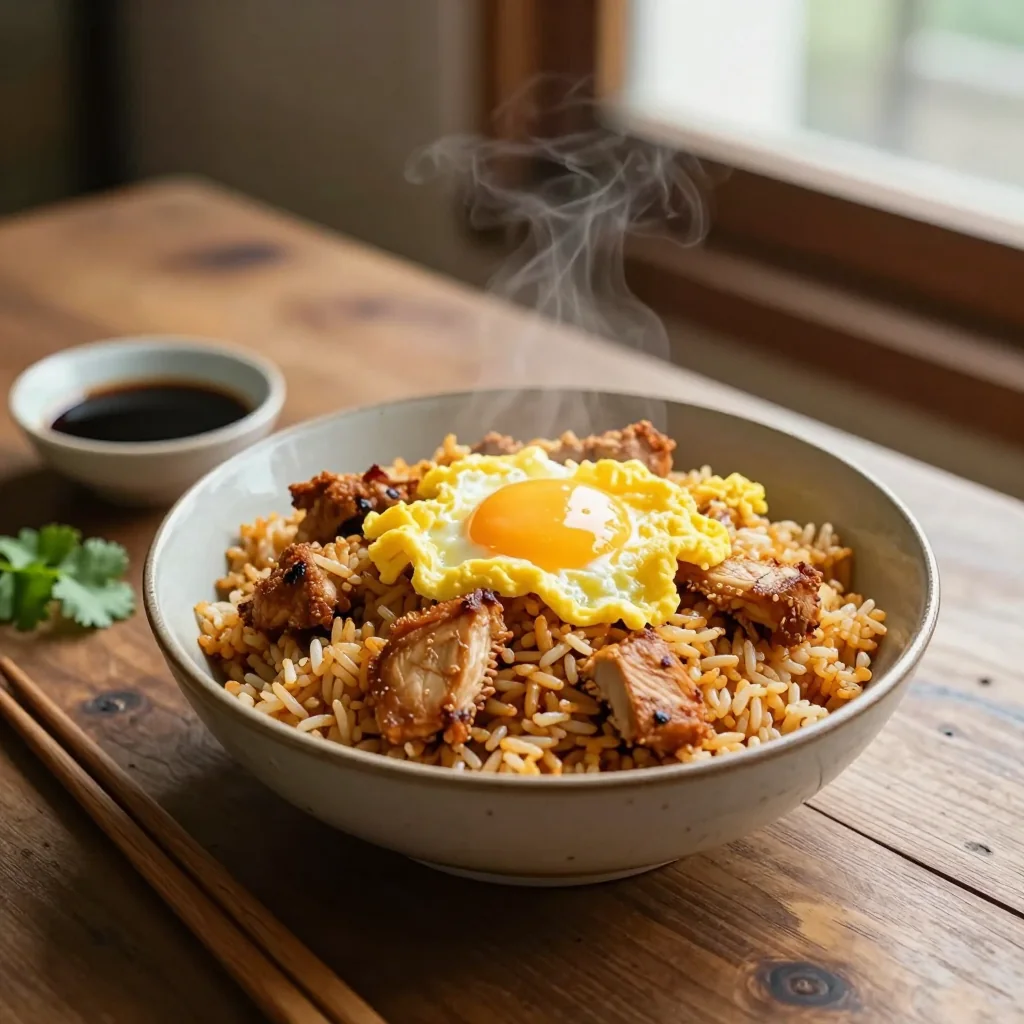
A comforting, quick‑cook Asian‑inspired dish that turns leftovers into a vibrant, protein‑packed meal.
When I first tasted a street‑style fried rice bowl on a rainy night in Bangkok, the smoky aroma of wok‑seared soy sauce, the gentle crackle of an egg sliding into the pan, and the bright burst of green onions instantly transported me back to my childhood kitchen, where my mother would whip up a quick rice stir‑fry for us after school. That memory sparked a lifelong love affair with fried rice, and over the years I’ve refined the technique until it became a reliable go‑to for busy weeknights.
Chicken Fried Rice with Egg is a classic dish that bridges comfort and sophistication. Originating from Chinese home cooking, it was traditionally a clever way to repurpose day‑old rice, turning it into a fragrant, satisfying meal. The addition of tender chicken pieces and a silky scrambled egg adds protein and richness, making it a complete dish that can stand alone or accompany a larger spread.
In this guide, you’ll discover why the balance of textures, the precise timing of each step, and a few secret flavor boosters make this version unbeatable. You’ll learn how to achieve perfectly separated grains, a golden‑kissed egg, and a subtle umami depth without drowning the rice in sauce.
Let’s dive in together—grab your wok, gather the ingredients, and get ready to create a restaurant‑quality plate right at home.
🌟 Why This Recipe Will Captivate You
From the first spoonful, this chicken fried rice delivers a harmonious blend of savory, sweet, and aromatic notes that keep you coming back for more.
- ✨ Perfectly Separated Grains: By using day‑old jasmine rice and a hot wok, each grain stays distinct, avoiding mushy clumps and giving you that coveted “fried rice” texture.
- ✨ Balanced Umami Profile: A duo of soy and oyster sauces, plus a splash of sesame oil, layers depth without overwhelming the natural chicken flavor.
- ✨ Quick, One‑Pan Cooking: All components are prepared in the same pan, minimizing cleanup while maximizing flavor integration.
- ✨ Nutrient‑Rich and Satisfying: Lean chicken breast, protein‑packed eggs, and vegetables provide a balanced macronutrient profile suitable for active lifestyles.
- ✨ Customizable Heat Level: Add sriracha or fresh chilies for a spicy kick, or keep it mild for family‑friendly comfort.
- ✨ Ideal for Meal Prep: The dish stores beautifully, allowing you to enjoy a fresh‑tasting lunch or dinner throughout the week.
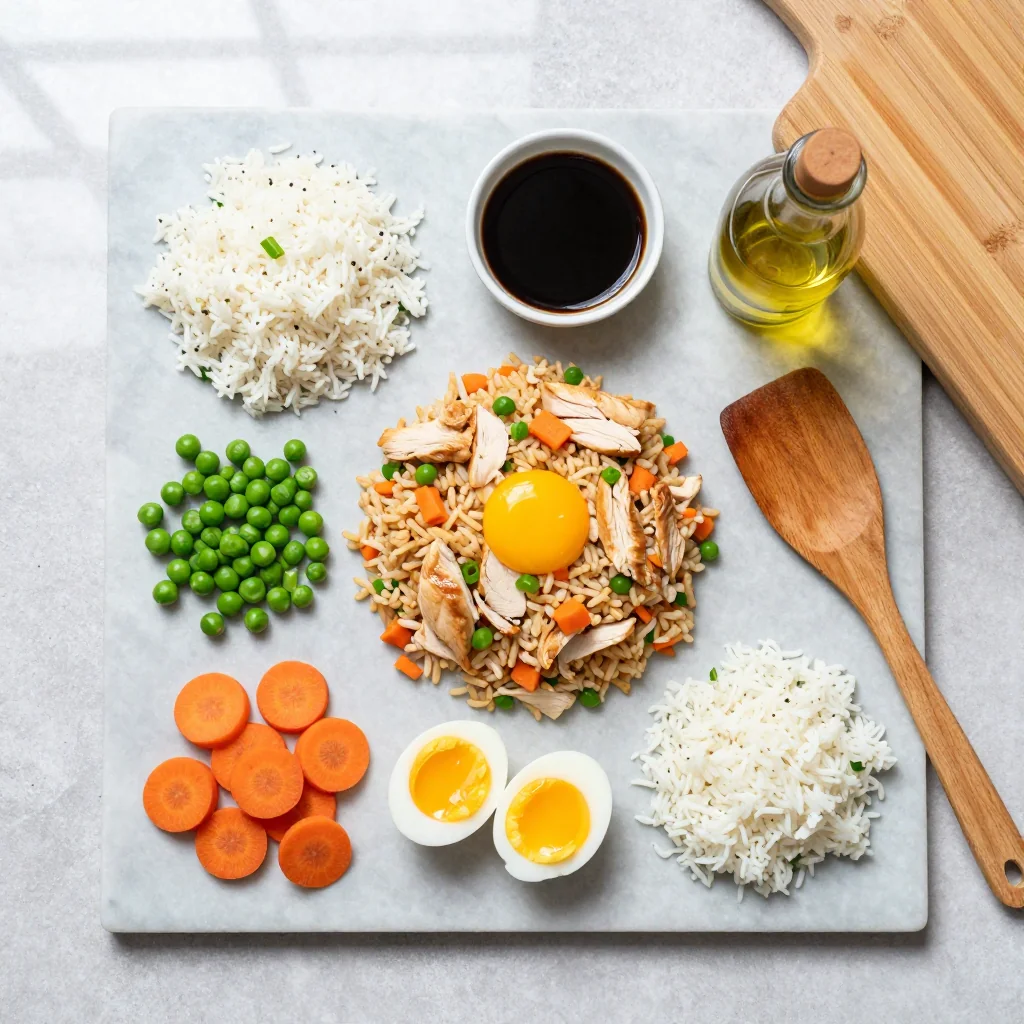
🥗 Ingredients
📝 Complete Ingredient List
For the Rice Base:
For the Chicken Marinade:
For the Garnish & Final Seasoning:
🔍 Focus on Key Ingredients
Jasmine Rice
Jasmine rice provides a fragrant, slightly sticky base that absorbs sauces without turning soggy. For best results, cook the rice a day ahead and refrigerate it uncovered; this dries the surface and prevents clumping when it hits the hot wok.
Chicken Breast
Using boneless, skinless chicken breast ensures lean protein and a tender bite. Dice the meat into uniform 1‑cm cubes so they cook quickly and evenly, and marinate briefly in soy and oyster sauce to infuse umami before cooking.
Sesame Oil
A drizzle of toasted sesame oil at the end adds a nutty aroma that lifts the entire dish. Because it burns easily, add it off‑heat or at the very last moment to preserve its delicate flavor.
🔄 Quick Substitutions
| If you don’t have… | Use instead… |
|---|---|
| Jasmine rice | Long‑grain basmati or short‑grain sushi rice |
| Oyster sauce | Hoisin sauce diluted with a splash of water |
| Sesame oil | Peanut oil (use sparingly) |
👨🍳 Step‑by‑Step Instructions
Follow these detailed steps to transform humble leftovers into a vibrant, restaurant‑style fried rice that dazzles the palate.
📋 Phase 1: Preparation & Mise en Place
Having everything ready before the wok heats up is crucial for a smooth cooking flow.
Prepare the Rice
Break up any clumps of day‑old rice with your hands or a fork, spreading it on a large plate. If the grains are still sticky, drizzle a tiny drizzle of oil and toss gently. This ensures each grain will fry independently and achieve that signature “fried rice” texture.
Marinate the Chicken
In a bowl, combine diced chicken, soy sauce, oyster sauce, grated ginger, minced garlic, and white pepper. Mix until every piece is evenly coated. Let it sit for 5‑10 minutes; the brief marination deepens flavor without cooking the meat.
Prep the Vegetables & Eggs
Measure out frozen peas & carrots, slice green onions (separating white and green parts), and crack the eggs into a shallow bowl. Lightly beat the eggs with a pinch of salt—this will create soft curds when scrambled later.
🔥 Phase 2: Cooking & Assembly
High heat and quick movements are the heart of wok cooking.
Sauté the Chicken
Heat 1 tablespoon of vegetable oil in a wok over medium‑high heat until shimmering. Add the marinated chicken in a single layer. Let it sear without stirring for 30 seconds, then toss and cook for another 2‑3 minutes until the pieces are just cooked through and lightly caramelized.
Scramble the Eggs
Push the chicken to the side of the wok, add a splash more oil if needed, and pour in the beaten eggs. Allow them to sit for a few seconds, then gently stir, creating soft curds. Once just set, mix the eggs with the chicken.
Stir‑Fry the Vegetables
Add the white parts of the green onions, peas, and carrots. Stir‑fry for 2 minutes until the vegetables are bright and just tender. This quick cook preserves their color and crunch.
Introduce the Rice
Increase the wok temperature to high. Add the prepared rice, breaking any remaining clumps with a spatula. Toss vigorously, allowing the rice to coat in the seasoned oil. The high heat should produce a faint “wok‑kiss” aroma.
Season & Finish
Pour the extra soy sauce, sesame oil, and optional sriracha over the rice. Stir‑fold until everything is evenly coated. Finally, sprinkle the green parts of the onions and chopped cilantro for freshness.
✨ Phase 3: Finishing & Plating
A few final checks ensure perfect texture and flavor balance.
Check Doneness
Taste a spoonful; the rice should be hot, the chicken fully cooked, and the seasoning balanced—salty, slightly sweet, with a whisper of heat. Adjust with a splash more soy sauce or a pinch of salt if needed.
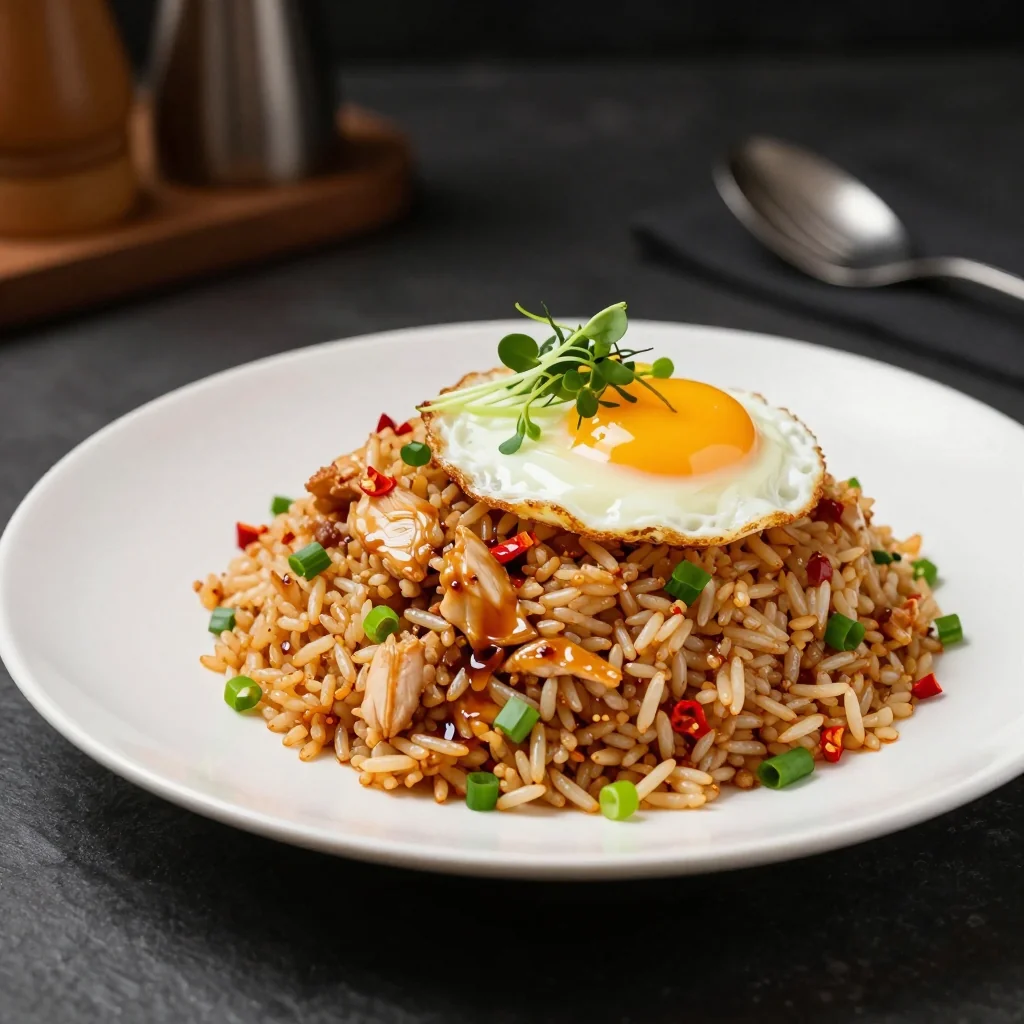
Plate and Serve
Scoop the fried rice onto a warmed serving plate, garnish with an extra sprinkle of cilantro or toasted sesame seeds if desired. Serve immediately while the wok‑kissed aroma is at its peak.
💡 Expert Tips & Tricks
🛒 Choosing the Right Ingredients
Select jasmine rice with a distinct floral scent; avoid short‑grain sushi rice unless you prefer a stickier texture. For chicken, opt for pieces that are uniform in size to ensure even cooking. Fresh ginger and garlic should be firm and aromatic—if they start to dry, they’ll lose potency.
🔪 Preparation Techniques
Dice the chicken into 1‑cm cubes and keep them in a single layer while marinating to allow the sauce to penetrate fully. When beating the eggs, add a pinch of water; this creates a lighter, fluffier curd. Pre‑measure all sauces and spices before heating the wok to avoid over‑cooking.
🌡️ Mastering the Heat
A wok should be hot enough that a drop of water evaporates instantly. This high temperature creates the signature “sear” on the chicken and a subtle caramelization on the rice. If the wok cools, lift it off the burner briefly, then return to high heat before adding the next ingredient.
🍽️ Presentation & Service
Serve the fried rice in a shallow bowl or directly on a warm plate. Garnish with bright green onions, cilantro, and a light drizzle of sesame oil for visual contrast. Pair with a crisp cucumber salad to balance the richness.
🏆 Pro Tips
Professional chefs rely on precision, timing, and a deep understanding of flavor chemistry to elevate a simple stir‑fry into a masterpiece.
- 🎯 Control Moisture with a Dry Wok: Before cooking, heat the wok empty until a drop of water dances across the surface. This “dry‑heat” method evaporates excess moisture from the rice instantly, preventing sogginess.
- 🎯 Layer Flavors with a “Sauce‑First” Approach: Add a small amount of soy sauce early to caramelize the chicken, then finish with a light soy drizzle for seasoning. This creates depth without overwhelming saltiness.
- 🎯 Use a Two‑Stage Oil Technique: Start with a high‑smoke‑point oil (like grapeseed) for searing, then finish with toasted sesame oil for aroma. The separation prevents burnt sesame flavor while preserving its nutty essence.
- 🎯 Temperature Shock for Veggies: Toss frozen peas & carrots directly into the hot wok; the sudden heat shock locks in bright color and crispness, a technique chefs use to preserve texture.
- 🎯 Portion Scaling with Precision: The built‑in portion adjuster recalculates each numeric quantity, ensuring you never over‑ or under‑season when scaling up or down.
- 🎯 Rest Before Serving: Let the finished rice rest for 2 minutes off the heat. This allows flavors to meld and the steam to settle, delivering a cohesive bite.
"The secret to great fried rice is not the ingredients, but the fire and timing." — Chef Ming Tsai
🔄 Variations & Adaptations
This recipe is a versatile canvas. Below are several ways to customize it for dietary preferences, flavor cravings, and family-friendly twists.
🥬 Vegetarian/Vegan Version
Replace chicken with firm tofu cubes (pressed and marinated in the same sauce) and substitute the eggs with scrambled silken tofu or a chickpea flour “egg” mixture. Add extra vegetables like bell peppers, mushrooms, or baby corn for texture.
- 200 g firm tofu, cubed and marinated
- 1 Tbsp nutritional yeast for a subtle umami boost
🌶️ Flavor Variations
Explore regional twists by adjusting sauces and aromatics.
Spicy Sichuan Style
Add 1 tsp Sichuan peppercorn powder, 1 Tbsp doubanjiang (fermented bean paste), and a handful of sliced dried chilies for a tongue‑tingling heat.
Mediterranean Twist
Swap oyster sauce for a splash of lemon juice, incorporate sun‑dried tomatoes, and finish with crumbled feta and fresh oregano.
Thai Inspired
Use fish sauce instead of soy, add a dash of lime juice, and stir in Thai basil leaves for an aromatic finish.
⚠️ Dietary Adaptations
Gluten‑Free
Use tamari or a certified gluten‑free soy sauce. Ensure the oyster sauce is gluten‑free or replace it with mushroom sauce.
Lactose‑Free
All ingredients are naturally lactose‑free; just avoid adding butter or dairy‑based sauces.
Low‑Calorie
Reduce oil to 1 Tbsp, increase the proportion of vegetables, and use skinless chicken breast. Substitute some rice with cauliflower rice for a lighter version.
👶 Kid‑Friendly Version
Omit the sriracha and white pepper, cut the chicken into tiny bite‑size pieces, and add sweet corn kernels for a milder, sweeter flavor that appeals to young palates.
📦 Storage & Reheating
🧊 Conservation
Refrigerator:
- Duration: 3 days
- Container: Airtight glass or BPA‑free plastic container
- Tip: Store the sauce separately if you plan to re‑heat later to avoid soggy rice.
Freezer:
- Duration: 1 month
- Method: Portion into freezer‑safe bags, remove excess air, and label with date.
- Defrost: Transfer to refrigerator overnight or use the microwave’s defrost setting.
💡 For best texture after freezing, re‑heat in a skillet rather than the microwave to restore crispness.
♨️ Reheating
🔥 Oven (Recommended):
- Preheat to 180 °C (350 °F).
- Cover the dish with foil to retain moisture.
- Heat for 12‑15 minutes.
- Remove foil, stir, and heat an additional 3‑5 minutes to crisp the edges.
⚡ Microwave (Quick):
- Place a microwave‑safe bowl, cover loosely with a microwave‑safe lid.
- Heat on medium power for 1 minute, stir, then repeat 30‑second intervals until hot.
- Stir halfway to ensure even heating.
🍳 Skillet:
Heat a tablespoon of oil in a non‑stick skillet over medium heat, add the rice, and stir‑fry for 4‑5 minutes until steaming hot. This method restores the original wok‑kissed texture.
🍷 Perfect Pairings
🥗 Side Dishes
- Cucumber‑Sesame Salad: Light, crisp cucumber ribbons tossed in rice vinegar, sesame oil, and a pinch of sugar complement the savory rice.
- Steamed Edamame with Sea Salt: Provides protein and a satisfying pop, balancing the soft rice texture.
- Pickled Carrots & Daikon: The acidity cuts through the richness, refreshing the palate.
🍷 Wine & Beverage Pairings
- Riesling (off‑dry): Its bright acidity and subtle sweetness echo the soy‑based sauce while soothing any spice.
- Pinot Noir: Light‑bodied red with gentle tannins that won’t overpower the dish.
- Non‑alcoholic: Sparkling ginger‑lime soda offers a zingy counterpoint.
🍰 For a Complete Meal
Start with a delicate miso soup, follow with the fried rice, and finish with a light mango‑coconut panna cotta. The tropical sweetness of the dessert balances the savory main course beautifully.
❓ Frequently Asked Questions
Q: Can I use brown rice instead of jasmine?
Yes, you can substitute brown rice, but it requires a longer cooking time and should be fully cooked and cooled before frying. Brown rice absorbs sauces more slowly, so you may need to add a little extra soy sauce or a splash of broth to keep the dish moist.
Q: How do I avoid a mushy texture?
The key is using day‑old rice that has dried out in the refrigerator. If you must use fresh rice, spread it on a tray, let it cool, and optionally refrigerate for 30 minutes. Additionally, keep the wok hot and avoid over‑stirring, which can release starches and make the rice sticky.
Q: What if I don’t have a wok?
A large, heavy‑bottomed skillet works well. Pre‑heat the skillet thoroughly to mimic the high heat of a wok, and use a small amount of oil to prevent sticking. The flavor may be slightly less “wok‑kissed,” but the technique remains effective.
Q: Can I make this dish gluten‑free?
Absolutely. Use tamari or a certified gluten‑free soy sauce, and verify that your oyster sauce is gluten‑free (or replace it with mushroom sauce). All other ingredients are naturally gluten‑free.
Q: How can I make it spicier?
Add 1‑2 teaspoons of sriracha, a pinch of red pepper flakes, or fresh sliced Thai chilies during the cooking process. Adjust to your heat tolerance, remembering that the spice intensifies as the dish rests.
Q: Is it possible to prep this ahead of time?
Yes. You can marinate the chicken and beat the eggs up to 12 hours in advance, storing them separately in the refrigerator. Keep the rice chilled and the vegetables pre‑measured. When ready, simply follow the cooking steps.
🎉 Let’s Cook!
This Chicken Fried Rice with Egg brings together the comfort of home cooking and the excitement of Asian street food. By mastering the high‑heat technique, balancing the sauces, and using day‑old rice, you’ll achieve a dish that’s crisp, flavorful, and satisfying every time. Whether you’re feeding a busy family, impressing friends, or meal‑prepping for the week, this recipe delivers consistent results and endless adaptability.
Give it a try, experiment with the suggested variations, and don’t hesitate to make it your own. Share your photos, ask questions in the comments, and let the community know how you personalized the recipe.
Have you tried this recipe?
Leave a comment and rating below! Share your photos on Instagram with #FriedRiceMagic to be featured.
Chicken Fried Rice with Egg
A quick, flavorful wok‑style fried rice that turns leftovers into a satisfying meal.
📝 Ingredients
Rice Base
Chicken Marinade
Garnish & Final Seasoning
👨🍳 Instructions
- 1
Break up day‑old rice and set aside.
- 2
Marinate chicken with soy, oyster sauce, ginger, garlic, and pepper for 5‑10 minutes.
- 3
Heat 1 Tbsp oil in a wok, sear chicken until golden, then push to side.
- 4
Scramble the eggs in the same wok, mixing with the chicken.
- 5
Add peas, carrots, and white onion parts; stir‑fry 2 minutes.
- 6
Increase heat, add rice, and toss vigorously for 3‑4 minutes.
- 7
Season with extra soy sauce, sesame oil, and optional sriracha.
- 8
Stir in green onion tops and cilantro; remove from heat.
- 9
Plate, garnish, and serve immediately.
- 10
Enjoy with your chosen side dishes and beverage.
🥗 Nutrition per Serving
*Values are approximate and based on standard ingredient brands.
📚 You Might Also Like

Shrimp Pad Thai

Beef Teriyaki Stir‑Fry

Vegetable Lo Mein

💬 Comments & Reviews
Leave a Comment
No comments yet. Be the first to share your thoughts!