I’ve spent countless hours experimenting with different batters, sauces, and cooking times, and the result is a dish that feels both classic and freshly modern. The key to this version is a simple, yet powerful, sauce that coats the chicken like velvet, while the batter keeps the crispness alive without becoming greasy. I’ve trimmed down the steps, eliminated the fluff, and added a few insider tricks that will transform your kitchen into a flavor laboratory. If you’ve ever struggled with achieving the perfect crunch or the right balance of sweet and umami, you’re not alone—and I’ve got the fix. Let me walk you through every single step—by the end, you’ll wonder how you ever made it any other way.
I’ve also discovered that the secret to a consistently crisp coating lies in the temperature of the oil and the sequence of the battering process. By letting the chicken rest after coating, the batter adheres better, and the heat of the pan crisps the exterior without burning the sauce. The final touch? A quick drizzle of citrus‑infused vinegar right before serving that brightens the dish and cuts through the richness. These small tweaks might seem trivial, but they’re the difference between a good meal and a memorable one. So grab your apron, and let’s dive into the details.
Now, let’s talk about what makes this version stand out from every other chicken nanban recipe you’ve tried. The flavor profile is a harmonious blend of sweet, salty, and umami that lingers on the palate. The texture is a dual experience: the outside is delightfully crunchy, while the inside remains succulent and tender. The method is straightforward enough for beginners yet refined enough for seasoned cooks. The use of panko breadcrumbs adds a light, airy crunch that’s hard to replicate with standard breadcrumbs. The sauce’s glossy finish is achieved through a simple reduction that concentrates the flavors without becoming syrupy. The dish is crowd‑pleasing, making it perfect for family dinners or casual get‑togethers. The ingredients are easy to find in any grocery store, so you won’t need a special trip to the Asian market. The preparation is quick, and the dish can be made ahead of time, making it a versatile addition to your weekly meal plan. Alright, let’s break down exactly what goes into this masterpiece…
Inside the Ingredient List
The Flavor Base
Soy sauce is the backbone of this dish, providing a deep, savory umami that anchors every bite. A quarter cup is enough to give the sauce depth without overwhelming the other flavors. If you’re watching sodium, you can use a low‑sodium version and add a pinch of sea salt later to taste. The mirin adds a subtle sweetness that balances the saltiness of the soy sauce. This combination is what gives chicken nanban its signature glossy sheen.
Rice vinegar is the secret to that bright, almost citrusy lift that cuts through the richness of the batter. A tablespoon is all you need; it adds a tangy punch that wakes up the palate. If you’re out of rice vinegar, a splash of white wine vinegar works as a decent substitute, though the flavor will be slightly different. The key is to keep the vinegar’s acidity balanced, so you don’t end up with an overly sour sauce. Remember, a good sauce is all about harmony.
Garlic and ginger are the aromatics that infuse the sauce with depth and warmth. A teaspoon of each is enough to create a subtle backbone without dominating the dish. Freshly grated ginger brings a bright, peppery note that pairs perfectly with the sweetness of mirin. If you’re using powdered garlic, be careful not to overdo it—powder can be more potent. These aromatics elevate the sauce from simple to sophisticated.
The Texture Crew
All‑purpose flour is the first layer of the batter, giving the chicken a sturdy base that holds the panko. One cup of flour is the sweet spot: it’s thick enough to create a crisp coating but thin enough to allow the sauce to shine through. If you’re aiming for a lighter texture, you can swap half the flour for cornstarch, which will produce a silkier crunch. The flour also helps the egg bind the batter, ensuring the coating stays on the chicken. This step is crucial for that satisfying bite.
Eggs act as the glue that holds the flour and panko together. Two large eggs are enough to coat the chicken evenly and create a firm crust. Whisk the eggs until they’re frothy, then dip each chicken piece in the mixture. The eggs give the batter a golden color when fried, adding visual appeal. If you’re vegan, you can use a flaxseed‑egg mixture, but the texture will differ slightly.
Panko breadcrumbs are the secret to the extra crunch that makes this dish unforgettable. One cup of panko adds a light, airy bite that doesn’t get soggy in the sauce. If you can’t find panko, you can use regular breadcrumbs, but you’ll need to toast them in a pan to achieve a similar crunch. The panko’s large flakes also allow the sauce to cling to the coating, giving each bite a burst of flavor. This is why the dish feels both crispy and saucy at the same time.
The Unexpected Star
Vegetable oil is the medium that creates the crispness without adding unwanted flavors. Two tablespoons are enough to coat the pan and prevent the batter from sticking. Choosing a neutral oil like canola or sunflower ensures the focus stays on the sauce and chicken. If you prefer a richer taste, you can use sesame oil, but use it sparingly to avoid overpowering the dish. The oil’s temperature is critical: if it’s too low, the coating will absorb oil and become soggy.
Scallions add a fresh, oniony crunch that brightens the dish. Two scallions, thinly sliced, provide a mild bite that complements the sauce’s sweetness. They also add a pop of color, making the plate look as good as it tastes. If you don’t have scallions, you can substitute with green onions or thinly sliced leeks. Just be sure to keep the layers thin to avoid overpowering the delicate balance.
Sesame seeds give the dish a nutty aroma and a subtle crunch that’s almost imperceptible. A teaspoon is enough to sprinkle over the finished dish. Toasting the seeds before adding them enhances their flavor and gives the dish a golden glow. If you’re allergic or just don’t like sesame, you can omit it or replace it with chopped almonds for a different texture.
The Final Flourish
The sauce’s final touch is a quick drizzle of citrus‑infused vinegar right before serving. This brightens the dish, cutting through the richness and adding a subtle zing that wakes up the palate. If you’re feeling adventurous, a splash of yuzu or lemon juice can elevate the flavor profile even further. The sauce should coat the chicken evenly, creating a glossy, mouth‑watering sheen. This finishing step is what makes the dish feel complete and polished.
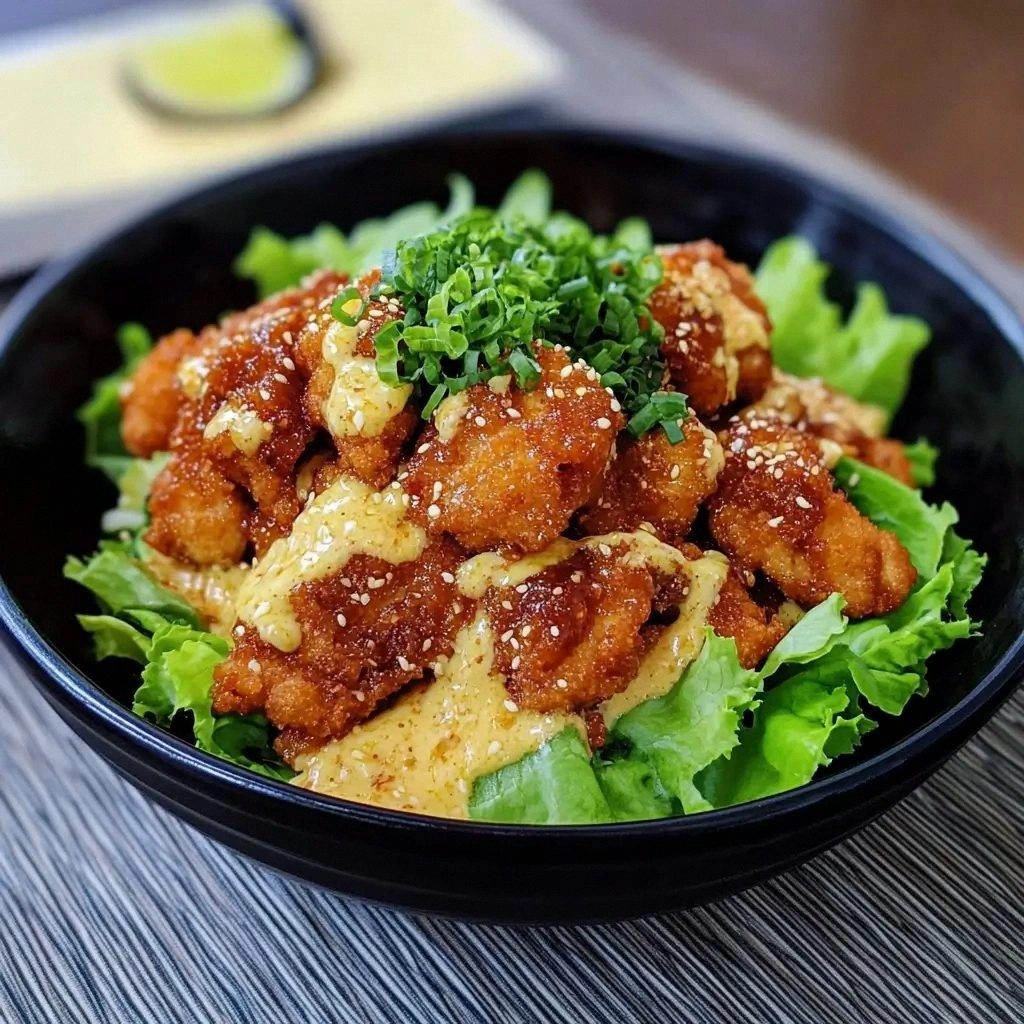
The plating is just as important as the cooking. Arrange the chicken pieces in a single layer on a plate, then drizzle the sauce in a zig‑zag pattern for visual appeal. Sprinkle the toasted sesame seeds over the top for a final pop of color and aroma. Serve immediately to enjoy the contrast between the hot, crispy coating and the tender, juicy interior. A side of steamed rice or a simple green salad balances the richness and adds a fresh element. This presentation will impress even the most discerning foodie.
Everything’s prepped? Good. Let’s get into the real action.
The Method — Step by Step
- Marinate the Chicken: Toss the bite‑sized chicken pieces in a bowl with 1/4 cup soy sauce, 2 tablespoons mirin, 2 tablespoons sugar, 1 tablespoon rice vinegar, 1 teaspoon garlic powder, and 1 teaspoon grated ginger. Let the chicken sit for at least 15 minutes so the flavors penetrate. This step is crucial for a deeply flavored sauce that clings to every bite. The longer you marinate, the more pronounced the umami will be. If you’re in a hurry, even 5 minutes will give a noticeable difference.
- Prepare the Batter: In a shallow dish, combine 1 cup all‑purpose flour with a pinch of salt. In a second bowl, whisk 2 eggs until frothy. In a third dish, pour 1 cup panko breadcrumbs. These three components will create the classic double‑batter that gives the chicken its signature crunch. Keep the batter at room temperature to ensure it adheres properly. The flour provides structure, the eggs bind, and the panko adds texture.
- Coat the Chicken: Dip each marinated chicken piece first into the flour, shaking off any excess. Then plunge it into the beaten eggs, letting any excess drip off. Finally, roll it in the panko breadcrumbs until fully coated. This double‑batter technique creates a thick, crunchy shell that protects the chicken from becoming soggy. Make sure each piece is evenly coated for consistent texture. This step is where the magic happens.
- Heat the Oil: Pour 2 tablespoons of vegetable oil into a large skillet and heat over medium‑high until shimmering. Test the temperature by dropping a small pinch of flour; if it sizzles immediately, the oil is ready. If the oil is too hot, the coating will burn before the chicken cooks through. If it’s too cool, the batter will absorb oil and become greasy. Maintaining the right temperature is key to a crisp, golden exterior.
- Fry the Chicken: Carefully place the coated chicken pieces into the hot oil, being careful not to overcrowd the pan. Fry for 3–4 minutes on each side until the coating turns golden brown and the internal temperature reaches 165°F (74°C). Flip only once to preserve the crispness. The sizzle that fills the kitchen is a sign that everything is working as it should. Let the chicken rest on a paper towel‑lined plate to drain excess oil.
- Reduce the Sauce: While the chicken rests, pour the remaining soy sauce mixture into the same skillet. Add 1 tablespoon of sugar and 1 tablespoon of rice vinegar. Simmer over medium heat until the sauce thickens slightly and coats the back of a spoon. Stir constantly to prevent burning. The sauce should be glossy yet pourable, ready to coat the chicken.
- Combine Chicken and Sauce: Return the fried chicken to the skillet with the reduced sauce. Toss gently to ensure each piece is evenly coated. Let it simmer for an additional 2 minutes so the flavors meld together. The sauce should cling to the crispy coating, creating a harmonious balance of textures. This final step is where the dish truly comes alive.
- Finish with Garnishes: Remove the skillet from the heat and sprinkle sliced scallions and toasted sesame seeds over the chicken. Drizzle a splash of citrus‑infused vinegar for that bright finish. The garnish adds color, aroma, and a subtle tang that lifts the dish. Plate the chicken immediately for the best texture.
- Serve and Enjoy: Serve the chicken nanban hot, accompanied by steamed rice or a crisp green salad. The contrast between the hot, crunchy coating and the tender interior is pure bliss. Take a bite, let the sauce coat your tongue, and watch the flavors dance. This dish is perfect for a quick weeknight dinner or a show‑stopping meal for guests. The result is a culinary masterpiece that will leave everyone asking for your recipe.
Insider Tricks for Flawless Results
The Temperature Rule Nobody Follows
Maintaining the right oil temperature is the most overlooked factor in achieving that perfect crunch. Too hot, and the coating burns before the chicken cooks; too cool, and the batter absorbs oil and becomes greasy. Use a thermometer to keep the oil between 350°F and 375°F (175°C to 190°C). If you don’t have a thermometer, drop a small piece of bread into the oil; if it browns in 60 seconds, you’re good. This simple check saves you from a soggy disaster.
Why Your Nose Knows Best
The aroma of frying batter is a reliable indicator of doneness. When the coating starts to crackle and emit a nutty scent, it’s time to flip. The smell of soy sauce reducing into a caramelized glaze signals that the sauce is ready. Trust your senses; they’re often more accurate than a timer. A good cook reads the kitchen like a book.
The 5‑Minute Rest That Changes Everything
After frying, let the chicken rest on a paper towel‑lined plate for five minutes. This allows the excess oil to drain and the coating to firm up. The rest period also lets the flavors redistribute, ensuring every bite is as flavorful as the last. Skipping this step often results in a slightly soggy crust. A quick rest is a small price for a big payoff.
Use Fresh Ingredients for a Bright Finish
Fresh scallions and sesame seeds bring a bright, aromatic contrast to the rich sauce. If you’re using frozen scallions, thaw them first to avoid excess moisture. Toast the sesame seeds in a dry pan until golden for a nutty aroma. Fresh ingredients elevate the dish from good to unforgettable.
Double‑Batter for Extra Crunch
The double‑batter technique—flour, egg, then panko—creates a multi‑layered crust that’s both crispy and airy. If you’re short on time, you can skip the flour step, but you’ll lose that extra crunch. The panko’s large flakes give the coating a light, airy feel that doesn’t become soggy. This technique is a staple in Japanese fried dishes.
Keep the Sauce Simple and Balanced
The sauce should be sweet, salty, and slightly tangy. Don’t overload it with sugar; a tablespoon is enough to balance the saltiness of soy sauce. If the sauce is too thick, add a splash of water to thin it out. A balanced sauce ensures every bite is harmonious.
Creative Twists and Variations
Spicy Nanban
Add a teaspoon of crushed red pepper flakes to the batter for a subtle kick. The heat pairs nicely with the sweet sauce, creating a balanced flavor profile. This version is perfect for those who love a bit of spice in their meals. The heat adds a new dimension without overwhelming the dish.
Citrus Infusion
Replace the rice vinegar with fresh lemon juice and add a splash of orange zest. The citrus notes brighten the sauce and cut through the richness. This variation is ideal for spring or summer dinners when fresh fruit is in season. The bright flavors make the dish feel lighter.
Herb‑Enhanced
Fold chopped fresh basil or cilantro into the sauce for a fragrant twist. The herbs add a fresh, green contrast to the savory sauce. This version is great for those who love a burst of herbal aroma. The fresh herbs elevate the dish’s overall flavor.
Gluten‑Free Version
Swap the all‑purpose flour for a gluten‑free blend and use almond flour for the coating. The texture remains crisp, but the flavor profile shifts slightly. This variation caters to dietary restrictions without sacrificing taste. The result is still delicious and satisfying.
Asian Fusion
Add a splash of sesame oil to the sauce and sprinkle toasted sesame seeds on top. The sesame flavor deepens the dish, giving it an authentic Asian twist. This version is a hit at dinner parties and impresses guests with its depth.
Vegetarian Nanban
Use tofu instead of chicken, marinating it in the same sauce before battering. The tofu absorbs the flavors beautifully, creating a satisfying bite. This variation is perfect for plant‑based diners. The texture is surprisingly similar to chicken.
Storing and Bringing It Back to Life
Fridge Storage
Store leftover chicken nanban in an airtight container in the refrigerator for up to 3 days. The coating may soften slightly, so reheat gently to restore crispness. A quick pan‑fry over medium heat for 2 minutes is enough to revive the crunch. The dish tastes best when served fresh, but reheating works well for leftovers.
Freezer Friendly
Wrap the cooked chicken in parchment paper and place it in a freezer bag for up to 2 months. Thaw in the refrigerator overnight before reheating. The texture remains crisp if you use a skillet to reheat. Freezing is a great option for meal prep.
Best Reheating Method
Reheat in a skillet over medium heat, adding a splash of water to create steam and keep the sauce moist. The water should be just enough to coat the bottom of the pan, preventing the sauce from drying out. This method preserves the sauce’s glossy finish and the coating’s crunch. Serve immediately for the best experience.
Now that you’ve mastered the fundamentals, it’s time to experiment and make this dish your own. Whether you keep it classic or add your own twist, the key is to respect the balance of flavors and textures. The result will always be a dish that feels both comforting and adventurous. Don’t forget to share your version with friends and family; the joy of cooking is amplified when you spread it around.
Remember, the secret to a perfect chicken nanban is patience, precision, and a dash of love. Every step, from marinating to the final garnish, contributes to the overall experience. When you finally take that first bite, you’ll understand why this dish has become a staple in my kitchen. Thank you for joining me on this culinary journey—now go and create your own masterpiece.