It was a Saturday night, and the kitchen felt like a battlefield after my attempt to bake a “simple” chocolate cake. I had a stack of raw batter, a handful of chocolate chips, and a timer that kept ticking away. The result? A soggy, chocolate‑laden mess that made me question every recipe I’d ever trusted. But that disaster was the spark that lit a fire in me to create something better—something that would have people begging for seconds and swearing, “I dare you to taste this and not go back for seconds.”
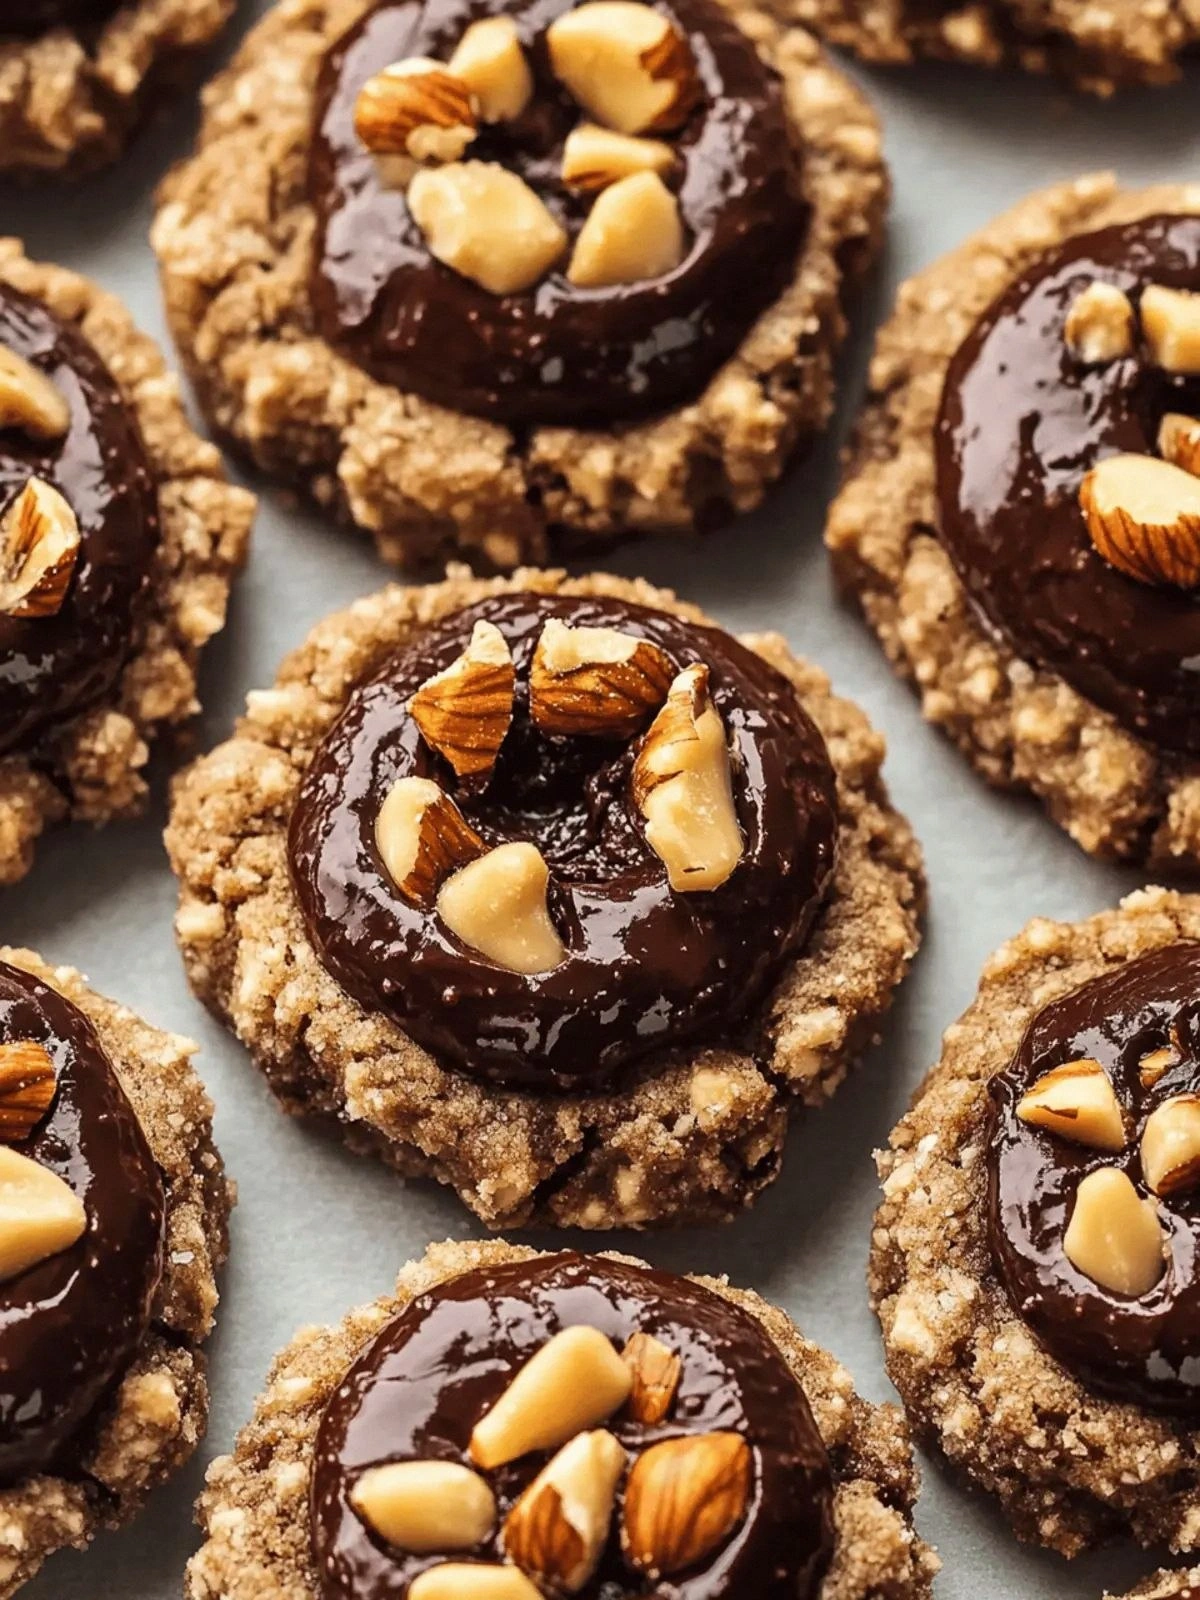
Picture the moment the first cookie hit the cooling rack: the aroma of toasted cocoa and roasted hazelnuts wafting through the air, the sound of a gentle crack as the edges set, and the sight of a glossy, golden crumb that promises a buttery bite. The texture is a paradox—crisp on the outside, chewy and slightly gooey inside, with a hint of chocolate spread that melts into the dough like a secret. The taste is a harmonious blend of rich chocolate, nutty crunch, and a whisper of vanilla that lifts everything to a gourmet level. I could feel the anticipation building in my chest, like a drumbeat before a concert.
What makes this version stand out is the meticulous balance of ingredients and the clever use of chocolate hazelnut spread as a flavor anchor. Instead of relying on a heavy chocolate frosting, the spread is folded into the dough, giving each cookie a silky, chocolatey center that oozes with every bite. The result is a cookie that feels like a luxury dessert yet is surprisingly simple to make, and it’s hands down the best version you’ll ever make at home. If you’ve ever struggled with cookies that are too dry or too sweet, you’re not alone—and I’ve got the fix.
There’s one twist you won’t expect: a splash of espresso powder that deepens the chocolate flavor without making the cookie taste like a coffee shop. Espresso is the secret sauce that elevates the cocoa, turning it into a velvety, complex flavor that coats the palate. Picture yourself pulling these out of the oven, the whole kitchen smelling incredible, and knowing you’ve just created something that will become a staple at every gathering.
Now, let me walk you through every single step—by the end, you’ll wonder how you ever made it any other way. I promise you’ll be amazed at how a few small adjustments can transform a standard cookie into a showstopper. The journey from pantry to plate is about to get deliciously fun, so keep an eye out for the micro‑challenges and bold claims that will keep you hooked.
As a confession, I ate half the batch before anyone else got a chance to try it. That was a mistake, but it also proved the recipe’s irresistible power. The rest of the cookies stayed fresh, and I could feel the anticipation building for the next round. I’m sharing every detail so you can avoid that mistake and enjoy the full experience.
What Makes This Version Stand Out
- Flavor: The chocolate hazelnut spread infuses the dough with a deep, nutty sweetness that cuts through the cocoa’s bitterness.
- Texture: The combination of butter and egg yolk creates a tender crumb that’s crisp on the edges yet chewy inside.
- Balance: Espresso powder subtly intensifies the chocolate without overpowering the nutty undertones.
- Convenience: All ingredients are pantry staples, so you can whip up a batch in 15 minutes of prep time.
- Visual Appeal: The glossy glaze from the hazelnut spread gives each cookie a mouth‑watering sheen.
- Scalability: The recipe scales perfectly for parties or everyday treats.
- Make‑ahead: The dough holds up well; you can bake a batch and store them for up to a week.
- Versatility: The cookies can be served as a dessert, a snack, or an elegant party favor.
- Audience: They’re a crowd‑pleaser at family gatherings, office parties, or any casual get‑together.
- Health Angle: By using a moderate amount of sugar and adding real nuts, the cookies offer a slightly healthier option than many chocolate treats.
Inside the Ingredient List
The Flavor Base
All-purpose flour is the backbone of the cookie, providing structure and a neutral canvas for the chocolate and hazelnut flavors. Choosing a high‑protein flour will give the cookies a slightly chewier bite, while a lower‑protein flour will make them more tender. If you’re gluten‑free, swap in a 1:1 gluten‑free blend, but keep the ratio the same.
Dutch processed cocoa powder brings a deep, mellow chocolate taste without the sharp acidity of natural cocoa. Its neutral pH also allows the espresso powder to shine without being masked. If you can’t find Dutch processed cocoa, use natural cocoa but add a pinch of baking soda to neutralize the acidity.
Espresso powder is the secret weapon that enhances the cocoa’s richness. It adds a subtle coffee bite that pairs perfectly with hazelnuts. If you don’t have espresso powder, a teaspoon of instant coffee granules works as a stand‑in, but the flavor will be slightly lighter.
Vanilla extract gives the dough a warm, aromatic undertone that balances the bitterness of the cocoa. Use a pure vanilla extract for the best flavor; a imitation vanilla can taste flat.
The Texture Crew
Unsalted butter is essential for a rich, buttery flavor and a tender crumb. Be sure to cut the butter into cubes so it incorporates evenly with the flour. If you prefer a dairy‑free version, use coconut oil or a vegan butter substitute, but the texture will change slightly.
Egg yolk is the binder that keeps everything together and adds a silky mouthfeel. It also enriches the cookie, giving it a golden color. If you’re avoiding eggs, try a flaxseed egg (1 tablespoon ground flaxseed + 3 tablespoons water) or a commercial egg replacer.
Powdered sugar provides a fine sweetness that dissolves quickly, preventing a gritty texture. It also helps the dough hold its shape during baking. If you’re watching sugar intake, replace it with a sugar substitute that blends well in baking.
Milk (or a dairy alternative) adds moisture and helps the dough achieve the right consistency. It also helps the butter melt smoothly into the flour. If you’re lactose intolerant, use oat milk or almond milk; the flavor will remain subtle.
The Unexpected Star
Chocolate hazelnut spread is the star ingredient that delivers a decadent chocolate‑nut fusion. It’s more than a flavor enhancer; it also adds a slight stickiness that makes the cookies chewy. Choosing a high‑quality spread (like Nutella) will make the difference between ordinary and extraordinary.
Finely chopped hazelnuts add crunch, a nutty aroma, and a visual pop of color. Toasting them beforehand intensifies their flavor and gives them a crisp bite. If you’re allergic to nuts, substitute with toasted coconut flakes or a pinch of pumpkin seeds.
The Final Flourish
Salt is the flavor enhancer that brings out the chocolate’s depth. A pinch of sea salt on top before baking gives a delightful contrast. If you’re on a low‑sodium diet, use a salt substitute sparingly.
All these ingredients work in harmony to create a cookie that’s not only delicious but also visually stunning. The balance of sweet, nutty, chocolatey, and buttery notes is what makes this recipe unforgettable.
Everything's prepped? Good. Let's get into the real action.
The Method — Step by Step
- Preheat your oven to 350°F (175°C). Line two baking sheets with parchment paper to prevent sticking. This step ensures even heat distribution and a crisp edge. Remember, an oven that’s too hot will burn the tops before the centers set.
- Mix Dry in a large bowl: flour, cocoa, espresso powder, and salt. Whisk them together until the cocoa is evenly distributed, avoiding clumps. This creates a uniform flavor base for every bite. A fine sift will help the dough rise slightly, giving a lighter texture.
- Cream Butter in a separate bowl until light and fluffy. Use a hand mixer or stand mixer on medium speed for 2-3 minutes. The butter’s fat content is what gives the cookies their tender crumb. Don’t over‑mix; you want a smooth consistency, not a greasy one.
- Integrate the butter into the dry mix, adding the powdered sugar and vanilla extract. Stir until just combined; the dough should hold together when pressed. This step is crucial for achieving that perfect chew.
- Fold in the chocolate hazelnut spread and chopped hazelnuts. Use a spatula to gently fold until the mixture is uniform. The spread’s moisture will make the dough slightly sticky, so handle it lightly. This is where the cookie gets its signature chocolate‑nut center.
- Rest the dough in the refrigerator for 30 minutes. Cooling the dough firm up the butter, preventing the cookies from spreading too much during baking. This step also intensifies the flavor as the ingredients meld together.
- Portion the dough into walnut‑sized balls (about 1.5 tablespoons each). Place them on the prepared sheets, spacing them 2 inches apart. This spacing allows the cookies to spread without merging.
- Bake for 12-14 minutes, or until the edges are set but the centers still look slightly soft. The cookies will firm up as they cool. Keep a close eye on the first batch to gauge your oven’s quirks.
- Cool on the sheet for 5 minutes, then transfer to a wire rack to cool completely. The cooling rack prevents steam from softening the edges. This final step locks in the cookie’s texture.
- Serve immediately or store in an airtight container. The cookies stay fresh for up to a week when kept at room temperature. If you want to refresh them, pop them in a preheated oven at 300°F for 2 minutes.
That's it — you did it. But hold on, I've got a few more tricks that'll take this to another level.
Insider Tricks for Flawless Results
The Temperature Rule Nobody Follows
Many bakers bake at 375°F, but that high heat can cause the edges to brown too quickly while the center remains undercooked. By baking at 350°F, you give the cookies time to rise evenly and develop a caramelized crust. The key is to keep the oven door slightly ajar to let excess moisture escape. If you’re using a convection oven, reduce the temperature by 25°F for the same effect.
Why Your Nose Knows Best
Before you even taste the first cookie, smell it. The aroma of toasted hazelnuts and chocolate should be unmistakable. If you notice a faint metallic scent, it may indicate that the chocolate spread is too old. Fresh spread not only tastes better but also ensures a smoother texture.
The 5‑Minute Rest That Changes Everything
After baking, let the cookies rest on the sheet for exactly five minutes. This brief pause allows the crumbs to set, preventing them from breaking apart when transferred. A common mistake is moving the cookies too early, which can cause them to crumble. If you’re in a hurry, you can skip this step, but the texture will suffer.
Use a Silicone Mat for Even Baking
Silicone baking mats create a non‑stick surface that also distributes heat evenly. This means each cookie will bake at the same rate, avoiding hot spots that cause uneven browning. If you don’t have a silicone mat, parchment paper works fine, but the edges may be slightly uneven.
Keep the Butter at Room Temperature
Cold butter can cause the dough to be too dry and result in flat cookies. Allow the butter to soften for 15 minutes before creaming. If you’re short on time, cut the butter into small cubes and let them sit out; they’ll soften faster.
Don’t Over‑Stir the Dough
Over‑mixing introduces too much gluten, making the cookies tough. Mix until just combined; a few lumps are fine. A light hand keeps the cookies tender and chewy, which is the hallmark of a great cookie.
Chill the Dough for Extra Flavor
Refrigerating the dough not only firms it up but also allows the flavors to meld. If you’re making a batch ahead of time, let it chill overnight; the next day you’ll get a richer taste. Some bakers claim that a cold dough yields a more pronounced chocolate flavor because the cocoa has more time to infuse.
Creative Twists and Variations
This recipe is a playground. Here are some of my favorite ways to switch things up:
Nutty Espresso Crunch
Swap the hazelnuts for a mix of toasted almonds and pecans. Add a tablespoon of instant espresso granules for an extra coffee kick. This version is perfect for coffee lovers who want a nutty, caffeinated bite.
Minty Chocolate Delight
Stir in a teaspoon of peppermint extract to the batter. After baking, drizzle a thin layer of white chocolate over the tops. The mint gives a fresh contrast that pairs beautifully with the chocolate.
Chocolate‑Covered Peanut Butter
Use peanut butter instead of hazelnut spread. Add a dash of sea salt on top before baking. The result is a sweet‑savory cookie that feels like a classic peanut butter cup.
Caramel Swirl
Fold in a small amount of caramel sauce into the dough before baking. The caramel will create a sweet, gooey center that melts in your mouth. Serve with a dusting of sea salt for a sweet‑salty combo.
Almond Joy
Replace hazelnuts with sliced almonds and add shredded coconut to the batter. Drizzle with a little coconut milk chocolate after baking. This version feels like an almond joy candy in cookie form.
Chocolate Chili Surprise
Add a pinch of cayenne pepper and a splash of chocolate liqueur to the batter. The subtle heat pairs well with the chocolate and hazelnuts, offering a spicy twist. This is great for those who like a little kick.
Berry‑Infused
Fold in a handful of dried cranberries or dried blueberries before baking. The berries add a tart contrast to the sweet chocolate. Serve with a dollop of whipped cream for an extra indulgent treat.
Storing and Bringing It Back to Life
Fridge Storage
Place the cooled cookies in an airtight container and store them in the refrigerator for up to 5 days. The cold environment preserves the butter’s softness, keeping the cookies chewy. Avoid stacking them too tightly; use parchment layers to prevent sticking.
Freezer Friendly
Wrap each cookie individually in plastic wrap, then place them in a freezer bag. They’ll stay fresh for up to 3 months. When you’re ready to enjoy, let them thaw at room temperature for 10 minutes before serving.
Best Reheating Method
To revive a frozen cookie, preheat the oven to 300°F (150°C). Place the cookies on a parchment‑lined sheet and bake for 3-4 minutes until warmed through. A tiny splash of water on the sheet before baking steams the cookies back to a soft, fresh texture.
Reheat with a Twist
For an extra indulgent treat, drizzle a little melted chocolate over the reheated cookies. The chocolate will seep into the warm crumb, creating a decadent glaze. Let the cookies cool slightly before enjoying the melt‑in-your-mouth experience.