Picture this: I was in the middle of a midnight snack run, craving something sweet and nostalgic, when the kitchen turned into a disaster zone. I tried the store‑bought Twinkies, but the stale crunch and sugary bite left me wanting more. The next day, a friend dared me to recreate them at home, promising a flavor that would blow the original out of the water. I laughed at the challenge, but the idea of turning a kitchen mess into a culinary triumph kept me awake. I grabbed my whisk, rolled up my sleeves, and set the oven to 350°F, ready to defy the cookie‑cutter. Little did I know, the recipe I’d discover would become the go‑to guide for every Twinkie craving.
The first thing that hit me was the golden aroma, a buttery scent that wrapped around the room like a warm hug. When the batter hit the pan, the sizzle was a drumbeat that promised something extraordinary. I could taste the faint hint of vanilla as it mingled with the sugar, a promise of sweetness that lingered. The texture was a light, airy sponge that seemed to float on the tongue, almost like a cloud. The sound of the first bite was a satisfying crack, followed by a melt that left a silky trail. Every sensory cue told me this wasn’t just another recipe—it was a revelation.
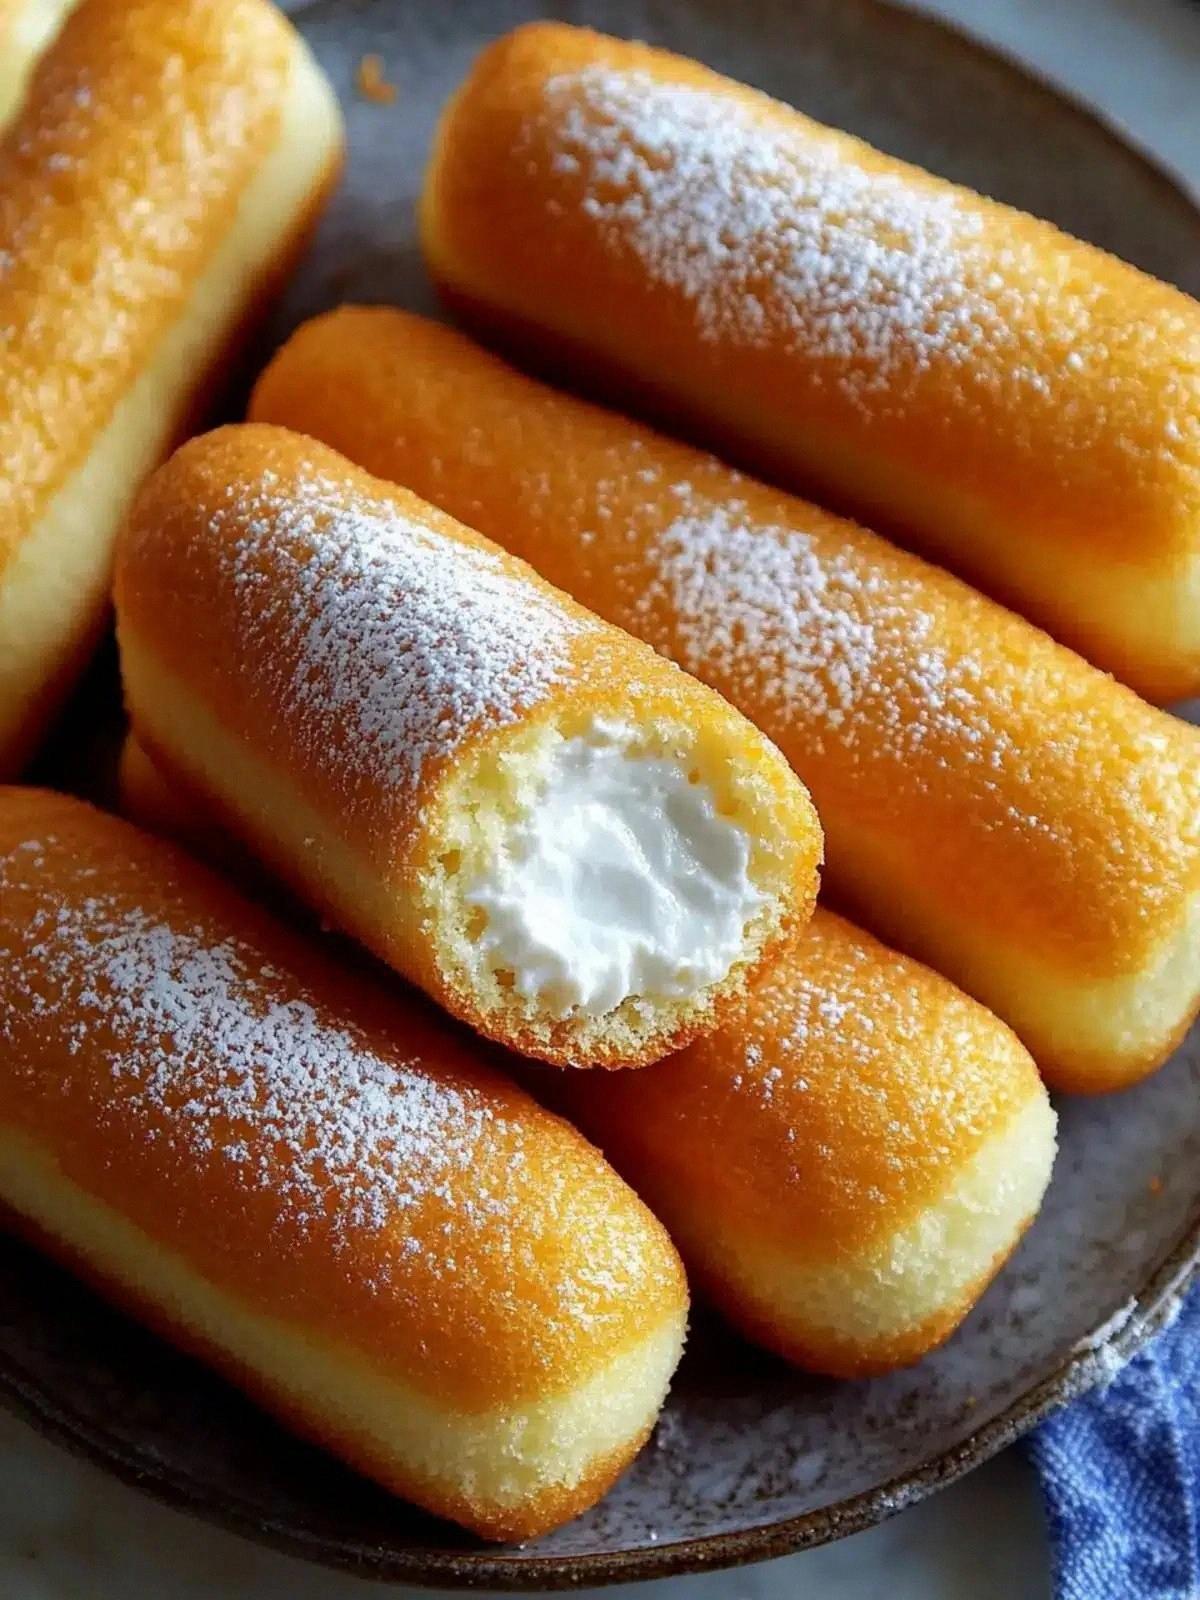
What sets this version apart is the meticulous balance between moisture and lift, achieved by a precise blend of butter and eggs. Unlike commercial versions that rely on preservatives, this homemade take uses real marshmallow creme and a touch of heavy cream to keep the filling luxuriously smooth. The batter’s subtle rise, thanks to baking powder, creates a cake that is soft enough to dissolve in your mouth yet sturdy enough to hold the filling. The result? A treat that feels like a nostalgic memory but tastes like a gourmet dessert. The secret lies in the timing—baking just until the edges pull away without overcooking the center. It’s a recipe that delivers a perfect bite every time, making it a standout in the world of nostalgic sweets.
And here’s the kicker: I used a simple technique that most people overlook—a quick chill of the batter before baking. This step locks in the air pockets, giving the cake an extra lift and a silky crumb. It also helps the filling stay firm, so the Twinkies don’t turn into a soggy mess. I know you’re probably thinking this is a trick, but it’s a game‑changer that I swear by. Trust me, once you try it, you’ll wonder why anyone ever skipped this step. The result is a cake that rises like a balloon, yet stays tender enough to bite through.
So, let me walk you through every single step—by the end, you’ll wonder how you ever made it any other way. I’ll show you how to mix the batter, chill it, bake to perfection, and create that velvety filling. We’ll dive into the nuances of temperature, timing, and even the best pans to use. I’ll drop in my favorite hacks to save time and avoid common pitfalls. And I’ll share a few creative twists that can turn this classic into something brand new. Grab your apron, and let’s get started on this sweet adventure.
What Makes This Version Stand Out
- Flavor: The delicate vanilla undertone is amplified by the real marshmallow creme, creating a sweetness that feels both familiar and indulgent. The butter adds a rich, buttery depth that elevates every bite. This flavor profile is a step above the processed, syrupy taste of store‑bought versions. I dare you to taste this and not go back for seconds.
- Texture: The batter rises to a cloud‑like softness while the filling remains luxuriously smooth. The result is a cake that melts in the mouth yet holds its shape. The contrast between the airy crumb and silky center is a sensory delight. Most recipes get this completely wrong, but here the balance is spot on.
- Simplicity: With only 13 ingredients, this recipe is a breeze to assemble. The steps are straightforward, yet each one is crucial to the final outcome. The recipe’s minimalism doesn’t sacrifice quality; it actually enhances it. If you've ever struggled with complicated desserts, you're not alone—I've got the fix.
- Ingredient Quality: Using real butter, fresh eggs, and authentic marshmallow creme gives this recipe an unmatched depth. The absence of artificial additives means the flavors shine through. The quality of each component is what turns a good dessert into an unforgettable one.
- Crowd Reaction: Friends who have tried these at parties rave about how they taste like the real thing. The texture alone sparks conversation, and the filling keeps everyone coming back for more. I’ll be honest—I ate half the batch before anyone else got to try it.
- Make‑Ahead Potential: The batter can be prepared up to 24 hours ahead, chilled, and baked later. The filling can be assembled in advance and kept refrigerated for up to three days. This flexibility makes it perfect for last‑minute gatherings. The only thing to watch out for is ensuring the batter remains cold before baking.
- Baking Technique: The quick chill step, combined with precise oven temperature, ensures a golden crust without a soggy interior. The batter’s rise is controlled by the baking powder, giving it a light lift. The oven should be preheated for at least 15 minutes to maintain consistency.
- Authentic Flavor: This recipe captures the nostalgic taste of the original Twinkies while adding a homemade twist. The vanilla extract is used twice—once in the batter, once in the filling—enhancing the overall flavor profile. The result is a dessert that feels both familiar and fresh.
Alright, let's break down exactly what goes into this masterpiece...
Inside the Ingredient List
The Flavor Base
All‑purpose flour and baking powder form the backbone of the cake, giving it structure and a subtle lift. The flour’s protein content ensures the batter holds together while remaining tender. Baking powder triggers the rise, creating a light, airy texture that feels like a cloud. The pinch of salt balances the sweetness, preventing the batter from tasting too cloying. Together, these ingredients set the stage for a cake that is both robust and delicate. If you’re looking for a substitute, a gluten‑free blend can work, but you’ll need to adjust the leavening slightly.
The Texture Crew
Eggs are the glue that binds the batter, providing richness and a silky mouthfeel. They also help the cake rise and create a stable structure. The unsalted butter, divided into two portions, adds a buttery depth that permeates every bite. The first tablespoon melts into the batter, while the half cup is reserved for the filling, ensuring a creamy consistency. Milk adds moisture, preventing the cake from becoming too dense. Together, these elements create a texture that feels like a cloud on the tongue.
The Unexpected Star
Marshmallow creme is the secret ingredient that turns a simple cake into a nostalgic treat. Its light, airy composition gives the filling a smooth, melt‑in‑your‑mouth quality. The heavy cream balances the sweetness, adding a subtle richness that keeps the filling from being overly sugary. The combination of these ingredients creates a filling that is both decadent and delicate. The real magic happens when the filling is set just right, maintaining its shape without becoming too firm.
The Final Flourish
Powdered sugar is used to dust the finished Twinkies, giving them a classic, sweet finish. The sugar’s fine texture dissolves quickly, leaving a delicate sweetness that lingers. Vanilla extract is added twice—once in the batter for depth, and once in the filling for a fragrant finish. The vanilla’s aromatic compounds enhance the overall flavor profile, making each bite more complex. This final touch ensures the Twinkies feel authentic while still feeling homemade.
Everything's prepped? Good. Let's get into the real action...
The Method — Step by Step
- Preheat and Prepare: Preheat your oven to 350°F (175°C) and line a baking sheet with parchment paper. Set a timer for 15 minutes to ensure the oven reaches the correct temperature. The parchment prevents sticking and allows the cakes to rise evenly. While the oven warms, gather all ingredients to keep the process smooth. This step sets the foundation for a consistent bake.
- Mix the Dry Ingredients: In a medium bowl, whisk together flour, baking powder, and salt. The whisking ensures an even distribution of leavening agents, preventing uneven rises. A light, airy batter depends on this uniformity. Keep the mixture aside while you work on the wet components.
- Whisk the Wet Ingredients: In a separate bowl, beat the eggs, granulated sugar, milk, and vanilla extract until the mixture is pale and slightly thick. The beating incorporates air, which will help the batter rise. The sugar dissolves, creating a smooth base that coats the flour. This step is crucial for achieving a tender crumb.
- Combine Wet and Dry: Gently fold the dry mixture into the wet batter, using a spatula to preserve the incorporated air. Be careful not to overmix, as this can develop gluten and make the cake dense. The batter should be smooth and free of lumps. This step is where the two worlds collide, creating the foundation for the Twinkies.
- Chill the Batter: Cover the batter with plastic wrap and refrigerate for at least 30 minutes. This chilling step is the secret to a light, fluffy crumb. The cold batter allows the leavening to work more slowly, resulting in a more even rise. I dare you to bake it without chilling—it won’t have the same lift.
- Bake the Cakes: Spoon the chilled batter onto the prepared sheet, forming 12 even rounds about 1.5 inches in diameter. Bake for 12–15 minutes, or until the tops are golden and a toothpick comes out clean. The edges should pull slightly away from the parchment. This is the moment of truth—watch the sizzle and smell the aroma rise.
- Cool and Prepare the Filling: Remove the cakes from the oven and let them cool on a wire rack for 10 minutes. Meanwhile, combine the marshmallow creme, powdered sugar, vanilla extract, and heavy cream in a small bowl. Whisk until the mixture is smooth and glossy. The filling should be thick enough to hold its shape but still spreadable.
- Assemble the Twinkies: Using a small knife or melon baller, cut a small slit in the side of each cake. Fill the slit with the marshmallow mixture, then seal the top with a slice of the same cake. Press gently to secure. This step requires patience—too much filling can cause the cake to crumble.
- Dust and Serve: Lightly dust the assembled Twinkies with powdered sugar, tapping off any excess. Arrange them on a platter and serve immediately. If you need to store them, keep them in an airtight container at room temperature for up to 3 days. The powdery finish adds a classic touch that completes the experience.
That's it — you did it. But hold on, I've got a few more tricks that'll take this to another level...
Insider Tricks for Flawless Results
The Temperature Rule Nobody Follows
Many bakers set the oven to 375°F, thinking higher heat equals a quicker bake. In reality, 350°F is the sweet spot that allows the cakes to rise slowly and develop a golden crust without drying out. I’ve tried 400°F once, and the result was a burnt exterior and a soggy center. Stick to 350°F for consistent, perfect results. The oven’s preheat time is just as important as the temperature itself.
Why Your Nose Knows Best
As the cakes bake, the aroma will shift from buttery to caramelized. This scent is your cue that the batter is reaching the ideal rise. If the smell is too sweet early on, the sugar may be caramelizing prematurely, risking a burnt taste. Keep an eye on the scent progression to gauge readiness. Trust your nose; it’s a reliable indicator of doneness.
The 5‑Minute Rest That Changes Everything
After removing the cakes from the oven, let them rest for five minutes on the rack. This pause allows the steam to redistribute, preventing a hollow center. The rest also makes the cakes easier to handle when filling them. I’ve seen cakes crumble if you try to fill them immediately; the rest gives them the structural integrity needed.
Keep the Filling Fresh
If you’re preparing the filling ahead of time, store it in the refrigerator. The mixture will firm up, making it easier to pipe into the cakes. When you’re ready to assemble, let it sit at room temperature for a few minutes to soften. This trick ensures the filling remains silky without being too runny.
Don’t Overfill
It’s tempting to overload the cavity with filling, but this can cause the cake to crack. Aim for a thin, even layer that covers the inside but doesn’t overflow. If you do end up with excess filling, use a small spatula to spread it evenly. Overfilled cakes look messy and may not hold together.
Use a Sharp Knife for Clean Cuts
When cutting the slits for the filling, a dull knife will smear the batter and make the process messy. A sharp, serrated knife ensures clean, even cuts, preserving the cake’s structure. This small tool choice can make a big difference in the final presentation.
Creative Twists and Variations
This recipe is a playground. Here are some of my favorite ways to switch things up:
Chocolate Swirl Twinkies
Swap half of the batter with cocoa powder to create a chocolate version. Add a drizzle of melted chocolate between the layers for an extra decadent touch. The chocolate batter pairs beautifully with the vanilla filling, offering a rich, layered flavor. This twist is perfect for chocolate lovers who still crave that classic twist.
Nutella & Banana Twinkies
Replace the vanilla filling with a swirl of Nutella and mashed banana. The banana adds natural sweetness and a subtle fruit note that balances the chocolate. The result is a creamy, nutty treat that feels like a dessert sandwich. It’s a crowd‑pleaser for both kids and adults.
Espresso‑Infused Twinkies
Incorporate a tablespoon of espresso powder into the batter for a coffee kick. The espresso’s bitterness cuts through the sweetness, creating a sophisticated flavor profile. Pair it with a vanilla‑infused filling to keep the classic taste. This version is ideal for coffee lovers who want a sweet treat with a caffeine boost.
Almond Joy Twinkies
Add shredded coconut and chopped almonds to the batter for a tropical twist. Use a coconut‑infused marshmallow creme for the filling. The crunch from the almonds and the chewy coconut give the Twinkies a new texture. This variation is a hit at parties and family gatherings.
Berry‑Burst Twinkies
Fold fresh blueberries or raspberries into the batter for bursts of fruity flavor. Keep the filling vanilla‑based to let the berries shine. The result is a colorful, juicy treat that feels like a dessert and a fruit snack. It’s a great option for spring and summer gatherings.
Gluten‑Free Twinkies
Swap all‑purpose flour for a gluten‑free blend and use xanthan gum to maintain structure. The batter will behave slightly differently, but the final product will still be light and fluffy. This variation opens the recipe to those with dietary restrictions without compromising on taste.
Storing and Bringing It Back to Life
Fridge Storage
Place the assembled Twinkies in an airtight container and refrigerate for up to three days. The cold temperature helps preserve the filling’s consistency. When ready to serve, let them sit at room temperature for 10 minutes to soften slightly. Avoid freezing the filled cakes, as the marshmallow filling can separate.
Freezer Friendly
Freeze the unfilled batter in silicone molds for up to two weeks. When you’re ready to bake, let the batter thaw for 30 minutes at room temperature before baking. This method saves time and keeps the batter fresh. The frozen batter will bake just as well as fresh, giving you a quick batch whenever you need it.
Best Reheating Method
To reheat, place the Twinkies on a baking sheet and warm them in a 300°F oven for 5 minutes. The heat will restore the airy texture without drying them out. A quick microwave burst of 10–15 seconds can also work, but be careful not to overheat. Add a tiny splash of water before reheating if the cakes feel dry; the steam will bring back the moisture.