I was standing in my kitchen, a burnt batch of pancakes staring back at me like a guilty verdict, when my friend dared me to create a gluten‑free version that would actually taste good. I laughed, tossed the skillet aside, and decided that this was the moment to rewrite the pancake playbook. The smell of scorched sugar lingered in the air, the sound of my own frustration echoed off the tiles, and my taste buds were already planning revenge. That night, I set out to turn that kitchen disaster into a sweet, fluffy triumph that would make even the most skeptical of brunch lovers swoon.
Picture this: a bright, sunlit kitchen, the gentle hum of the refrigerator, and the unmistakable scent of ripe bananas mingling with oats. I sliced two bananas, their yellow flesh glistening like honey, and tossed them into a bowl that already smelled of cinnamon and vanilla. As the oats hit the mixture, the texture began to shift from dry to velvety, a promise of something extraordinary. The sound of the whisk was a rhythmic drumbeat, and the anticipation in the room was palpable. I could almost taste the first bite—soft, sweet, with a hint of nutty crunch.
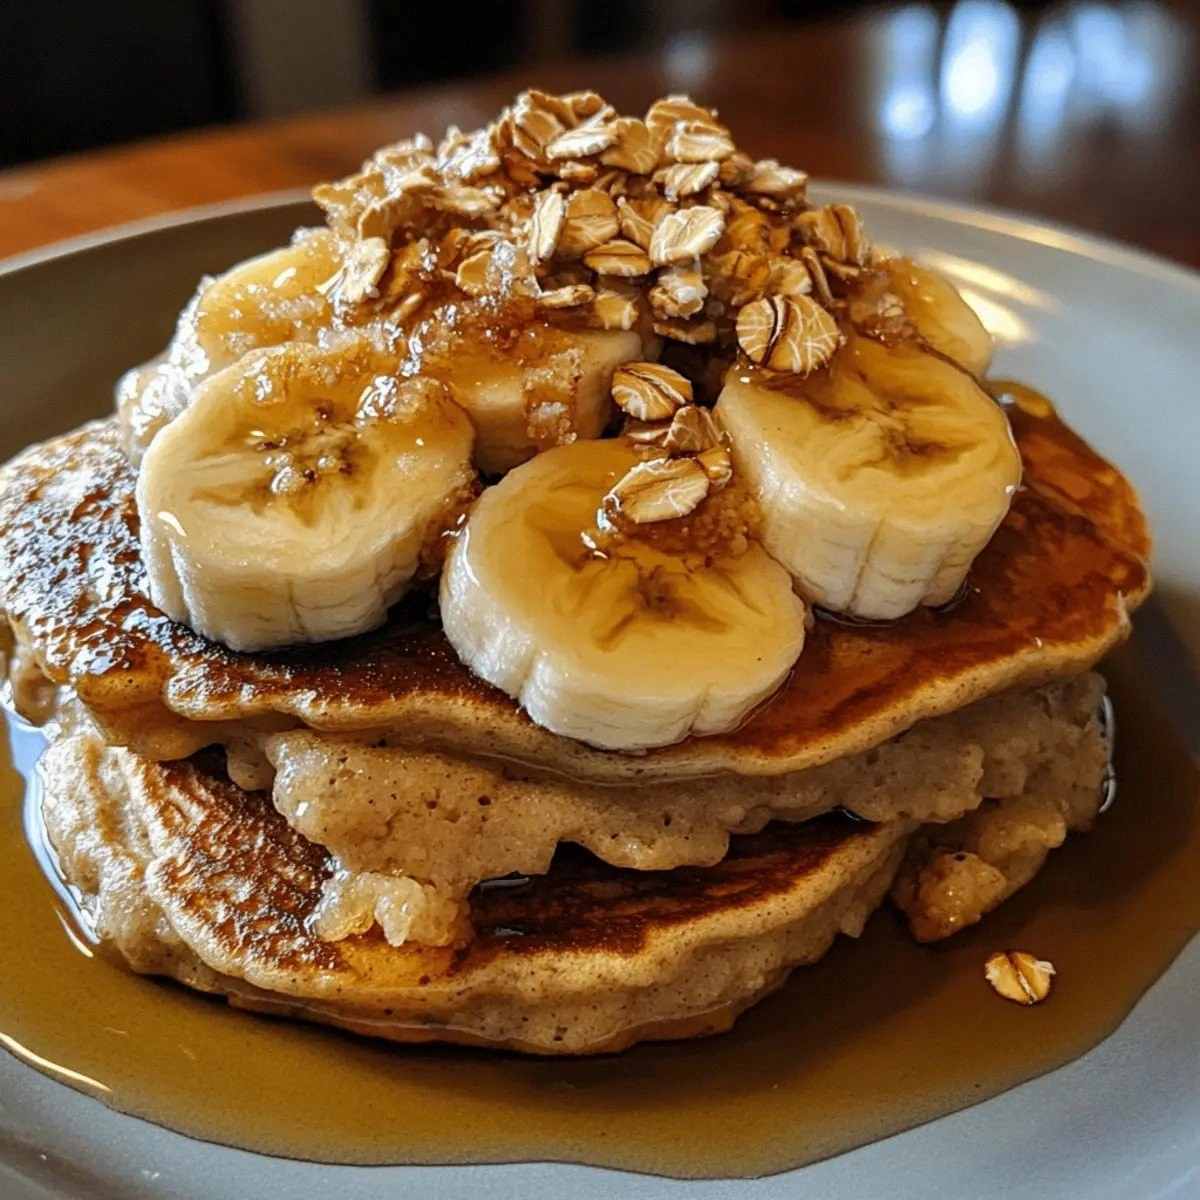
This version of banana oat pancakes is not just another gluten‑free recipe; it’s a game‑changing, crowd‑pleasing, kitchen‑savvy masterpiece. The secret? A fluffy batter that’s naturally sweetened by ripe bananas and maple syrup, with a subtle crunch from chopped nuts that keeps the texture from becoming mushy. Unlike most gluten‑free pancakes that rely on flour blends and artificial sweeteners, this recipe uses simple, wholesome ingredients that elevate flavor without the chemical aftertaste. The result is a pancake that rises like a cloud, holds its shape, and melts in your mouth with a buttery finish.
I dare you to taste this and not go back for seconds. The first bite will make you question every gluten‑free pancake you’ve ever made. I’ll be honest—by the time I finished the last bite, the pan was a mess and my kitchen smelled like a bakery. Most recipes get this completely wrong, but here’s what actually works: the right balance of wet and dry, the timing of the batter’s rest, and a gentle heat that lets the pancakes expand without burning.
Picture yourself pulling this out of the skillet, the whole kitchen smelling incredible, and the batter looking like a golden, cloud‑like canvas ready for toppings. The anticipation builds as you flip the pancake and hear that satisfying sizzle that signals it’s ready. The moment the edges start to pull away, you know you’re about to experience pure, unadulterated bliss. And if you’re wondering why this is hands down the best version you’ll ever make at home, it’s because every element has been fine‑tuned to create the ultimate brunch experience.
Let me walk you through every single step—by the end, you’ll wonder how you ever made it any other way. Stay with me here, because this is worth it. The next part? Pure magic. And if you've ever struggled with this, you're not alone—and I've got the fix. Okay, ready for the game‑changer?
What Makes This Version Stand Out
- Flavor: The natural sweetness of ripe bananas and maple syrup eliminates the need for added sugar, giving each pancake a deep, caramelized flavor profile that feels indulgent yet wholesome.
- Texture: The combination of rolled oats and eggs creates a batter that is thick enough to hold together yet light enough to rise, producing a fluffy interior with a satisfying bite.
- Convenience: No pre‑mixes, no complicated gluten‑free flours—just pantry staples that you can grab in seconds, saving time and money.
- Nutrition: Packed with protein from eggs, fiber from oats, and healthy fats from nuts, this recipe delivers a balanced meal that keeps you full and energized.
- Versatility: The batter can be made ahead and frozen, reheated with a splash of milk, or served fresh—perfect for busy mornings or lazy weekends.
- Visual Appeal: The golden‑brown edges and the glossy maple drizzle create a plate that looks as good as it tastes, making it Instagram‑worthy.
- Ingredient Quality: Using fresh, high‑quality bananas and whole‑grain oats ensures a robust flavor that stands out from mass‑produced alternatives.
- Make‑Ahead Potential: The batter’s stability allows you to prepare it the night before and simply cook when you’re ready, making this a stress‑free brunch solution.
Inside the Ingredient List
The Flavor Base
The two ripe bananas are the star of the show, providing natural sweetness and a subtle banana flavor that carries through each bite. Their creamy texture also helps bind the batter, reducing the need for extra flour or starches. If you skip the bananas, the pancakes will become dry and lack the signature sweet profile, turning them into a plain oat cake. For a slightly tangy twist, try using a mix of banana and a splash of lemon zest.
The maple syrup adds a deep, caramelized sweetness that complements the banana while providing a glossy finish when drizzled. It also contributes a touch of moisture, preventing the pancakes from drying out during cooking. If maple syrup isn’t available, you can substitute with honey or agave nectar, though the flavor will shift slightly. Using a pure maple syrup (not flavored or imitation) ensures the authentic, earthy sweetness that makes these pancakes irresistible.
The Texture Crew
Rolled oats are the backbone of this recipe, delivering a hearty, chewy texture that contrasts beautifully with the soft interior. They also add a subtle nutty flavor and a good dose of fiber, which helps keep you satisfied longer. If you prefer a finer texture, pulse the oats in a blender until they reach a coarse flour consistency, but be careful not to overprocess, or the pancakes may become too dense.
Eggs act as the glue that holds everything together while adding richness and structure. They help the pancakes rise and develop a light, airy crumb. If you’re vegan or allergic to eggs, you can replace them with a flaxseed egg (1 tablespoon ground flaxseed + 3 tablespoons water) or a commercial egg replacer, but expect a slightly different texture.
The Unexpected Star
Chopped nuts, such as walnuts or pecans, introduce a delightful crunch and a burst of healthy fats. They also add a subtle depth of flavor that elevates the overall taste. If you’re allergic to nuts or prefer a nut-free version, sprinkle toasted chia seeds or pumpkin seeds instead for a similar crunch.
The Final Flourish
Fresh berries not only add a burst of color and freshness but also introduce a juicy contrast to the soft pancakes. They provide antioxidants, vitamins, and a slight tartness that balances the sweet maple glaze. If berries are out of season, sliced kiwi or diced mango work wonderfully as alternatives. For a sweeter option, sprinkle a handful of dried cranberries or raisins for a chewy texture.
The pinch of salt is essential—it enhances all the flavors, preventing the pancakes from tasting flat. Even a tiny amount of salt can make a big difference, so don’t skip it. The cinnamon adds warmth and a hint of spice that pairs beautifully with the banana and maple. If you prefer a spicier kick, add a pinch of nutmeg or a dash of cayenne pepper for a surprising twist.
Everything’s prepped? Good. Let’s get into the real action.
The Method — Step by Step
- Step 1: Mash the Bananas. In a large bowl, use a fork or potato masher to crush the two ripe bananas until they’re almost smooth, with a few small lumps remaining. These lumps will become the pockets of texture in the finished pancakes. The aroma of banana should fill the room, signaling that the batter will be irresistibly sweet. Keep the bowl ready for the next step.
- Step 2: Mix Wet Ingredients. Add the two eggs, a tablespoon of vanilla extract, and a teaspoon of cinnamon to the mashed bananas. Whisk vigorously until the mixture is uniform and the eggs are fully incorporated. This creates a silky, aromatic base that will carry the flavors through the pancakes. If you’re watching the time, this should take about a minute.
- Step 3: Combine Dry Ingredients. In a separate bowl, sift the rolled oats, baking powder, and a pinch of salt. Sifting removes clumps and ensures an even distribution of leavening agent, which is critical for fluffy pancakes. The oats provide structure, while the baking powder gives the batter lift. This step is essential; skipping it will result in flat, dense pancakes.
- Step 4: Blend Wet and Dry. Gradually pour the oat mixture into the banana‑egg batter, stirring gently with a spatula. Mix until just combined—over‑mixing will develop gluten‑free oat proteins, making the pancakes rubbery. You want a slightly lumpy batter that will hold its shape when poured onto the pan. The batter should be pourable but thick enough to create distinct pancakes.
- Step 5: Rest the Batter. Cover the bowl with plastic wrap and let the batter rest for 10 minutes. This allows the oats to absorb moisture, resulting in a tender crumb. While the batter rests, preheat a non‑stick skillet over medium‑low heat and lightly oil it with a teaspoon of butter or oil. If you’re watching the timer, the batter should start to thicken slightly during this time.
- Step 6: Cook the Pancakes. Pour a 1/4‑cup ladle of batter onto the skillet, spreading it into a circle with the back of the ladle. Let it cook for 2‑3 minutes or until bubbles form on the surface and the edges start to lift. Flip gently with a spatula and cook for another 1‑2 minutes on the other side. The pancake should be golden brown and firm to the touch. This step is the moment of truth; don’t rush it.
- Step 7: Watch Out for Over‑Cooking. If you let the pancakes sit too long on the heat, they’ll dry out and develop a hard crust. Keep an eye on the color—once it’s a deep golden brown, flip or remove. This is the trickiest step because the cooking time can vary with stove heat and pan thickness. A quick visual cue is the formation of tiny holes in the surface, indicating doneness.
- Step 8: Add the Final Touches. While the pancakes are still warm, drizzle maple syrup evenly across the top, then sprinkle chopped nuts and fresh berries. The heat will slightly melt the maple, creating a glossy glaze that clings to the pancakes. The berries add a burst of color and a juicy contrast that elevates the overall presentation.
- Step 9: Serve Immediately. Stack the pancakes on a warm plate, allowing the steam to keep them soft. Serve with a side of extra maple syrup or a dollop of Greek yogurt for added richness. The first bite should be airy, sweet, and packed with flavor—a true breakfast masterpiece. If you’re craving a second bite, you’ll be disappointed because this is the best version you’ll ever make at home.
- Step 10: Clean Up. While the pancakes are still hot, wipe down the skillet and wash the utensils. A clean kitchen is a happy kitchen, and it’ll make the next batch even easier. This step often gets overlooked, but a tidy space keeps the cooking flow smooth.
That’s it—you did it. But hold on, I’ve got a few more tricks that’ll take this to another level. These insider tips will help you avoid common pitfalls and ensure each pancake is perfect.
Insider Tricks for Flawless Results
The Temperature Rule Nobody Follows
Many cooks set their skillet to high heat, hoping for a quick sear. The truth is, medium‑low heat is essential for even cooking and to prevent the outside from burning while the inside remains undercooked. I’ve tried the high‑heat method, and the pancakes ended up with a burnt exterior and a soggy center. Stick to medium‑low, and you’ll get that perfect golden crust every time. If your skillet has hot spots, rotate the pan halfway through cooking to ensure uniform heat distribution.
Why Your Nose Knows Best
The aroma of a pancake in progress can tell you a lot about its doneness. When you smell a sweet, buttery scent, the batter is ready to flip. If you detect a raw or metallic odor, the heat is too high or the batter hasn’t cooked through. Trust your nose; it’s a reliable indicator that the pancakes are cooked to perfection. A quick sniff can save you from a burnt mess.
The 5‑Minute Rest That Changes Everything
After the batter has rested, let it sit for an additional 5 minutes before cooking. This extra rest time allows the oats to fully hydrate, resulting in a softer crumb and a more cohesive texture. I once skipped this step and ended up with a pancake that felt like a dry oat cake. The extra rest also helps the batter thicken slightly, preventing the pancakes from spreading too thin on the skillet.
The Sweet‑Savory Balance
If you’re a fan of savory toppings, try a sprinkle of smoked paprika or a dash of sea salt on top before drizzling maple syrup. This contrast creates a complex flavor profile that’s both sweet and savory. A friend once added a pinch of chili flakes and called it “the best breakfast ever.” It’s a risk worth taking if you like to experiment.
The Perfect Stack
When stacking pancakes, place the warmest on the bottom to keep the stack from cooling too quickly. Adding a small layer of butter between each pancake creates a silky, melt‑in‑your-mouth experience. If you’re serving a crowd, keep the stack on a warming tray or place a low‑heat oven set to 200°F to maintain warmth. This trick keeps the pancakes fluffy and ready to eat.
These tricks might sound simple, but they’re the difference between a decent pancake and a memorable breakfast. Give them a try, and you’ll see the transformation.
Creative Twists and Variations
This recipe is a playground. Here are some of my favorite ways to switch things up:
Chocolate Banana Oat Pancakes
Add 2 tablespoons of cocoa powder to the dry mix and replace half the maple syrup with chocolate syrup for a decadent twist. The chocolate pairs wonderfully with the banana, creating a rich, indulgent flavor. Serve with a dusting of powdered sugar and a splash of milk for a dessert‑like experience.
Coconut‑Infused Pancakes
Replace half the milk with coconut milk and stir in a tablespoon of shredded coconut. The tropical flavor elevates the pancakes to a beach‑side breakfast vibe. Top with toasted coconut flakes and a drizzle of honey for extra crunch.
Peanut Butter Banana Pancakes
Fold in 2 tablespoons of peanut butter into the batter for a protein boost and a nutty undertone. The peanut butter adds a creamy richness that complements the banana’s sweetness. Finish with sliced bananas and a drizzle of maple syrup for a classic flavor combination.
Berry‑Burst Pancakes
Add a cup of frozen mixed berries to the batter before cooking, allowing them to thaw slightly. The berries burst in each bite, offering a juicy contrast to the fluffy base. A splash of lemon juice enhances the berry flavor and keeps the batter from browning too quickly.
Savory Banana Oat Pancakes
Swap maple syrup for a savory sauce made of sautéed onions, garlic, and a splash of soy sauce. Add chopped spinach and a pinch of black pepper to the batter. The result is a hearty, protein‑rich pancake that’s perfect for lunch or a light dinner.
Almond‑Butter Crunch Pancakes
Incorporate almond butter into the batter and sprinkle sliced almonds on top before serving. The almond butter provides a subtle nutty flavor and a creamy texture. The almonds add a satisfying crunch that contrasts with the soft interior.
Storing and Bringing It Back to Life
Fridge Storage
Cool the pancakes completely, then stack them with parchment paper between each layer. Store in an airtight container in the refrigerator for up to 3 days. When ready to serve, reheat in a toaster or microwave for 30 seconds. The pancakes will stay soft and fluffy, and the maple glaze will still shine.
If you’re planning a brunch party, keep the pancakes in a warming drawer at 200°F until you’re ready to serve. This keeps them fresh and warm without drying them out.
Freezer Friendly
Place the cooled pancakes in a single layer on a baking sheet and freeze until solid. Transfer to a freezer bag or airtight container. They can be frozen for up to 2 months. To reheat, pop them in a preheated oven at 350°F for 10 minutes. The pancakes will regain their fluffiness, and the maple syrup will be as glossy as when freshly made.
For a quick snack, simply thaw them at room temperature and drizzle a bit of maple syrup before eating. The texture remains delightful.
Best Reheating Method
The secret to reheating without drying out is to add a tiny splash of water or milk to the pan before warming. This creates steam that softens the pancakes and preserves moisture. Alternatively, wrap the pancakes in foil and heat in a preheated oven at 300°F for 5 minutes. The result is a warm, moist pancake that tastes almost as fresh as when first cooked.
Now that you have all the tools, it’s time to create your own batch of these incredible gluten‑free banana oat pancakes. Trust me, once you’ve tasted them, you’ll never go back to the old version.