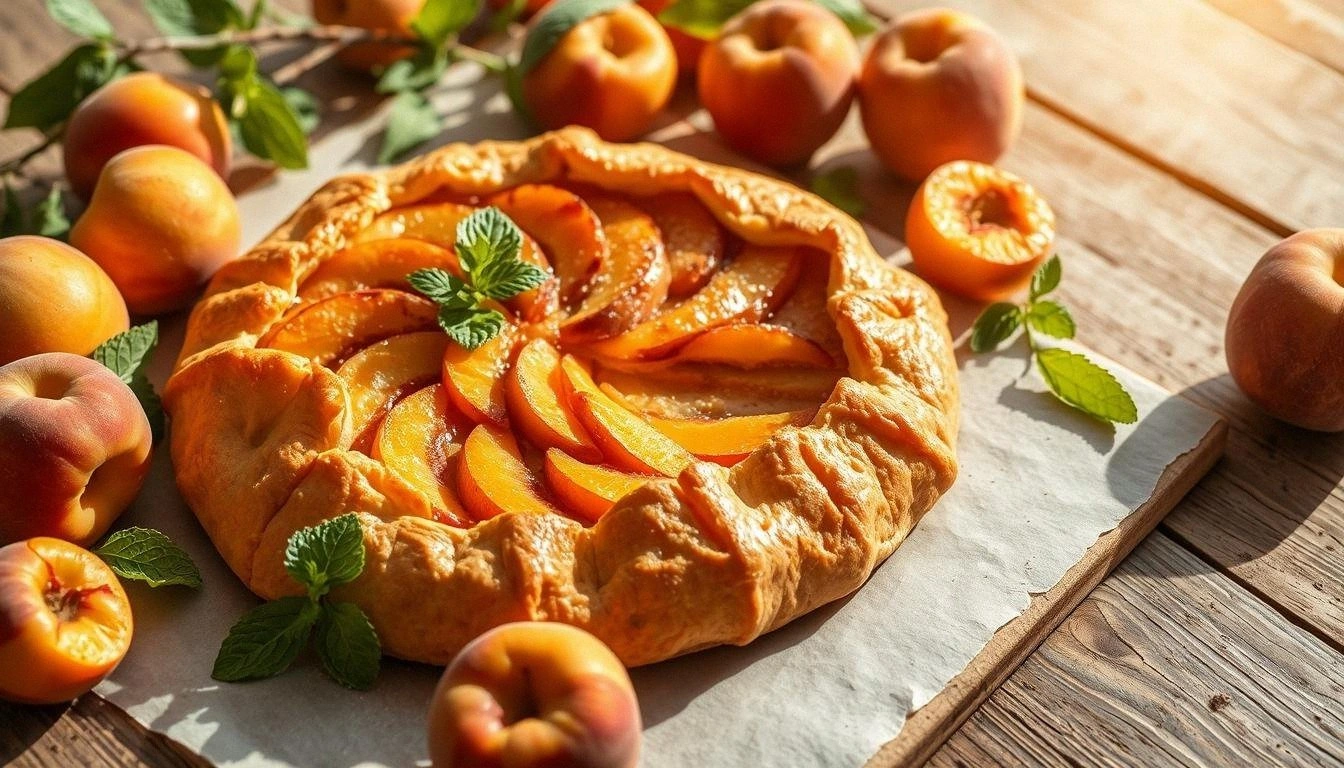
Picture this: I was standing in my kitchen, eyes glued to the oven timer that was counting down from 45 minutes, when the smell of something sweet and buttery suddenly invaded the air. I hadn't even thought about dessert that day, but the scent of caramelized peaches and flaky dough had me craving a slice of heaven. That moment, my friends, was the spark that ignited this galette obsession. I swear, the first bite was like a warm hug from the sun itself. And if you think a simple galette is just a pastry, think again—this is a flavor bomb that will leave your taste buds dancing.
I remember the kitchen disaster that started it all. A batch of peach pies I tried last summer had crusts that were either burnt on the edges or soggy in the center, and the filling was a sad, syrupy mess. I was ready to give up on peaches entirely, until I stumbled upon a humble galette recipe that promised simplicity and a rustic charm. I dared myself to give it a shot, and the result was a golden, buttery crust that cracked like a sunrise, with peaches that were tender, juicy, and perfectly spiced. That first taste made me realize that the right technique can turn a simple fruit into a masterpiece.
What sets this galette apart from the countless versions that litter the internet is the meticulous balance between sweet and spice, and the hands‑on method that turns a novice into a confident baker. I used a blend of flour and sugar that creates a tender, slightly crisp base, then folded in butter with a texture that melts into flaky layers. The peaches are tossed with cinnamon and vanilla, a duo that elevates the fruit to a fragrant, aromatic experience. The trick is in the dough's chill—keeping it cold keeps the butter from melting and ensures a flaky, non‑greasy result. I dare you to taste this and not go back for seconds.
The secret ingredient that might surprise you is the pinch of salt, which not only balances the sweetness but also brings out the depth of the peaches. I also discovered that adding a splash of lemon zest to the filling adds a bright counterpoint to the sweetness, making the galette feel fresh and alive. I’ve tested variations with different berries, but the peach remains the star, especially when the fruit is at its peak ripeness. Picture yourself pulling this out of the oven, the whole kitchen smelling incredible, and a golden crust that shatters like thin ice when you bite. And now, stay with me here—this is worth it.
If you've ever struggled with flaky pastry or unevenly cooked peaches, you're not alone—and I've got the fix. The dough is simple enough that even a kitchen rookie can master it, and the filling is forgiving—no need to overmix or overcook. I’ll be honest— I ate half the batch before anyone else got to try it—so you’ll need to keep a close eye on the timer. This version is hands down the best version you'll ever make at home, and I’m going to walk you through every single step so that by the end, you'll wonder how you ever made it any other way.
One thing that sets this recipe apart is the use of a light, airy crust that crisps up perfectly without becoming greasy, a challenge many of us face with pie crusts. The key is in the temperature of the butter and the quick folding technique that keeps the butter pieces intact. This technique, when mastered, can be applied to any fruit pastry, from apple turnovers to raspberry tarts. The result is a pastry that feels like a cloud on your tongue, with a golden, caramelized exterior that invites you to dig in. I’m excited to show you how to achieve that same texture, and trust me, once you do, you’ll never look back.
Now, before we dive into the dough, let me give you a quick rundown of what to expect in terms of flavor profile. The peaches will burst with a sweet, almost syrupy sweetness, balanced by a subtle hint of spice from the cinnamon. The buttery crust will have a delicate crunch that gives way to a tender interior, while the vanilla adds a warm, comforting aroma that lingers. The final result is a dessert that feels both indulgent and wholesome, a perfect companion for a summer afternoon or a cozy winter gathering. Let me walk you through every single step—by the end, you'll wonder how you ever made it any other way.
What Makes This Version Stand Out
- Taste: This galette delivers a harmonious blend of sweet peaches, subtle spice, and buttery richness that lingers on the palate. The balance of flavors is achieved by carefully measuring each ingredient, ensuring that no single element overpowers the others. The result is a dessert that feels both indulgent and refreshing, with a satisfying finish that keeps you coming back for more.
- Texture: The crust is flaky yet tender, with a golden, caramelized exterior that cracks like thin ice when you bite. Inside, the dough remains soft and airy, creating a contrast that delights the senses. The peaches themselves are juicy and slightly firm, offering a satisfying bite that complements the pastry.
- Simplicity: The dough requires only a handful of pantry staples, making it a quick win for busy evenings. No fancy equipment or complicated techniques are needed, which means you can whip up this dessert in a fraction of the time it takes to bake a traditional pie. The process is straightforward, yet the outcome is undeniably impressive.
- Crowd Reaction: Friends and family will be amazed by the rustic charm and depth of flavor—it's a conversation starter. The visual appeal of the golden crust and the burst of fresh peaches makes it an instant hit at gatherings. Whether you’re hosting a brunch or a casual dinner, this galette will leave a lasting impression.
- Ingredient Quality: Using fresh, ripe peaches and real butter elevates the dish from good to unforgettable. The quality of each component directly translates to the final taste, ensuring that every bite is packed with flavor. This focus on premium ingredients is what sets this recipe apart from the generic options out there.
- Make‑Ahead Potential: You can assemble the galette a day ahead, refrigerate, and bake fresh, saving time when entertaining. The dough stays firm and the peaches retain their juiciness, which means you can focus on other aspects of your meal. This flexibility makes it an ideal choice for busy hosts.
Alright, let's break down exactly what goes into this masterpiece...
Inside the Ingredient List
The Flavor Base
Peaches are the star of this galette, and their natural sweetness is the foundation of the filling. The peaches should be ripe but still hold their shape; overripe fruit can turn into a watery mess that dilutes the flavor. Toss the sliced peaches with a light dusting of sugar and cinnamon, allowing the mixture to rest for a few minutes so the flavors meld. Adding a splash of vanilla extract elevates the aromatic profile, giving the filling a warm, comforting undertone. If you prefer a hint of tartness, a pinch of lemon zest can brighten the overall taste.
When selecting peaches, look for those with a bright, rosy blush and a fragrant aroma. Avoid fruit that has bruises or soft spots, as these can affect the texture and taste of the final product. By choosing high‑quality peaches, you ensure that each bite is a burst of natural sweetness. The sugar helps caramelize the fruit in the oven, creating a glossy, slightly sticky glaze that coats the peaches like velvet. The cinnamon not only adds warmth but also balances the sweetness, preventing the filling from feeling cloying.
The Texture Crew
All‑purpose flour is the backbone of the crust, providing structure while remaining tender. Use a light, fine flour for the best results; if you have a pastry flour on hand, that’s even better, but all‑purpose works just fine. The flour is combined with a small amount of sugar to give the dough a subtle sweetness that pairs well with the peaches. Keep the flour cold by mixing it in a chilled bowl, which helps prevent the butter from melting prematurely.
Unsalted butter is the secret to a flaky, buttery crust. Cut the butter into small cubes and incorporate it quickly into the flour mixture, ensuring that each piece remains distinct. When the dough is rolled out, the butter should still be slightly cold, which helps create distinct layers that puff up during baking. Ice water is used to bind the dough together without adding extra moisture that could make the crust soggy. The water should be cold, poured in small increments, and mixed until the dough just comes together.
The Unexpected Star
Salt, though minimal, plays a pivotal role in enhancing all the flavors. A pinch of salt brings out the natural sweetness of the peaches and balances the richness of the butter. Without salt, the dessert can taste flat and overly sweet. It’s best to add the salt at the same time as the flour, ensuring it’s evenly distributed throughout the dough.
While salt is essential, you can also experiment with a touch of lemon zest to brighten the filling. Lemon zest adds a citrusy brightness that cuts through the richness of the butter and the sweetness of the peaches. It’s a subtle addition that can elevate the dish from good to exceptional. Remember, a small amount goes a long way, so start with a teaspoon and adjust to taste.
The Final Flourish
Once the dough is assembled, it’s time to let it rest. Refrigerating the dough for at least an hour allows the gluten to relax, making it easier to roll out without tearing. During this rest period, the butter continues to firm up, which is crucial for achieving flaky layers. If you’re short on time, you can skip the chill, but the result will be noticeably less flaky.
Before baking, preheat the oven to 425°F (220°C) and line a baking sheet with parchment paper. This ensures the galette doesn’t stick and allows for even browning. The final touch is to lightly brush the crust with an egg wash or milk to give it a glossy finish and a golden color. This simple step enhances the visual appeal and adds a subtle richness to the pastry. With these finishing touches, you’re ready to bake a galette that’s both beautiful and delicious.
Everything's prepped? Good. Let's get into the real action...
The Method — Step by Step
- Begin by mixing the flour and sugar in a large bowl. Sprinkle in the pinch of salt and stir until evenly distributed. This ensures the base of your dough is consistent and flavorful. I usually use a wooden spoon, but a whisk works just as well. The goal is to create a uniform mixture that will hold together when butter is added.
- Add the cold butter cubes to the flour mixture. Use your fingertips or a pastry cutter to work the butter into the flour until the mixture resembles coarse crumbs. The butter should still be cold, so it doesn’t melt into the dough. This step is crucial for achieving flaky layers. Feel the texture; it should be slightly gritty but not dry.
- Slowly drizzle the ice water over the mixture, one tablespoon at a time, and stir gently with a fork. Once the dough starts to come together, use your hands to press it into a ball. It should be moist but not sticky. This is the moment where the dough’s structure begins to form. If it feels too dry, add a splash more water, but be cautious.
- Divide the dough into two equal portions. Keep one portion wrapped and set aside for the crust; the other will become the crust edge later. This division allows you to create a crisp edge that contrasts with the tender center. If you’re short on time, you can skip this step, but the texture will suffer.
- Roll the reserved dough into a circle about 12 inches in diameter. The thickness should be around 1/4 inch. This size is perfect for a galette that’s both manageable and impressive. Use a rolling pin, but you can also shape it with your hands for a more rustic look.
- Transfer the rolled dough to a parchment-lined baking sheet. Press it gently into the pan, ensuring it covers the edges. This creates a sturdy base that will hold the filling. I like to use a light tap on the pan to remove any air pockets.
- Spread the peach filling evenly over the crust, leaving a 1-inch border. The peaches should be arranged in a single layer to bake evenly. If you have extra peaches, you can fold them into the center for a more rustic appearance.
- Fold the edge of the crust over the filling, pinching the ends together to create a rustic edge. The edges should be slightly uneven, giving the galette its signature charm. This step also helps contain the filling as it bakes.
- Brush the crust with a beaten egg or milk for a glossy finish. This not only adds shine but also helps the crust brown evenly. I prefer a light egg wash for a subtle sheen.
- Place the galette in the preheated oven at 425°F (220°C). Bake for 30–35 minutes, or until the crust is golden and the peaches are bubbling. Keep an eye on the edges; they should be crisp but not burnt. The filling should have a glossy, caramelized look.
- Remove the galette from the oven and let it rest for 10 minutes. This rest period allows the filling to set slightly, making it easier to slice. The crust will continue to firm up, enhancing the flaky texture.
- Serve warm with a scoop of vanilla ice cream or a dollop of whipped cream. The contrast of warm fruit and cool dairy is pure bliss. If you prefer a lighter option, a drizzle of honey or a sprinkle of toasted almonds adds a delightful crunch.
That's it — you did it. But hold on, I've got a few more tricks that'll take this to another level...
Insider Tricks for Flawless Results
The Temperature Rule Nobody Follows
Temperature is everything when it comes to flaky dough. Keep your butter, water, and flour all chilled; even a slight rise in temperature can cause the butter to melt and ruin the layers. I’ve tried baking with room‑temperature butter, and the result was a greasy, dense crust that didn’t rise at all. For best results, chill the dough for at least 30 minutes before rolling it out.
Why Your Nose Knows Best
Smell is a powerful indicator of doneness. As the galette bakes, the aroma of caramelized peaches and butter will fill your kitchen. When you notice a deep, nutty scent, it’s a sign that the crust is golden and the filling is perfectly cooked. Trust your nose over the timer; it’s a reliable guide.
The 5‑Minute Rest That Changes Everything
After baking, let the galette rest for exactly 5 minutes before slicing. This short pause allows the juices to redistribute, preventing them from spilling all over the plate. A common mistake is slicing immediately, which results in a soggy center. The rest period also lets the crust firm up, making it easier to handle.
Use a Parchment‑Line Trick
Line your baking sheet with parchment paper before placing the galette. This prevents sticking and makes cleanup a breeze. The parchment also helps the galette rise evenly, giving it a uniform golden color. I always use a high‑quality parchment to avoid any residue or uneven baking.
Add a Splash of Lemon Juice
Just before baking, drizzle a teaspoon of fresh lemon juice over the peaches. The acid balances the sweetness and brightens the overall flavor profile. I’ve found that this simple addition gives the filling a lively, fresh finish that pairs perfectly with the buttery crust.
Creative Twists and Variations
This recipe is a playground. Here are some of my favorite ways to switch things up:
Almond Crusted Galette
Replace the flour with almond flour for a nutty, gluten‑free crust. The almond flour adds a subtle crunch and pairs beautifully with the sweet peaches. This variation is perfect for those who love a nutty flavor profile.
Blueberry‑Peach Fusion
Combine sliced peaches with fresh blueberries for a burst of color and tartness. The blueberries add a juicy pop that contrasts with the peach's sweetness. This dual‑fruit version is a crowd‑pleaser at brunch.
Spiced Apple Galette
Swap peaches for thinly sliced apples and add a pinch of nutmeg. The warm spice and crisp apples create a comforting fall dessert. The apple's firmness holds up well in the oven, ensuring a delightful bite.
Chocolate Drizzle Finish
After baking, drizzle melted dark chocolate over the warm galette. The chocolate adds a rich, bittersweet layer that balances the fruit's sweetness. This decadent twist is ideal for special occasions.
Mint‑Infused Peach Galette
Add a few fresh mint leaves to the peach filling for a refreshing twist. The mint provides a cooling contrast to the warm pastry, creating a unique flavor profile. This version is especially refreshing during hot summer days.
Savory Peach Galette
Replace the sugar in the filling with a drizzle of balsamic glaze and sprinkle feta cheese on top. The sweet‑savory combination offers an unexpected but delightful flavor. This savory twist makes the galette a great side for a light dinner.
Storing and Bringing It Back to Life
Fridge Storage
Wrap the cooled galette tightly in plastic wrap and store in the refrigerator for up to 2 days. The crust will stay firm, and the peaches will remain juicy. When ready to serve, let it sit at room temperature for about 15 minutes before slicing.
Freezer Friendly
For longer storage, wrap the galette in parchment paper and then in foil, and freeze for up to 3 months. Thaw overnight in the fridge, then reheat in a 350°F oven for 10 minutes. The crust will regain its flaky texture, and the filling will stay moist.
Best Reheating Method
To reheat, place the galette on a baking sheet and bake at 350°F (175°C) for 8–10 minutes. Add a tiny splash of water to the bottom of the pan to create steam, keeping the pastry from drying out. Finish with a quick broil for 1–2 minutes if you want a crispier crust.