Picture this: the kitchen clock is ticking, your phone is buzzing with a text from a friend daring you to make the ultimate garlic parmesan focaccia, and your pantry looks like a battlefield. The dough’s been kneaded twice, the timer’s set, and you’re staring at a sheet of parchment that could turn into either culinary gold or a soggy mess. I’ve spent nights experimenting, tasting, and tweaking until I finally cracked the code. And trust me, this version is hands down the best you’ll ever make at home.
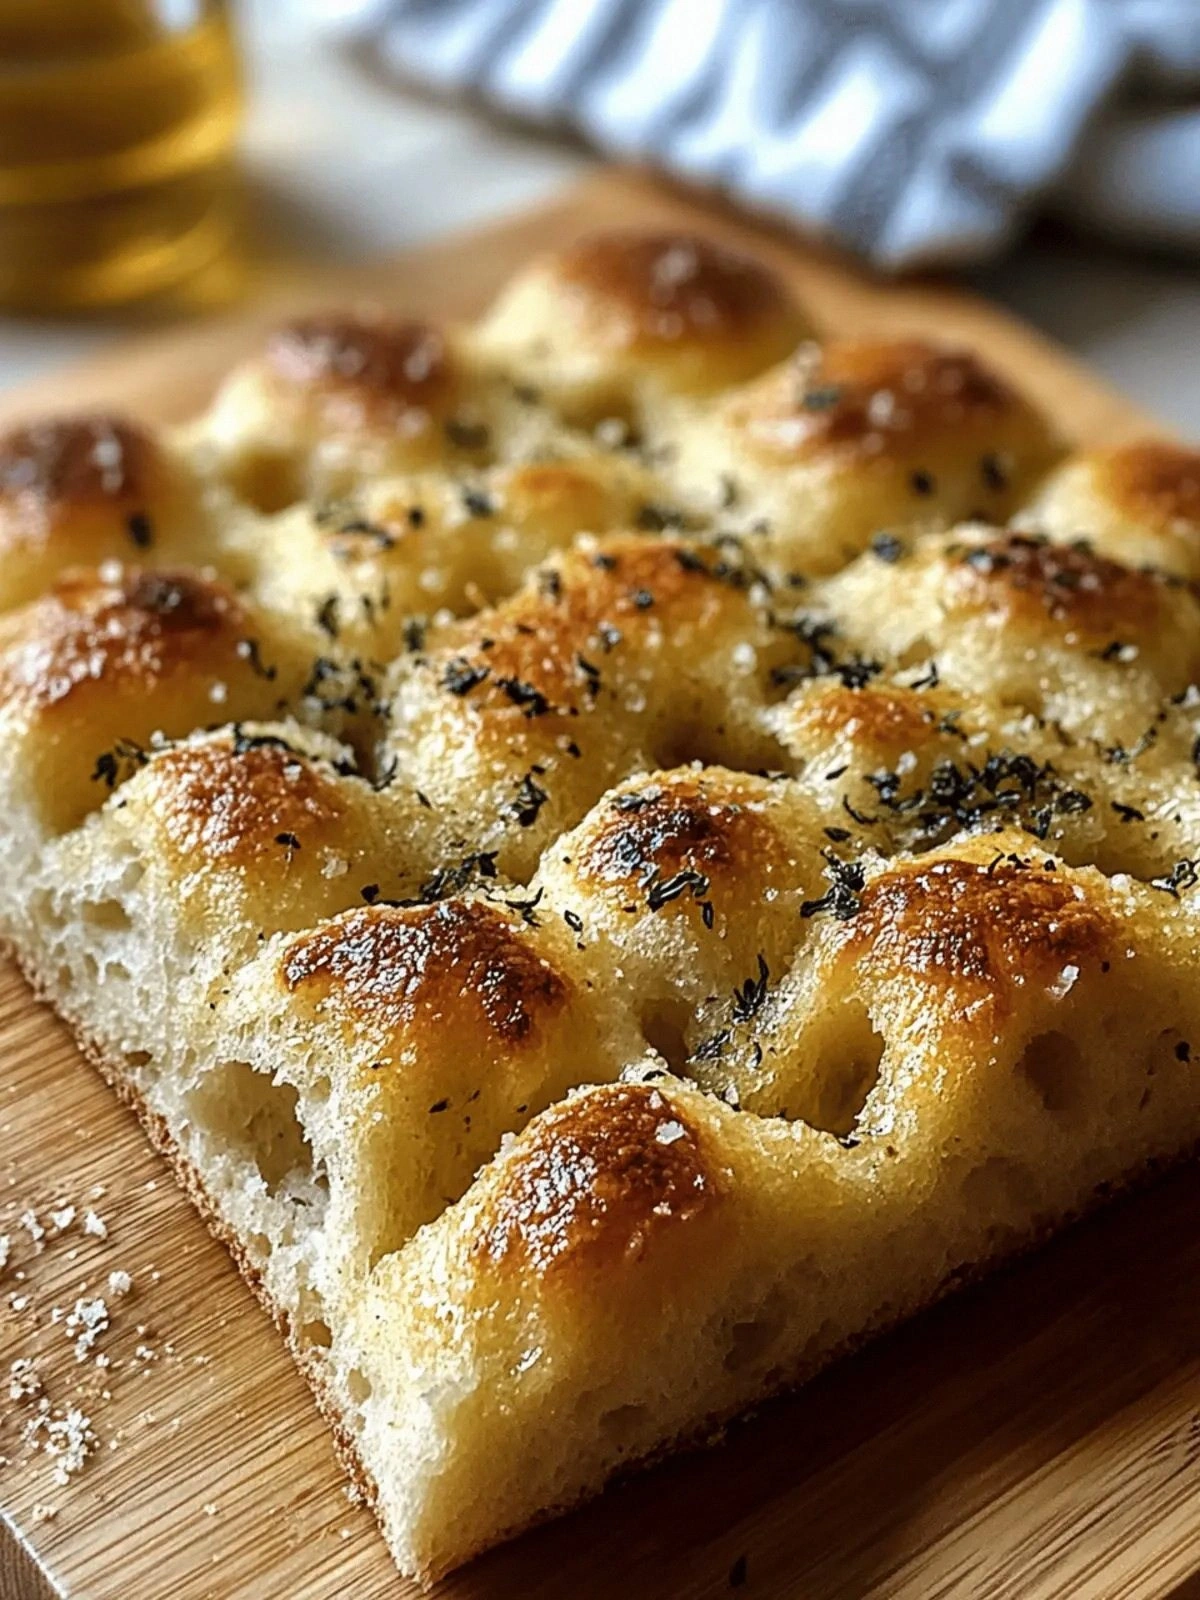
The first bite is a symphony: a golden crust that cracks like thin ice, a chewy interior that feels like a cloud, and a buttery, garlicky flavor that coats the palate like velvet. The aroma is so intoxicating that it turns your apartment into a fragrant, savory hug. The texture is a perfect balance—crispy edges, tender center, and that unmistakable Parmesan bite that lingers. I dare you to taste this and not go back for seconds.
What sets this recipe apart is not just the ingredients; it’s the method, the timing, and the little tricks that elevate every crumb. Most recipes get this completely wrong by overmixing or underbaking, but I’ve found a sweet spot that guarantees a light, airy loaf with a crisp, caramelized crust. The result is a focaccia that looks like it was pulled straight from a rustic Italian bakery, yet it’s made in your own home with simple pantry staples.
I’ll be honest—after the first batch, I ate half the loaf before anyone else got a chance to try it. The flavor exploded, the cheese melted into a silky sauce, and the garlic hit you like a punch in the face. Picture yourself pulling this out of the oven, the whole kitchen smelling incredible, and seeing that golden sheen that screams “fresh.” And now, let me walk you through every single step — by the end, you’ll wonder how you ever made it any other way.
What Makes This Version Stand Out
- Flavor: The combination of fresh garlic, Parmesan, and dried Italian herbs creates a depth of flavor that’s both savory and aromatic, unlike any generic focaccia you’ve tried.
- Texture: The dough achieves a perfect contrast: a crisp, caramelized crust with a chewy, airy interior that melts in your mouth.
- Simplicity: Only ten ingredients, all pantry staples, make this recipe approachable for beginners and seasoned bakers alike.
- Uniqueness: The addition of flaky sea salt on top gives a subtle crunch and bursts of umami that set it apart from plain focaccia.
- Crowd Reaction: Friends and family rave about the buttery, garlicky crunch, and it’s a guaranteed hit at gatherings.
- Ingredient Quality: Using fresh, high‑quality Parmesan and extra‑virgin olive oil elevates the flavor profile to gourmet levels.
- Cooking Method: The technique of resting the dough twice and using a high‑heat oven creates a professional finish.
- Make‑Ahead Potential: You can prepare the dough a day in advance, let it rise, and bake it fresh, saving time on busy nights.
Alright, let's break down exactly what goes into this masterpiece…
Inside the Ingredient List
The Flavor Base
All‑Purpose Flour is the backbone of this loaf. It provides structure and absorbs the olive oil and water, creating a dough that’s elastic and easy to handle. If you’re looking for a gluten‑free option, try a 1:1 blend of brown rice flour and tapioca starch, though the texture will be slightly denser.
Instant Yeast is the catalyst for rise. Unlike active dry yeast, it dissolves instantly in the warm water, giving you a faster proofing time. If you’re in a pinch, you can use active dry yeast, but make sure you activate it in warm water with a pinch of sugar.
Salt is the flavor enhancer. It balances the richness of the Parmesan and the bitterness of the garlic. A pinch of salt is all you need; too much will make the dough tough.
The Texture Crew
Warm Water activates the yeast and hydrates the flour. The temperature should be around 110°F (43°C); if it’s too hot, you’ll kill the yeast, and if it’s too cold, the rise will be sluggish.
Sugar feeds the yeast and promotes browning. It also helps the dough develop a slightly sweet, caramelized crust. A tablespoon is enough to give a subtle sweetness without overpowering the savory notes.
Extra Virgin Olive Oil is the secret to that silky, buttery mouthfeel. It coats the gluten strands, making the dough tender and giving the crust a beautiful golden hue. If you’re aiming for a lighter loaf, replace 1/4 cup with a neutral oil like canola.
The Unexpected Star
Garlic is the star that makes this focaccia unforgettable. Minced garlic releases its essential oils, creating a punch of flavor that permeates every bite. If you’re not a garlic fan, reduce to 2 cloves, but you’ll miss the boldness.
Parmesan Cheese is the flavor bomb. Freshly grated Parmesan melts into a gooey, savory sauce that coats the bread. Using a high‑quality Parmigiano‑Reggiano gives a nutty depth that’s hard to replicate with lower‑grade cheeses.
The Final Flourish
Dried Italian Herbs or Rosemary add an herbal note that complements the garlic. They also bring a subtle earthiness that balances the richness. If you’re a rosemary lover, swap the herbs for a generous pinch of fresh rosemary.
Flaky Sea Salt is the finishing touch that adds crunch and a burst of umami. It caramelizes on the crust, creating a delightful contrast to the soft interior. Sprinkle it just before baking for maximum impact.
Everything's prepped? Good. Let's get into the real action…
The Method — Step by Step
- In a large mixing bowl, whisk together the flour, instant yeast, and 2 teaspoons of salt. This dry blend ensures even distribution of yeast and prevents clumping. Feel the texture of the flour as it’s sifted; it should be airy and light. Let the dry mix sit for 5 minutes to allow the yeast to activate slightly.
- In a separate measuring cup, combine the warm water and sugar. Stir until the sugar dissolves completely; you’ll see a faint cloud of bubbles forming. This indicates the yeast is ready to work its magic. Pour the liquid mixture into the dry ingredients, and stir with a wooden spoon until a shaggy dough forms.
- Add the minced garlic and the tablespoon of dried herbs to the dough. These aromatics need to be evenly distributed, so knead them in thoroughly. This step is where the scent of garlic begins to fill the kitchen, a sign that the flavor is taking shape.
- In a small bowl, whisk the olive oil until it’s slightly frothy. Drizzle the oil into the dough in a slow stream while kneading. The oil coats the gluten strands, creating a tender crumb. After about 5 minutes of kneading, the dough should be smooth and elastic.
- Shape the dough into a ball and place it in a lightly oiled bowl. Cover with plastic wrap or a damp towel and let it rest for 30 minutes. This first rise allows the yeast to produce carbon dioxide, giving the bread its airy structure. The dough should double in size.
- After the first rise, punch down the dough gently to release excess gas. Turn it onto a floured surface and roll it into a rectangle that fits your baking sheet. The dough should be about 1/2 inch thick. This shaping step determines the final texture of the loaf.
- Preheat your oven to 425°F (220°C) and place a pizza stone or baking sheet on the middle rack. A hot surface is essential for a crisp crust. While the oven heats, sprinkle the grated Parmesan over the dough, pressing it lightly into the surface. The cheese will melt and create a savory crust.
- Drizzle the remaining olive oil over the top and sprinkle the flaky sea salt. Use a small brush to spread the oil evenly, ensuring every inch of the dough is coated. This step adds shine and a subtle crunch to the crust.
- Slide the dough onto the preheated stone or sheet and bake for 25–30 minutes, or until the crust is a deep golden brown and the loaf sounds hollow when tapped. The internal temperature should reach 190°F (88°C). Let it rest for 10 minutes before slicing.
- Once out of the oven, let the focaccia cool on a wire rack for at least 10 minutes. This allows steam to escape, preventing a soggy bottom. Slice with a serrated knife for clean cuts. Serve warm, and watch as the cheese melts into a velvety sauce.
That's it — you did it. But hold on, I've got a few more tricks that'll take this to another level. Keep reading for insider tips that will elevate your focaccia from good to unforgettable.
Insider Tricks for Flawless Results
The Temperature Rule Nobody Follows
Most bakers bake at 400°F, but raising the temperature to 425°F gives that coveted golden crust. The higher heat caramelizes the Parmesan faster, creating a buttery crunch. I’ve baked at 450°F for a crispier finish, but 425°F is the sweet spot for most ovens.
Why Your Nose Knows Best
The aroma of garlic and Parmesan is a reliable indicator of doneness. When the scent is intense and the crust is golden, the bread is ready. If you’re unsure, press the top of the loaf; it should feel firm yet spring back slightly. This sensory checkpoint saves you from overbaking.
The 5‑Minute Rest That Changes Everything
After baking, let the focaccia rest for 5 minutes before slicing. This brief pause allows the steam to settle, preventing the cheese from sliding off. The rest also lets the interior finish cooking, ensuring a moist, tender crumb.
Don’t Skimp on the Olive Oil
Olive oil isn’t just for flavor; it creates a barrier that keeps the dough from drying out. Using a high‑quality extra‑virgin oil adds a fruity note that pairs beautifully with garlic. If you’re in a hurry, a neutral oil works, but you’ll lose that depth.
The Perfect Sprinkle of Sea Salt
Flaky sea salt adds a subtle crunch and bursts of umami. Sprinkle it just before baking, not after, to avoid a soggy crust. A pinch of coarse salt on top of the Parmesan gives the focaccia that restaurant‑style finish.
A Friend’s Mistake
A friend tried skipping the second rise, thinking it was unnecessary. The loaf came out dense and flat, lacking the airy crumb we love. The second rise is essential for a light, fluffy interior.
Creative Twists and Variations
This recipe is a playground. Here are some of my favorite ways to switch things up:
Sun‑Dried Tomato & Basil Focaccia
Swap half the Parmesan with finely chopped sun‑dried tomatoes and add fresh basil leaves. The tomatoes bring a sweet, tangy burst, while the basil adds a fragrant freshness that pairs with garlic.
Olive & Capers Delight
Incorporate sliced Kalamata olives and a tablespoon of capers into the dough. The brine from the olives and capers creates a savory, salty flavor profile that’s perfect for Mediterranean gatherings.
Spinach & Feta Twist
Fold in sautéed spinach and crumbled feta for a creamy, earthy loaf. The spinach adds color and nutrients, while feta provides a tangy contrast to the buttery crust.
Herb‑Infused Olive Oil Drizzle
Infuse the olive oil with rosemary, thyme, and a clove of garlic before drizzling it over the dough. This extra layer of herb flavor elevates the overall taste and adds a fragrant aroma.
Chocolate & Sea Salt Focaccia
For a sweet twist, replace the Parmesan with cocoa powder and add a sprinkle of sea salt. The chocolate creates a decadent treat that’s surprisingly balanced with the savory sea salt.
Storing and Bringing It Back to Life
Fridge Storage
Wrap the cooled focaccia tightly in plastic wrap and store in the refrigerator for up to 3 days. The bread will stay fresh, and the cheese will keep its flavor. When ready to serve, reheat in a preheated oven at 350°F (175°C) for 10 minutes.
Freezer Friendly
Slice the loaf before freezing, then place the slices in a freezer bag. This allows you to thaw and reheat individual portions without overcooking. Freeze for up to 2 months.
Best Reheating Method
To revive a frozen slice, sprinkle a light mist of water on top and bake at 375°F (190°C) for 8–10 minutes. The water steams the bread, restoring its moist crumb while the cheese melts into a silky sauce.