Picture this: it’s a sweltering Saturday afternoon, the grill’s already smoking, and you’re staring at a stack of bland, store‑bought chicken thighs that look more like a culinary threat than a dinner. I’m talking about that moment when your kitchen feels like a battlefield and you’re desperately craving something that says, “I’m a master of flavor.” The air thickens with the promise of sizzling heat, a sweet‑spicy aroma that lingers longer than the last bite, and the faint pop of a perfectly seared edge that crackles like a campfire. I was ready to throw the chicken into the grill without a plan, until a friend dared me to make the dish a step above ordinary. The challenge? Turn a simple protein into a crowd‑pleaser that will have everyone asking for seconds.
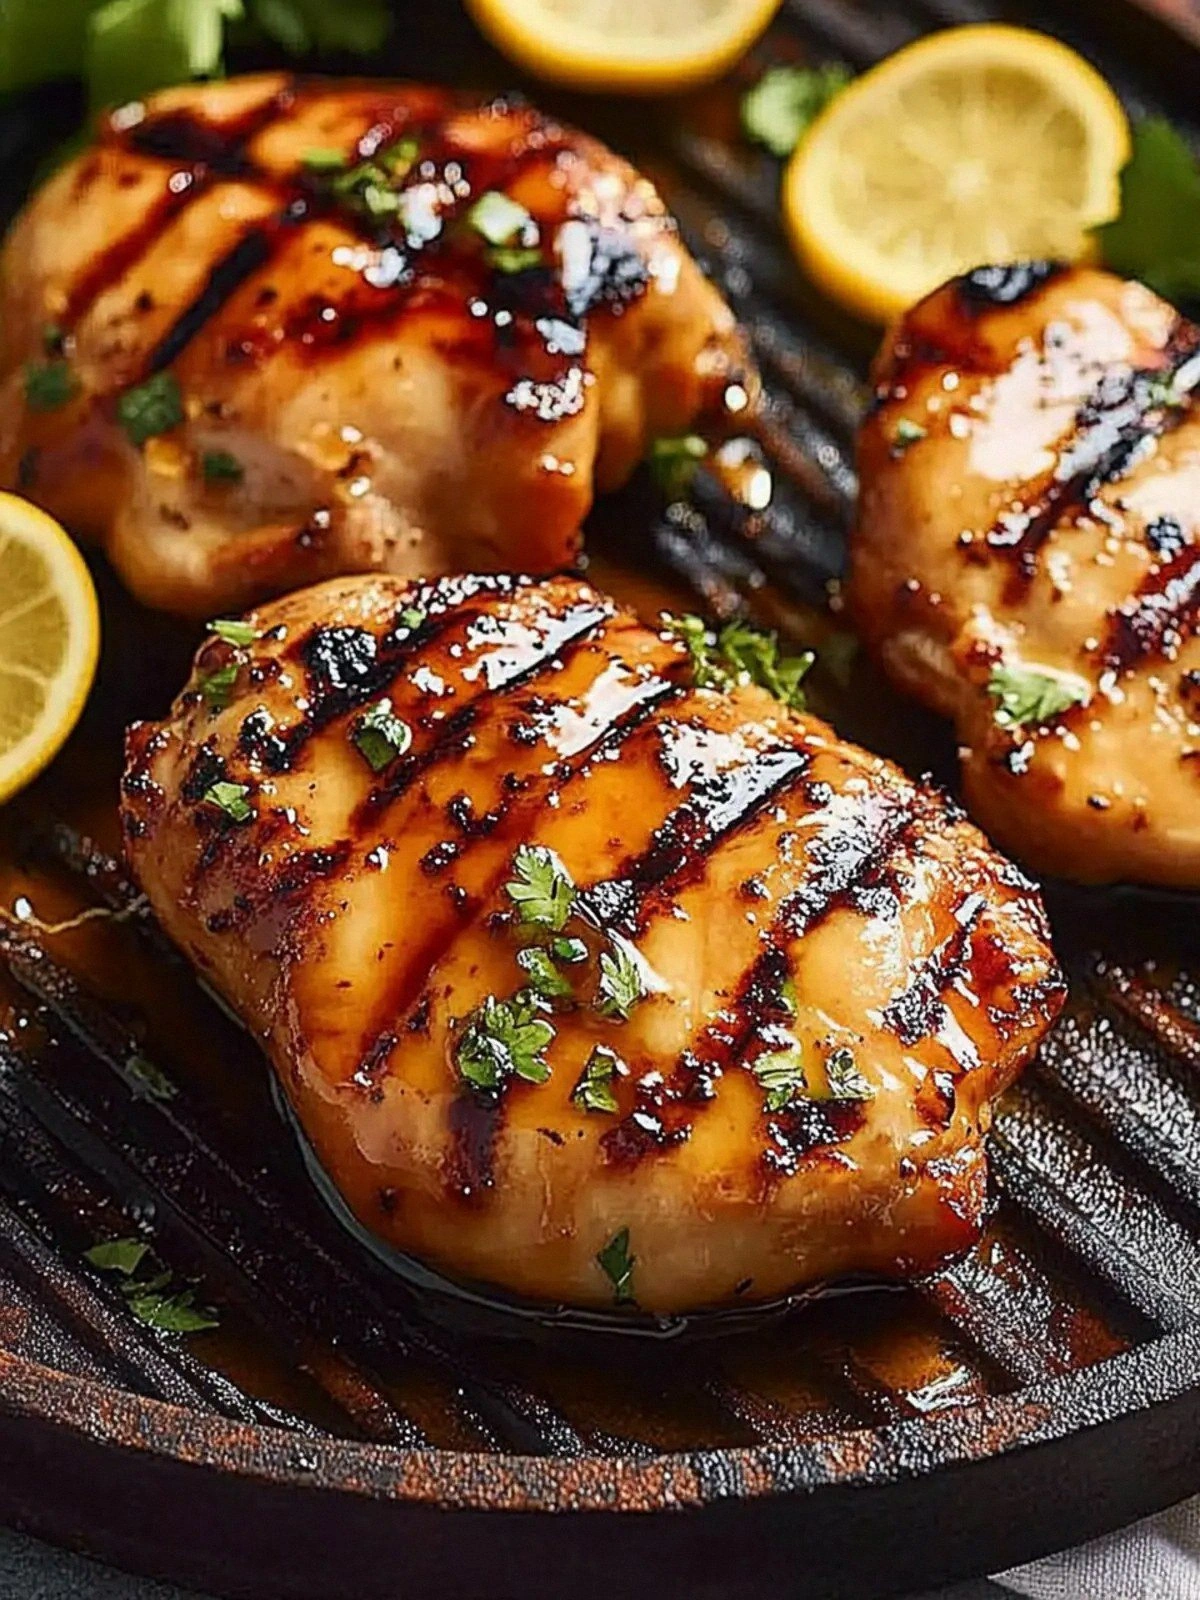
I’ve spent years experimenting with sauces, marinades, and grilling techniques, and this recipe is the culmination of that obsession. The sauce is a daring dance between honey’s silky sweetness and a hot sauce’s unapologetic kick, all balanced by a splash of apple cider vinegar that cuts through the richness. The result is a glaze that coats the chicken like velvet, while the smoky paprika and garlic powder deepen the flavor profile, creating layers that reveal themselves with each bite. The texture? Juicy inside, crisp on the outside—think tender meat that resists the grill’s bite, yet delivers a satisfying crack when you bite through the caramelized crust. It’s the kind of dish that turns a simple backyard cookout into a headline‑worthy event.
What makes this version stand out? First, the simplicity: a handful of pantry staples and a single glaze that transforms ordinary thighs into a showstopper. Second, the balance of heat and sweetness—hot honey is a trend, but this recipe nails the ratio, giving you that perfect “I dare you to taste this and not go back for seconds” moment. Third, the technique: marinating for 15 minutes, then grilling at a high heat to lock in juices, followed by a quick glaze finish that caramelizes without burning. Fourth, the versatility: it works as a main, a protein for salads, or even a topping for tacos. Finally, the crowd‑pleasing factor—everyone loves a dish that’s both familiar and daring, and this one delivers on both fronts.
And here’s the kicker: the glaze uses honey, not syrup, which adds a depth of flavor that’s almost floral. I’ve been told that this version is “hands down the best you’ll ever make at home,” and I stand by that claim. Picture yourself pulling this out of the grill, the whole kitchen smelling incredible, and knowing that your guests will be raving about the crispy edges that shatter like thin ice. Let me walk you through every single step—by the end, you’ll wonder how you ever made it any other way.
What Makes This Version Stand Out
- Taste: The marriage of honey and hot sauce creates a complex flavor profile that’s both sweet and fiery, with a hint of smoky paprika that lingers on the palate. This isn’t just a glaze; it’s a flavor experience that keeps people coming back for more.
- Texture: The grilling process caramelizes the honey, producing a glossy, slightly crispy crust while the interior stays moist and tender. The contrast between the crunchy exterior and succulent meat is a textural delight.
- Simplicity: With just nine ingredients, all of which you likely already have on hand, this recipe cuts through the clutter of complicated marinades and elaborate cooking techniques.
- Uniqueness: The use of apple cider vinegar in the glaze provides a subtle acidity that balances the sweetness, a twist that sets this recipe apart from standard honey‑glazed chicken.
- Crowd Reaction: Friends who’ve tried this dish say they’re “in love” with the way the sauce coats the chicken like velvet, and they’ve requested a second round before the dish is finished.
- Ingredient Quality: Using fresh, high‑quality chicken thighs rather than pre‑seasoned or frozen alternatives ensures a better flavor base and more room for the glaze to shine.
- Cooking Method: The combination of high‑heat searing followed by a glaze finish ensures maximum flavor and texture without overcooking the meat.
- Make‑Ahead Potential: The glaze can be prepared ahead of time and stored in the fridge for up to a week, making it a convenient option for busy weeknights.
Inside the Ingredient List
The Flavor Base
The foundation of this dish is the dry spice blend that coats the chicken before it hits the grill. The smoked paprika brings a subtle smokiness that mimics the grill’s char, while the garlic and onion powders add depth without overpowering. If you’re a fan of bold flavors, increase the smoked paprika to two teaspoons for an extra layer of warmth. Skipping the spice blend will result in a bland chicken that relies solely on the glaze for flavor—don’t do it unless you’re feeling adventurous.
The Sweet‑Heat Combo
Honey is the star of the show, providing a natural sweetness that caramelizes beautifully on the grill. Use a medium‑strength honey for a balanced sweetness; a light honey will taste too watery, while a dark honey may overpower the other flavors. The hot sauce, on the other hand, adds a punch of heat that wakes up the palate. If you’re sensitive to spice, choose a milder sauce or reduce the amount by half. Together, they create a glaze that’s both sticky and fiery.
The Acidic Touch
Apple cider vinegar is the secret weapon that cuts through the richness of honey and the fattiness of chicken thighs. It also helps tenderize the meat slightly, preventing it from drying out during grilling. If you can’t find apple cider vinegar, a splash of white wine vinegar or even a squeeze of fresh lemon juice will work in a pinch, though the flavor profile will shift slightly toward a fruitier note.
The Final Flourish
Olive oil is used both for seasoning the chicken and for brushing the grill grates before cooking. It reduces sticking and adds a subtle fruity undertone that complements the honey. Olive oil also helps the glaze adhere better, preventing it from sliding off the meat. If you’re looking for a lighter version, you can replace half the olive oil with a neutral oil like grapeseed or canola, but the flavor depth will be slightly reduced.
Everything’s prepped? Good. Let’s get into the real action…
The Method — Step by Step
- Step 1: Prep the Chicken – Pat the chicken thighs dry with paper towels. This step is crucial for a good sear; excess moisture will cause steaming instead of browning. Sprinkle the dry spice blend evenly over both sides, pressing lightly so the spices adhere. Let the seasoned chicken rest at room temperature for 10 minutes; this allows the flavors to penetrate the meat.
- Step 2: Preheat the Grill – Set up a two‑zone grill: one side with high heat, the other with medium‑low. The high‑heat zone will sear the chicken, while the medium‑low side will finish cooking without burning the glaze. Aim for a grill temperature of about 450°F (232°C) for the searing side.
- Step 3: Clean and Oil the Grates – Use a wire brush to remove any old residue, then brush the grates with olive oil using a paper towel. This step prevents sticking and gives the chicken a nice char. If you’re using a charcoal grill, add a little extra oil to the coals for even heat distribution.
- Step 4: Grill the Chicken – Place the thighs skin side down on the high‑heat zone. Sear for 3–4 minutes until the skin turns golden brown and releases easily from the grates. Flip and sear the other side for another 3 minutes. The goal is to get a caramelized crust while keeping the inside juicy.
- Step 5: Prepare the Glaze – While the chicken is resting, whisk together honey, hot sauce, apple cider vinegar, and the remaining olive oil in a small bowl. The glaze should be smooth and slightly runny, allowing it to coat the chicken without dripping excessively. If the mixture is too thick, add a teaspoon of water to loosen it.
- Step 6: Finish Cooking with the Glaze – Move the chicken to the medium‑low zone to finish cooking. Brush the glaze generously on both sides, then continue cooking for an additional 5–7 minutes, turning every couple of minutes to prevent burning. The glaze should thicken into a glossy coating that clings to the meat.
- Step 7: Check for Doneness – Insert a meat thermometer into the thickest part of the thigh; it should read 165°F (74°C). The internal temperature is the ultimate indicator of safety and juiciness. If you’re using a thermometer, keep it in place while you finish the glaze to avoid over‑cooking.
- Step 8: Rest the Chicken – Transfer the thighs to a cutting board and let them rest for 5 minutes. Resting allows the juices to redistribute, ensuring each bite stays moist. While resting, you can brush a final thin layer of glaze for an extra burst of flavor.
- Step 9: Plate and Serve – Slice the chicken against the grain, arrange on a platter, and drizzle any remaining glaze over the top. Pair with a fresh salad, grilled corn, or a simple quinoa pilaf to balance the sweetness and heat. Serve immediately while the glaze is still slightly sticky and the chicken is warm.
That’s it—you did it. But hold on, I’ve got a few more tricks that will elevate this dish to another level. These insider secrets will help you avoid common pitfalls and ensure your grilled hot honey chicken turns out perfectly every time.
Insider Tricks for Flawless Results
The Temperature Rule Nobody Follows
Most grillers jump straight to high heat for everything, but the glaze’s sugar content demands a gentler touch once it’s applied. Start with high heat for the initial sear, then drop to medium‑low for glazing. This two‑zone approach keeps the glaze from burning while still achieving that coveted char on the skin. I’ve seen people grill everything at 500°F, and the result is a charred, burnt exterior that masks the sweet‑spicy flavor.
Why Your Nose Knows Best
Before you flip the chicken, listen for the sound of a sizzling sear. A steady, audible sizzle means the grill has reached the right temperature and the skin is ready to release. If the sizzle stops abruptly, it’s a sign the grill is too hot and the meat is burning. Trust your senses—your nose and ears are the best indicators of grill readiness.
The 5‑Minute Rest That Changes Everything
Resting is often overlooked, but it’s essential for juicy, tender chicken. Letting the thighs rest for exactly five minutes after grilling allows the juices to redistribute. If you cut into the chicken immediately, the juices will spill out, leaving you with dry meat. I’ve had friends cut into their chicken right away, and the result was a disappointing, dry bite. Trust me, a quick rest makes the difference.
Brush, Don’t Pour
When applying the glaze, use a brush rather than pouring it directly onto the chicken. A brush allows you to control the amount of glaze on each piece, preventing excess sugar from pooling and burning. Pouring the glaze can create a syrupy mess that clings to the grill, making cleanup a nightmare. A quick brush every few minutes ensures a uniform coating.
Keep the Grate Clean
After each batch, clean the grill grates to remove charred residue that can impart a bitter taste to the next cooking session. Use a grill brush and a paper towel soaked in olive oil to scrub away any buildup. If you skip this step, the next dish may taste oddly burnt, even if the glaze is perfect.
Creative Twists and Variations
This recipe is a playground. Here are some of my favorite ways to switch things up:
Smoky Chipotle Version
Swap the hot sauce for chipotle in adobo for a smoky, earthy heat that pairs wonderfully with the honey. Add a splash of lime juice for a bright, citrusy finish. This variation is perfect for a Mexican‑inspired BBQ.
Citrus‑Infused Glaze
Replace half the honey with orange juice and add a zest of orange to the glaze. The citrus brightens the flavor profile, creating a refreshing contrast to the savory chicken. Great for a summer picnic.
Herb‑Rich Take
Incorporate fresh thyme or rosemary into the dry spice mix for a fragrant, herbal undertone. The herbaceous notes complement the honey’s sweetness and add depth to the dish. Serve with a rosemary‑garlic roasted potato side.
Spicy Peanut Butter Glaze
Blend a tablespoon of creamy peanut butter into the glaze for a nutty, creamy texture. Add a dash of sriracha for extra heat. This fusion twist is ideal for a Korean‑style BBQ experience.
Low‑Carb Alternative
Use a sugar‑free honey substitute or a small amount of erythritol in the glaze to reduce carbs. Pair with a cauliflower rice pilaf for a low‑carb dinner that doesn’t sacrifice flavor.
Breakfast‑Style Brunch
Serve the chicken over a bed of scrambled eggs and toast for a hearty brunch. The sweet‑spicy glaze pairs beautifully with the richness of eggs, creating a satisfying start to the day.
Storing and Bringing It Back to Life
Fridge Storage
Store cooked chicken in an airtight container in the refrigerator for up to 4 days. Keep the glaze separate in a small jar; this prevents the chicken from absorbing too much liquid and becoming soggy. When you’re ready to reheat, drizzle a splash of water over the chicken before microwaving to re‑steep the glaze.
Freezer Friendly
Wrap each chicken thigh individually in parchment paper and place them in a freezer bag. Freeze for up to 3 months. Thaw overnight in the refrigerator before reheating. The parchment keeps the chicken from sticking together.
Best Reheating Method
Reheat in a preheated oven at 350°F (177°C) for 10 minutes, or until heated through. If you’re in a hurry, use a microwave on medium power for 2 minutes, then finish in a skillet with a splash of water to revive the glaze’s gloss. A quick steam will keep the chicken juicy and the glaze intact.