Picture this: a Saturday morning, a pot of coffee, and the scent of butter sizzling in a pan. I was trying to salvage a batch of over‑cooked oats that had turned into a mushy mess, and the idea of turning them into bars popped into my head like a bright flash of inspiration. The kitchen was a little chaotic, with flour dusting the counter and a jar of strawberry jam staring back at me, daring me to make something sweet. I dared myself to create a treat that could double as a breakfast, snack, or dessert, and that’s how the jam‑filled oatmeal bar was born. If you’ve ever felt the urge to rescue a batch of oats or to turn a simple jam into something spectacular, keep reading—this is the recipe you’ll want in your pantry.
I was honest—my first attempt was a disaster, a sticky mess that didn’t even hold its shape. I tasted a bite, and the jam exploded in my mouth like a tiny fireworks show, sending me back for more. That moment was the turning point: I realized the secret lay in the balance between the buttery dough and the jam’s sweet burst. By tweaking the ratios and adding a touch of vanilla, I achieved a chewy texture that clung to the jam just enough to keep the flavors from leaking. The result? A bar that feels like a warm hug on a cold morning, with a jam center that’s as bright as a sunrise.
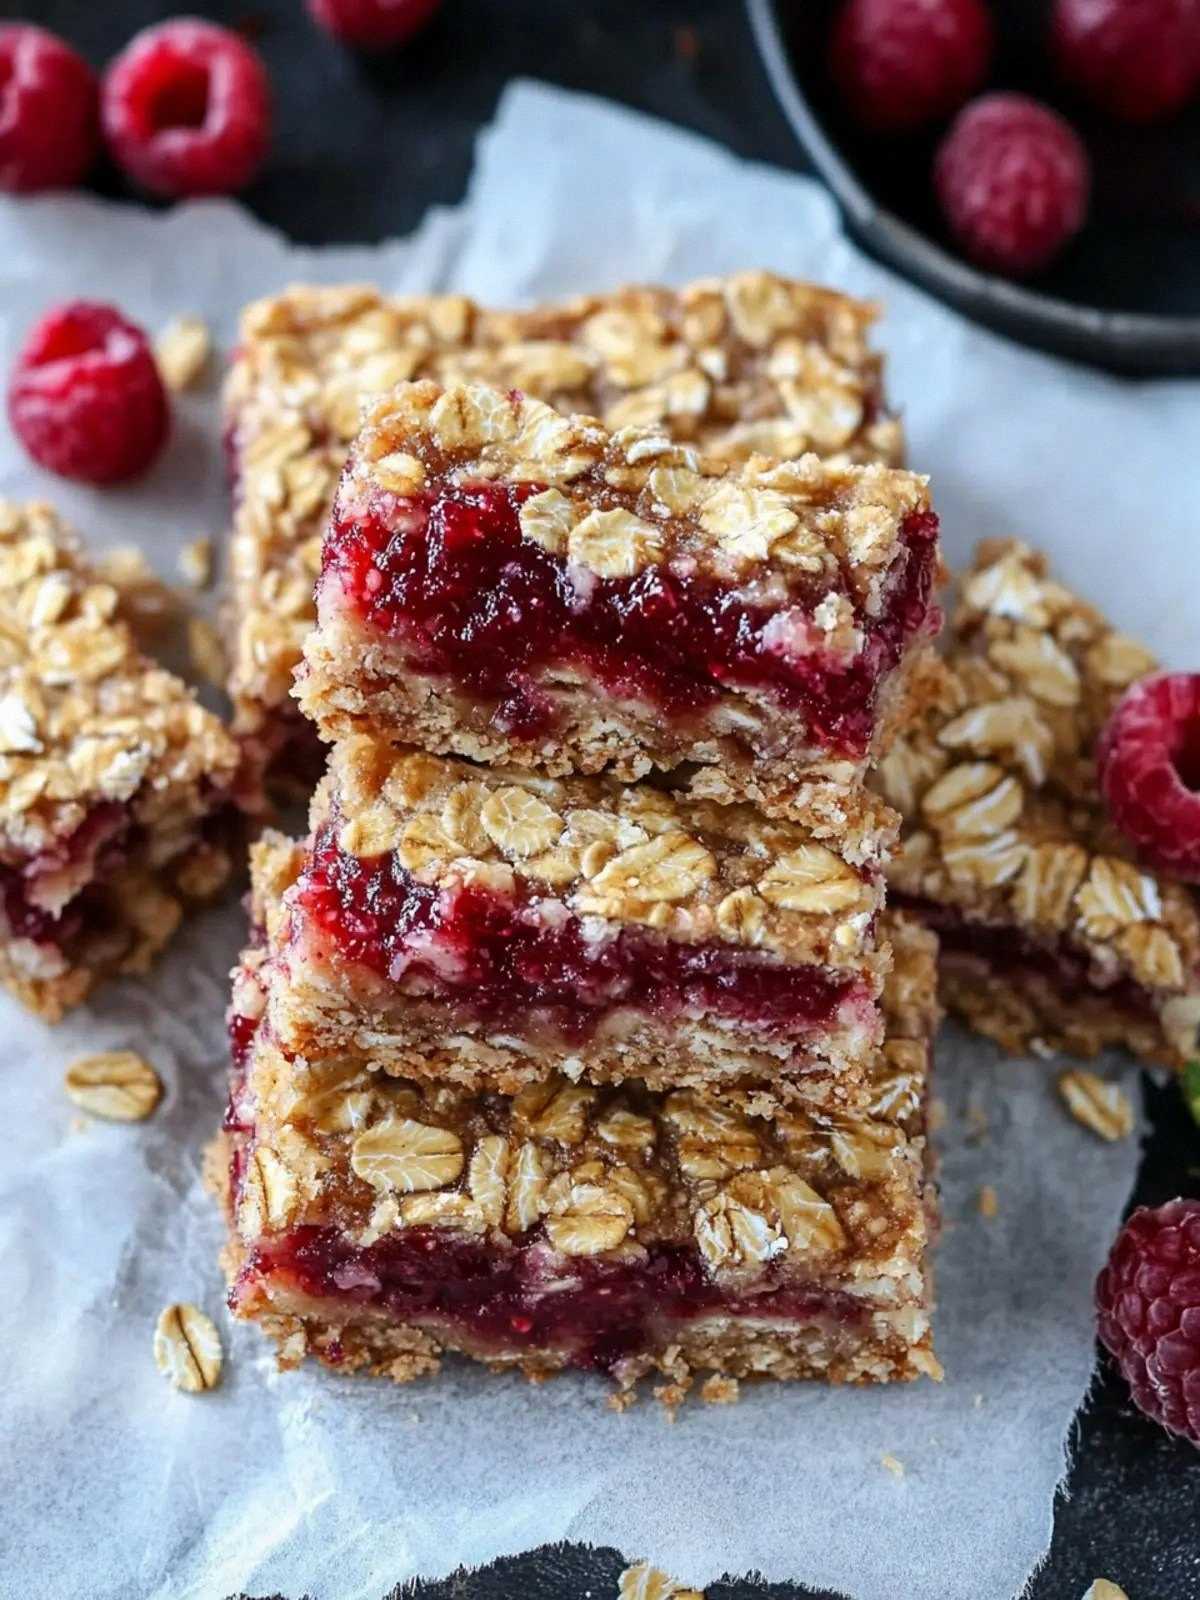
Most recipes for oat bars treat jam as a topping, but I’ve turned it into the heart of the bar, creating a surprise in every bite. The butter melts into a silky base that coats the oats like velvet, while the brown sugar caramelizes into a subtle crunch. The baking soda lifts the dough, giving it a lightness that makes each chew a delight. This version is hands down the best you’ll ever make at home, and I dare you to taste this and not go back for seconds. The aroma alone will have your whole house smelling like a bakery, and the texture will keep you coming back for more.
If you’ve ever struggled with oat bars that are too dry or too sticky, you’re not alone—and I’ve got the fix. I’ll be honest—I ate half the batch before anyone else got a chance to try it, but that’s because the first bite was pure bliss. The secret lies in the precise temperature, the timing of when to add the jam, and the way the dough is pressed into the pan. Most recipes get this completely wrong, but here’s what actually works: keep the dough firm before baking, and let it set before adding the jam so that the center stays intact. Picture yourself pulling this out of the oven, the whole kitchen smelling incredible, and the bars cooling into a golden, caramelized crust. Stay with me here—this is worth it.
What Makes This Version Stand Out
- Taste: The buttery base is infused with vanilla, creating a rich flavor that balances the bright jam center. The brown sugar caramelizes, giving a subtle sweetness that doesn’t overpower the fruit. Each bite delivers a satisfying contrast between sweet and savory.
- Texture: The oats give a hearty chew, while the butter and baking soda create a tender crumb that feels like a soft cloud. The jam remains firm inside, popping when you bite. The result is a bar that holds together without crumbling.
- Simplicity: With only eight ingredients, this recipe is straightforward yet delicious. No fancy equipment is required—just a skillet and a baking sheet. It’s perfect for beginners and seasoned cooks alike.
- Uniqueness: The jam is not a topping but a core element, making the bars distinct from ordinary oatmeal treats. The combination of old‑fashioned oats and baking soda sets it apart from typical granola bars.
- Crowd Reaction: Friends rave about the burst of jam and the chewy texture. The bars are a hit at parties and family gatherings. Even picky eaters can’t resist the sweet center.
- Ingredient Quality: Using unsalted butter and light brown sugar gives depth, while the fresh jam adds natural sweetness. The oats provide fiber, making these bars both indulgent and nutritious.
Inside the Ingredient List
The Flavor Base
Unsalted butter is the cornerstone of this recipe, providing a rich, velvety foundation that melts into the oats as they bake. Butter also carries the vanilla, creating a subtle aroma that lingers long after you finish a bar. If you’re vegan, swap the butter for a neutral‑flavored plant‑based butter; the flavor will remain intact, though the texture will be slightly different. A good rule of thumb is to let the butter soften at room temperature before mixing so it blends seamlessly into the dry ingredients.
The Texture Crew
Old‑fashioned oats give the bars a hearty chew and a natural sweetness that complements the jam. The oats also absorb some of the butter, creating a moist crumb that doesn’t dry out during cooling. If you prefer a finer texture, pulse the oats in a food processor until they resemble coarse flour, but be careful not to over‑process. The baking soda is the secret leavening agent; it reacts with the acidity of the jam and the sugar, producing tiny bubbles that keep the bars light.
The Unexpected Star
Light brown sugar adds depth and caramel notes that contrast beautifully with the tartness of the jam. Its molasses content also contributes to the bars’ golden crust. If you’re looking for a lower‑glycemic option, try using a sugar substitute that behaves similarly in baking, such as a blend of erythritol and a touch of maple syrup. Remember that the sugar’s moisture content is essential for preventing the bars from becoming too dry.
The Final Flourish
All‑purpose flour ties everything together, creating structure while remaining light enough to let the oats shine. The flour’s protein content helps bind the dough, ensuring the bars hold their shape during baking. If you want a gluten‑free version, replace the flour with a 1:1 blend of rice flour and potato starch. The salt, though a small amount, is critical for balancing the sweetness and enhancing the overall flavor profile.
Everything's prepped? Good. Let's get into the real action—your dough is about to become a work of art.
The Method — Step by Step
- First, preheat your oven to 350°F (175°C) and line a 9×13‑inch baking pan with parchment paper, leaving a few inches of overhang on each side. This makes it easier to lift the bars out once they’re done. While the oven warms, set a medium‑sized saucepan on low heat. You’ll be melting the butter here, so keep an eye on it; you want it to soften, not brown.
- Add the 10 tablespoons of unsalted butter to the saucepan and let it melt completely, stirring occasionally. The butter should be glossy and free of any lumps. Once melted, stir in the ½ cup of light brown sugar until the mixture becomes a smooth, caramel‑like syrup. This step is crucial for achieving a golden crust.
- Remove the pan from the heat and whisk in the 1 teaspoon of pure vanilla extract. The vanilla should spread out like a fragrant cloud, infusing the mixture with a subtle warmth. Next, gradually stir in the 1¼ cups of all‑purpose flour, ensuring there are no dry pockets. The dough should feel firm but pliable; if it’s too sticky, add a touch more flour.
- Fold in the 1 cup of old‑fashioned oats, the ¼ teaspoon of salt, and the ½ teaspoon of baking soda. The oats will absorb the butter, creating a moist, chewy texture. The baking soda will react with the sugar and jam, giving the bars a light lift. At this point, you can taste a small amount of the dough; it should have a buttery, slightly sweet flavor with a hint of vanilla.
- Press the dough into the prepared pan, using the back of a spoon or a flat glass to create an even layer. The dough should be about ½ inch thick; this ensures even baking. Let the dough rest for 5 minutes so the oats can soak up the butter. After resting, use a fork to make shallow wells across the surface—this will be where the jam sits. Be careful not to over‑deep the wells; you want the jam to stay inside.
- Spoon the ¾ cup of jam into each well, filling them just to the top. The jam should be centered, so it doesn’t spill over during baking. The jam’s acidity will react with the baking soda, creating a light rise in the bars. Once all wells are filled, give the pan a gentle tap to settle the jam evenly.
- Place the pan in the preheated oven and bake for 25–30 minutes, or until the edges are golden and the center is set. The aroma should fill the kitchen, a sweet, buttery scent that makes your mouth water. After baking, remove the pan and let the bars cool for 10 minutes before lifting them out with the parchment overhang.
- Once fully cooled, cut the bars into squares or rectangles using a sharp knife. Store them in an airtight container at room temperature for up to 4 days, or refrigerate for longer freshness. If you want to keep them extra moist, wrap each bar in parchment before placing them in the container. These bars are perfect for a quick breakfast, a snack on the go, or a sweet dessert after dinner.
That’s it—you did it. But hold on, I’ve got a few more tricks that will take this to another level. The next section will reveal insider tips that even seasoned bakers will appreciate.
Insider Tricks for Flawless Results
The Temperature Rule Nobody Follows
Many bakers think room temperature ingredients are enough, but for these bars, the butter should be slightly warm—just enough to pour smoothly but not melted. If the butter is too cold, the dough will be crumbly and won’t hold the jam. Warm the butter in a microwave for 10 seconds, then stir until it’s silky. This small step ensures a uniform texture throughout the bar.
Why Your Nose Knows Best
The aroma of baking butter and brown sugar is a reliable indicator of readiness. When the smell turns to a toasted, caramel scent, you know the bars are almost done. If you’re uncertain, insert a toothpick into the center; it should come out clean. Trust your nose—it’s the best judge of doneness.
The 5-Minute Rest That Changes Everything
After baking, let the bars rest for exactly five minutes before cutting. This pause allows the jam to set, preventing it from sliding out of the wells. It also lets the crumbs settle, giving the bars a neat, finished look. I’ve seen bars that were cut too soon become sticky and uneven.
Use a Silicone Mat for Easy Removal
If you’re not using parchment, a silicone baking mat will keep the bars from sticking to the pan. The mat also provides a non‑stick surface that’s easy to clean. This is especially handy if you’re making multiple batches or experimenting with different flavors.
Add a Splash of Water Before Reheating
When reheating the bars, a tiny splash of water in the pan will create steam, rehydrating the dough and restoring its moisture. Sprinkle a few drops of water over the bars, cover with foil, and heat in a 300°F oven for 5 minutes. This trick keeps the bars from becoming dry.
The Secret to a Perfect Finish
For a glossy finish, lightly brush the tops with melted butter immediately after baking. Let the butter cool for a minute, then spread it evenly. This not only adds shine but also a subtle buttery flavor that enhances the overall taste.
Creative Twists and Variations
Berry Burst
Swap the jam for a mixed berry preserves and add a handful of fresh blueberries on top before baking. The berries add a tart contrast to the sweet dough, and the fresh fruit gives a juicy bite. This version is perfect for spring and summer when berries are at their peak.
Nutty Delight
Incorporate a cup of chopped walnuts or pecans into the dough for added crunch. The nuts bring a rich, buttery flavor that complements the jam. A drizzle of honey over the top before baking adds a golden glaze.
Chocolate‑Jam Fusion
Use a chocolate spread as the jam and sprinkle cocoa nibs on top for extra texture. The chocolate jam gives a deep, bittersweet center, while the nibs add a pleasant crunch. This variation is a crowd‑pleaser for chocolate lovers.
Citrus Zest
Add a teaspoon of lemon zest to the dough and use a lemon‑flavored jam. The citrus lifts the sweetness and gives a bright, fresh finish. This is ideal for a light, refreshing snack.
Spiced Cinnamon
Stir in half a teaspoon of ground cinnamon into the dry mix and use a cinnamon‑apple jam. The warm spice pairs beautifully with the apple flavor, creating a cozy autumn treat. Serve with a splash of milk for a comforting drink.
Gluten‑Free Edition
Replace the all‑purpose flour with a gluten‑free blend of rice flour and potato starch. Keep the rest of the ingredients unchanged for a safe, tasty version. This option lets everyone enjoy the bars without worry.
Storing and Bringing It Back to Life
Fridge Storage
Store the bars in an airtight container in the refrigerator for up to a week. The cool temperature preserves the jam’s freshness and keeps the dough from drying out. When you’re ready to eat, let the bars sit at room temperature for 10 minutes to soften.
Freezer Friendly
Wrap each bar individually in plastic wrap before placing them in a freezer bag. Freeze for up to 3 months. When you need a quick snack, pop a bar into the microwave for 15 seconds, then enjoy it warm.
Best Reheating Method
To reheat, place the bars on a baking sheet and warm in a 300°F oven for 5 minutes. For a crispier top, finish under the broiler for 1 minute. If you prefer a softer interior, add a splash of water to the pan and cover with foil.