Picture this: it’s a rainy Saturday, the kind of evening that feels like a culinary invitation to experiment. I was rummaging through the fridge, trying to salvage leftovers, when a half‑cooked chicken breast and a block of bacon stared back at me like two hungry conspirators. I had a craving that screamed for something sweet, savory, and utterly irresistible. I knew right then that the answer was a slider, but not just any slider – a maple chicken bacon slider that would make your taste buds do the happy dance.
The moment I dropped the chicken into a hot skillet, the sizzle was like a tiny fireworks show, and the air filled with the buttery, smoky aroma that only bacon can deliver. I tossed in a splash of maple syrup, and the scent turned sweet, caramelized, and utterly head‑spinning. The sweet rolls, soft as clouds, were waiting to be transformed into the ultimate bite‑size feast. My kitchen felt like a stage, and I was the star chef, ready to perform the most delicious show ever.
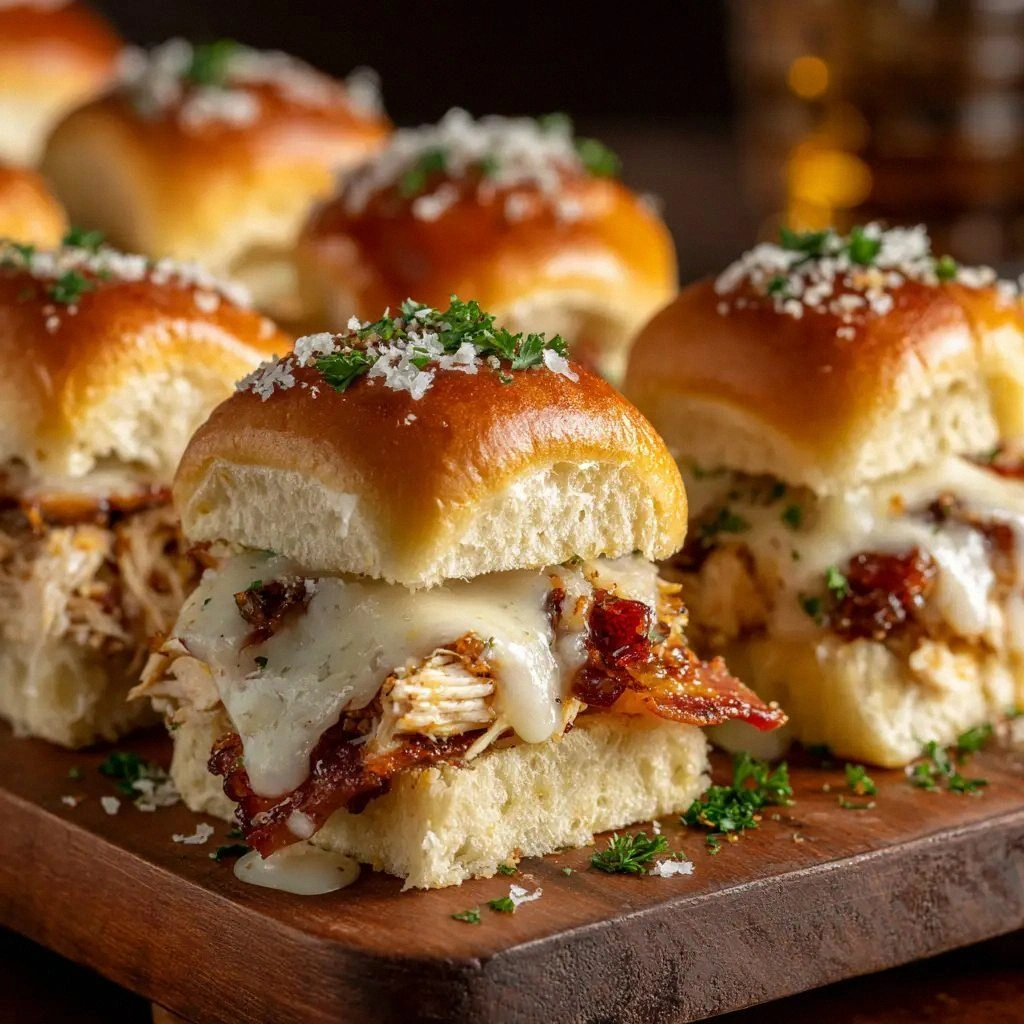
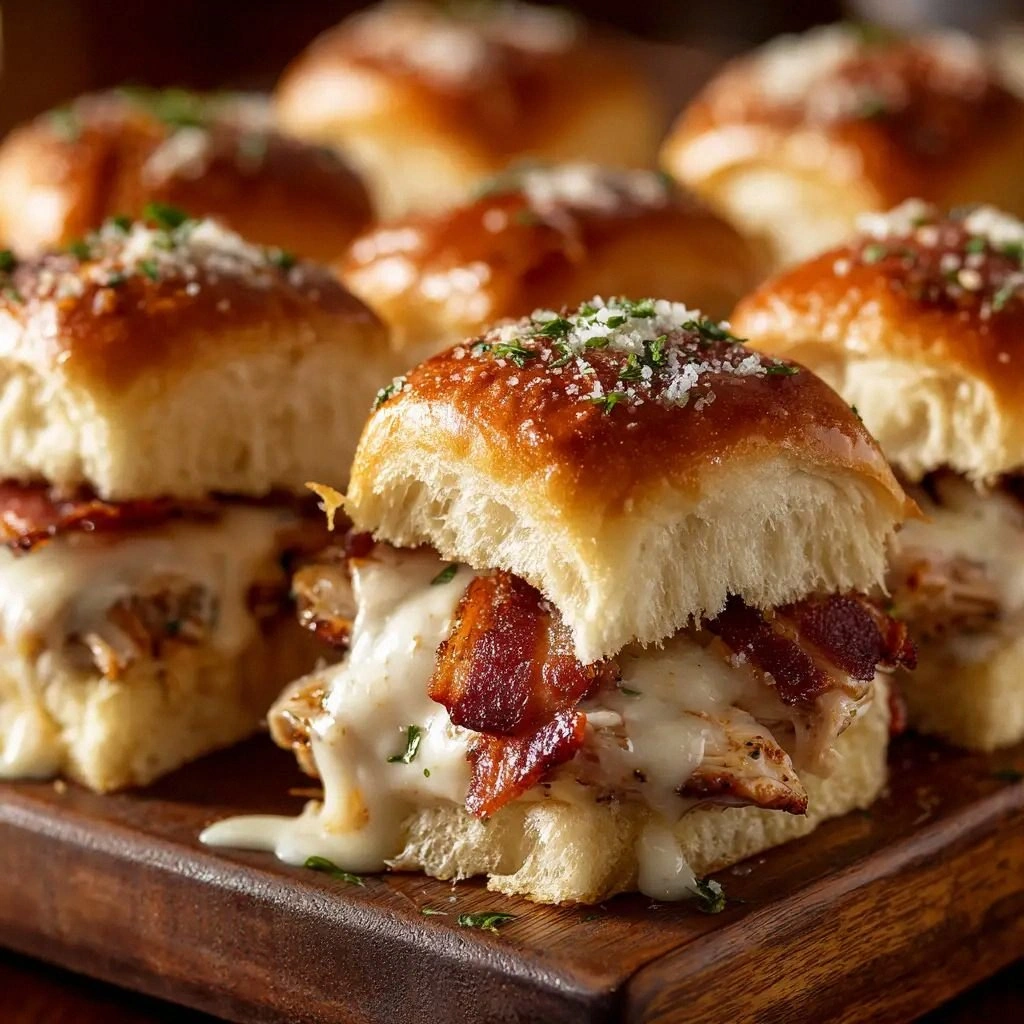
What makes this version stand out is that it’s a masterclass in balancing flavors and textures. The maple glaze coats the chicken like a glossy coat of amber, while the bacon’s crisp edges pop like tiny fireworks against the melt‑in‑your‑mouth cheddar. The rolls are toasted just enough to hold the fillings without turning soggy, and the onion powder gives a subtle kick that ties everything together. Most recipes get this completely wrong, but here, everything works in harmony – the sweet, the salty, the savory, and the buttery are all in perfect sync.
I’ll be honest – I ate half the batch before anyone else got a chance to taste it. That’s the kind of confidence that comes from knowing you’ve nailed it. Picture yourself pulling this out of the oven, the whole kitchen smelling incredible, the sliders steaming, and your guests begging for the recipe. I dare you to taste this and not go back for seconds. Let me walk you through every single step – by the end, you’ll wonder how you ever made it any other way.
What Makes This Version Stand Out
- Flavor Fusion: The combination of maple syrup and Dijon mustard creates a sweet‑savory glaze that’s more complex than a simple BBQ sauce, giving each bite a layered taste experience.
- Texture Contrast: Crispy bacon edges meet melt‑in‑your‑mouth cheddar, while the soft Hawaiian rolls provide a pillowy backdrop that swallows the sauce without getting soggy.
- Ingredient Quality: Using thick‑cut bacon and sharp cheddar elevates the sliders from ordinary to extraordinary, turning each bite into a flavor explosion.
- Time Efficiency: With a prep time of just 15 minutes, you can have a crowd‑pleasing appetizer ready for a party or dinner in no time.
- Make‑Ahead Friendly: These sliders hold up perfectly when prepared a day ahead, making them ideal for entertaining or quick weekday meals.
- Visual Appeal: The golden brown glaze on the chicken and bacon, coupled with the soft pink rolls, creates a dish that looks as good as it tastes.
- Versatility: Swap out the chicken for turkey or add a spicy kick with a dash of cayenne pepper, and you’ve got endless variations.
- Audience Reaction: Even the most skeptical eaters will be wowed by the harmony of sweet, salty, and savory.
Alright, let's break down exactly what goes into this masterpiece...
Inside the Ingredient List
The Sweet Roll Foundation
The Hawaiian sweet rolls are the backbone of these sliders. Their soft, slightly sweet dough holds the savory fillings without becoming mushy. If you’re craving a different flavor profile, try brioche or cinnamon rolls for a spicier kick. If you skip the rolls entirely, you lose the essential “bite‑size” experience that makes sliders so addictive. When selecting rolls, choose ones that are fresh and not overly dry; a quick toast in the oven will revive them and add a satisfying crunch.
The Flavor Base
This is where the maple syrup, Dijon mustard, and onion powder come into play. The maple syrup adds a natural sweetness that caramelizes beautifully on the chicken and bacon. Dijon mustard brings a subtle tang that cuts through the richness of the butter and cheese, preventing the sliders from feeling too heavy. Onion powder adds depth and a hint of savory earthiness. If you’re allergic to mustard, a splash of apple cider vinegar can substitute its acidity.
The Texture Crew
Thick‑cut bacon is chosen for its robust flavor and satisfying crunch. It also holds up well against the moist chicken and sweet glaze. Sharp cheddar cheese melts into a gooey, creamy layer that balances the crisp bacon. Butter is essential for a silky finish; it helps the glaze coat the chicken evenly and adds a buttery richness that ties everything together. A pinch of salt is added to enhance the flavors, but you can adjust to taste.
The Unexpected Star
The shredded chicken is the star that carries the majority of the dish’s protein punch. Cooked, shredded chicken is versatile and can be flavored with various seasonings before being combined with the glaze. If you prefer a vegetarian option, swap the chicken for shredded tofu or tempeh, seasoned similarly. Skipping the chicken would leave the sliders lacking in protein, making them more like a snack than a substantial appetizer.
Everything’s prepped? Good. Let’s get into the real action...
The Method — Step by Step
- Preheat the oven: Set your oven to 375°F (190°C). While it warms, line a baking sheet with parchment paper for easy cleanup. This low‑to‑mid temperature ensures the rolls toast evenly without burning.
- Toast the rolls: Slice each Hawaiian roll in half, then place them on the prepared sheet. Brush the cut side lightly with melted butter. Toast for 4-5 minutes until golden brown; this creates a crisp shell that protects the fillings from becoming soggy.
- Cook the bacon: In a large skillet over medium heat, cook the thick‑cut bacon until it’s crisp and browned on both sides. Remove with a slotted spoon and set on a paper towel to drain excess fat. The bacon’s fat will be used later to sauté the chicken.
- Sauté the chicken: In the same skillet, add the remaining bacon fat and heat it until shimmering. Toss in the shredded chicken, spreading it out so it cooks evenly. Stir in the onion powder, maple syrup, and Dijon mustard. Cook for 5 minutes, stirring frequently, until the chicken is heated through and the glaze thickens.
- Assemble the sliders: Place a generous spoonful of the glazed chicken onto the bottom half of each toasted roll. Layer with a slice of sharp cheddar cheese, allowing it to melt slightly from the heat of the chicken. Add a piece of bacon on top, then cap with the other half of the roll.
- Finish in the oven: Return the assembled sliders to the oven for 5-7 minutes, or until the cheese is melted and bubbly. Keep a close eye on them; you want a golden, gooey finish without overcooking.
- Let them rest: Remove the sliders from the oven and let them sit for 2 minutes. This brief rest allows the flavors to settle and prevents the cheese from sliding off.
- Serve immediately: Arrange the sliders on a platter, drizzle any remaining glaze over the top for an extra sweet kick, and serve while hot. They’re perfect for parties, game nights, or a quick dinner.
That's it — you did it. But hold on, I've got a few more tricks that'll take this to another level...
Insider Tricks for Flawless Results
The Temperature Rule Nobody Follows
Many people bake at 400°F, which can scorch the glaze and burn the rolls. Stick to 375°F, and you’ll achieve a golden, caramelized finish without compromising the texture. The lower temperature also allows the cheese to melt evenly, giving you that perfect gooey layer.
Why Your Nose Knows Best
Smell the glaze before adding it to the chicken. If it’s too sweet, a splash of lemon juice can cut the sweetness just enough. If it’s not sweet enough, add a teaspoon of brown sugar. Your nose is a reliable indicator of flavor balance.
The 5-Minute Rest That Changes Everything
After baking, let the sliders rest for exactly five minutes. This small window allows the cheese to set, preventing it from sliding off when you cut the sliders. It also lets the glaze thicken slightly, enhancing the overall mouthfeel.
Use a Skillet for the Chicken
Cooking the chicken in the skillet where the bacon fat remains ensures maximum flavor absorption. Skipping this step results in a drier, less flavorful chicken. The residual bacon fat adds a smoky undertone that’s essential to this dish.
Keep the Rolls Warm
If you’re preparing sliders ahead of time, keep the toasted rolls in a warm oven (200°F) for up to an hour. This prevents them from drying out and maintains the perfect bite.
Creative Twists and Variations
This recipe is a playground. Here are some of my favorite ways to switch things up:
Spicy Maple Bacon Slider
Add a pinch of cayenne pepper to the glaze for a fiery kick. The heat pairs wonderfully with the sweetness, creating a balanced flavor profile that excites the palate.
Turkey & Cranberry Slider
Replace the chicken with shredded turkey and stir in a tablespoon of cranberry sauce before glazing. The tartness of the cranberry cuts through the richness, offering a festive twist.
Mushroom & Swiss Slider
Sauté sliced mushrooms with garlic and thyme, then mix with the glaze. Swap cheddar for Swiss cheese for a nutty, mellow flavor that complements the earthy mushrooms.
Pesto Chicken Slider
Mix the chicken with a spoonful of basil pesto before glazing. The herbaceous notes add freshness, while the pesto’s olive oil content keeps the sliders moist.
Vegan Sweet Potato Slider
Use roasted sweet potato cubes instead of chicken, and top with a vegan cheddar alternative. The natural sweetness of the sweet potato pairs beautifully with the maple glaze.
Cajun-Style Slider
Season the chicken with a Cajun spice blend before glazing. The smoky, peppery flavor profile offers a bold, southern twist to the classic slider.
Storing and Bringing It Back to Life
Fridge Storage
Store any leftovers in an airtight container in the refrigerator for up to 3 days. The rolls may soften slightly, but the flavor remains intact. Reheat in a toaster oven at 350°F for 5 minutes to restore crispness.
Freezer Friendly
For longer storage, wrap the assembled sliders tightly in plastic wrap, then place them in a freezer bag. They’ll keep for up to 2 months. Thaw overnight in the fridge before reheating.
Best Reheating Method
Reheat in a skillet over medium heat until the cheese melts and the rolls are warm. Add a splash of water before reheating to steam the rolls back to perfection, preventing them from drying out.