I was in the middle of a movie marathon, popcorn was the star, but the kitchen turned into a volcano when a handful of kernels exploded onto the counter, scattering sugar like confetti. The heat burst sent a sweet, caramelized scent spiraling up, making my eyes water with anticipation and dread. I stared at the chaos, realizing that a simple snack could become a culinary catastrophe if not handled with precision. That moment of panic sparked a daring experiment: what if popcorn could be transformed into a pink, glittering, sweet‑tooth‑friendly treat that still kept its crunch? The result was a recipe that feels like a carnival in a bowl, and I’m here to spill every secret.
Picture the kitchen as a stage: the stovetop glows amber, the saucepan clinks against the counter, and the air vibrates with the faint hiss of butter melting. The scent of caramelized sugar rises, mingling with the buttery aroma that promises a glossy coat. As the kernels pop, they erupt like fireworks, each pop a tiny drumbeat in a symphony of crunch. The sound is almost hypnotic, a rhythmic reminder that this snack is about to transcend ordinary popcorn. When you finally taste the first bite, you’ll feel a burst of sugary pinkness that feels like a celebration in your mouth.
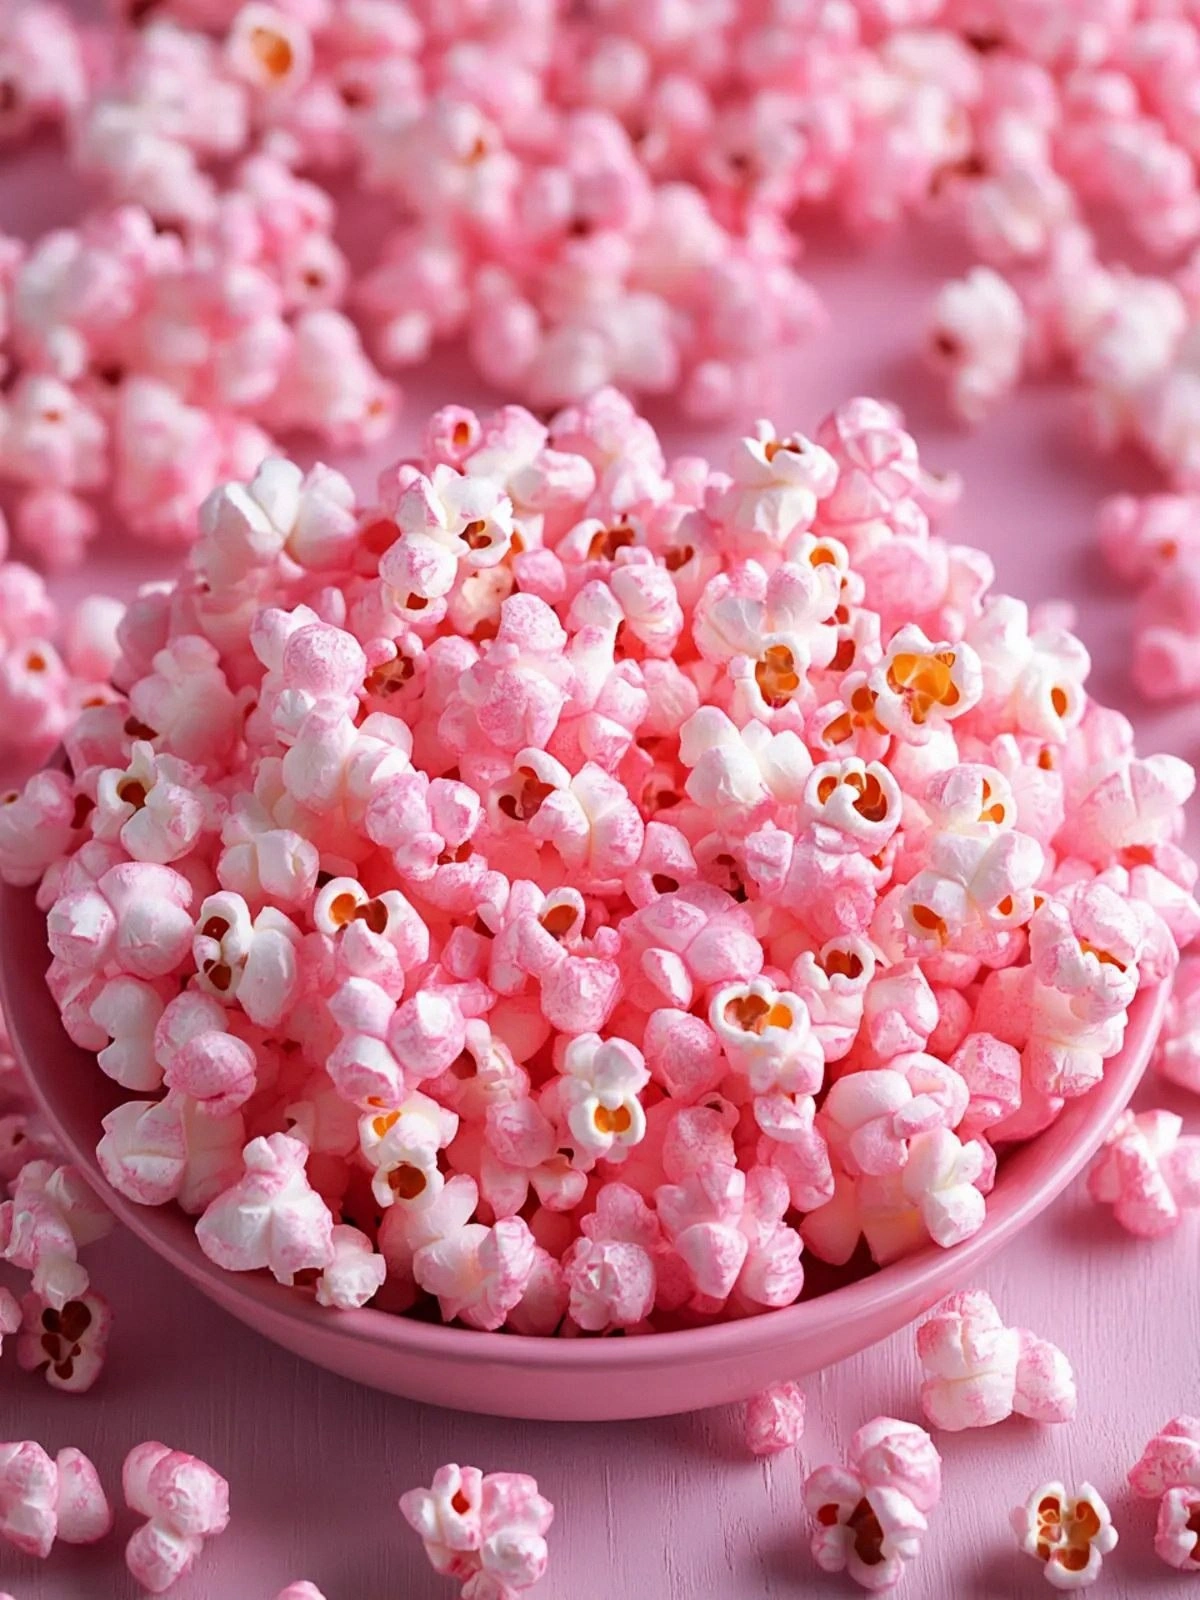
This version stands out because it marries the simplicity of stovetop popcorn with the indulgence of a candy coating, all while maintaining a delicate pink hue that’s impossible to replicate with store‑bought varieties. The use of raspberry extract gives the sweet coating a subtle tartness that cuts through the richness of butter and sugar, creating a balanced flavor profile that’s both nostalgic and sophisticated. The pop of edible glitter adds a visual sparkle that makes it perfect for themed movie nights or a playful dessert. And because the recipe is entirely homemade, you can tweak the sweetness or color intensity to suit your taste, something you can’t do with pre‑packaged popcorn. It’s a dish that feels both comforting and adventurous, and it’s guaranteed to become a crowd‑pleaser at any gathering.
But here’s the twist that makes this recipe unforgettable: the coating isn’t just sugar; it’s a carefully measured syrup‑butter blend that creates a glossy, candy‑like shell that clings to every kernel, giving you that perfect bite‑crunch without the stickiness of hard candy. I dare you to taste this and not go back for seconds, because each kernel is a little burst of buttery sweetness, a caramelized kiss that leaves you wanting more. The next section will walk you through what makes this version a game‑changer, and by the end, you’ll wonder how you ever made popcorn any other way.
What Makes This Version Stand Out
- Taste: The sweet coating is a delicate balance of caramelized sugar and a hint of raspberry, creating a flavor profile that’s both nostalgic and sophisticated.
- Texture: The popcorn remains crisp and airy while the coating provides a glossy, candy‑like snap that’s not sticky or hard.
- Color: The pink hue is achieved with a few drops of food coloring, giving the snack a playful, eye‑catching appearance.
- Simplicity: All ingredients are pantry staples, and the method requires just a pot, a whisk, and a little patience.
- Crowd Reaction: Guests rave about the novelty, and the snack is perfect for themed movie nights, parties, or a sweet snack after a long day.
- Make‑Ahead Potential: The coated popcorn can be stored in an airtight container for up to a week, making it ideal for prep‑and‑go moments.
- Ingredient Quality: Using real raspberry extract over artificial flavor ensures depth and authenticity.
- Cooking Method: The stovetop technique keeps the popcorn fluffy and prevents it from becoming soggy.
Alright, let’s break down exactly what goes into this masterpiece, from the humble kernels to the final glittering flourish.
Inside the Ingredient List
The Flavor Base
Popcorn kernels are the foundation of this snack, and selecting a high‑quality brand ensures a fluffy texture that can hold the sweet coating. If you’re a purist, look for kernels that are labeled “ready‑to‑pop” and free of additives. Skipping this step will result in a mushy or unevenly popped batch, which defeats the purpose of a crisp, candy‑coated treat. A small tip: store kernels in an airtight container to keep them fresh and prevent moisture absorption.
The Sweet Layer
The granulated sugar forms the backbone of the coating, giving the popcorn its sweet, caramelized crunch. When the sugar melts, it creates a glossy film that clings to each kernel. If you skip the sugar, you’ll lose that signature candy snap, and the popcorn will taste bland. You can substitute brown sugar for a deeper molasses flavor, but the color will shift toward amber, which might conflict with the pink aesthetic.
The Sticky Glue
Light corn syrup acts as a binding agent, preventing the sugar from crystallizing and ensuring a smooth coating that doesn’t flake off. Without syrup, the coating would be brittle and prone to cracking. If you’re avoiding corn syrup, a small amount of honey can work, but it will introduce a distinct floral note.
The Final Flourish
Raspberry extract provides a subtle tartness that balances the sweetness, while the pink food coloring gives the snack its eye‑catching hue. Edible glitter or sprinkles add a festive sparkle that makes this popcorn feel like a party in a bowl. If you’re vegan, look for plant‑based butter or a dairy‑free butter alternative. Each element is essential; omitting any of them changes the overall experience.
Everything’s prepped? Good. Let’s get into the real action, where the popcorn meets its sweet destiny.
The Method — Step by Step
- Step 1: Prepare the Popcorn Heat a large, heavy‑bottomed pot over medium heat. Add 1/2 cup of popcorn kernels and a splash of oil to keep the kernels from sticking. Cover the pot with a tight‑fitting lid and let the kernels pop, shaking the pot occasionally. The popping should slow to about one pop every few seconds before it stops completely. This is the moment of truth; don’t rush it or you’ll end up with unevenly popped popcorn.
- Step 2: Melt the Butter While the kernels are popping, melt 4 tablespoons of unsalted butter in a separate saucepan over low heat. Stir frequently to prevent burning. Once the butter is fully melted, remove it from the heat to keep it from scorching. The buttery aroma should fill the kitchen, signaling that the next step is about to begin. This butter will form the base of your sweet coating.
- Step 3: Combine Sugar and Syrup In the same saucepan used for the butter, add 1 cup of granulated sugar and 1/4 cup of light corn syrup. Stir until the sugar starts to dissolve and the mixture becomes glossy. Let it simmer gently for 2–3 minutes, watching for the first signs of caramelization. If the mixture thickens too quickly, lower the heat slightly. The goal is a smooth, amber‑colored syrup that coats the popcorn evenly.
- Step 4: Add Raspberry Extract Remove the saucepan from the heat and stir in 1 teaspoon of raspberry extract. The extract will infuse the coating with a subtle tartness that balances the sweetness. Be careful not to over‑stir, as you want the flavor to remain bright and not become muted. The mixture should now have a slightly fragrant, fruity undertone. This step is crucial for the signature flavor profile.
- Step 5: Color the Coating Add a few drops of pink food coloring to the syrup, stirring until the color is even. The pink hue should be vibrant but not overly saturated; you can always add more drops if desired. The color will set as the coating cools, giving the popcorn a festive look. Keep a small bowl of cold water nearby; a quick splash after popping can help maintain crispness.
- Step 6: Coat the Popcorn Transfer the freshly popped popcorn to a large mixing bowl. Drizzle the warm syrup over the popcorn, using a spoon or spatula to toss gently. Ensure each kernel is coated with the glossy mixture. The popcorn should look like it’s been dusted with sugar crystals, shimmering under the kitchen light. Don’t let the mixture cool too much before tossing; otherwise, the coating will harden prematurely.
- Step 7: Add Glitter or Sprinkles While the coating is still warm, sprinkle a handful of edible glitter or your favorite sprinkles over the popcorn. Toss again to distribute the sparkle evenly. The glitter will set as the coating dries, adding a touch of whimsy. If you prefer a more subtle look, you can reserve the glitter for a final garnish.
- Step 8: Let It Cool Spread the coated popcorn onto a large baking sheet lined with parchment paper. Let it cool for about 10 minutes, allowing the coating to harden into a crisp shell. The popcorn should feel firm to the touch, not sticky or soft. This is the moment where the coating transforms from liquid to candy, giving you that satisfying snap with each bite.
- Step 9: Serve and Enjoy Once cooled, break the popcorn into clusters and serve in bowls or snack bags. The sweet, pink popcorn is perfect for movie nights, parties, or a sweet treat after dinner. If you’re storing leftovers, keep them in an airtight container to preserve crispness. Remember, this snack is best enjoyed fresh, but it can last up to a week if kept properly sealed.
That’s it — you did it. But hold on, I’ve got a few more tricks that will take this to another level, ensuring that every bite is as delightful as the first.
Insider Tricks for Flawless Results
The Temperature Rule Nobody Follows
Many home cooks assume that higher heat always produces better popcorn, but the truth is that a steady, medium heat yields the fluffiest kernels. If the pot gets too hot, the outer layer of the kernel will burn before the inside has a chance to expand, resulting in uneven popping. Keep the heat at medium and let the kernels pop slowly for a more consistent texture. A quick visual cue: the popping should slow to one pop every few seconds before it stops. This method ensures you get that perfect, airy crunch.
Why Your Nose Knows Best
When the sugar begins to caramelize, a faint nutty aroma will fill the kitchen. That scent is your cue to reduce the heat and avoid burning. If you notice a bitter, acrid smell, the sugar has gone toasty, and the coating will taste burnt. Smell the mixture before adding it to the popcorn; a sweet, buttery scent is what you’re looking for. Trust your nose, and you’ll avoid the dreaded burnt popcorn moment.
The 5-Minute Rest That Changes Everything
After coating the popcorn, let it sit for exactly five minutes before breaking it into clusters. This brief rest allows the coating to set properly, creating a crisp shell that’s easy to break. A friend once rushed the process and ended up with a sticky, gooey mess that required a second coating. By giving the popcorn a short rest, you ensure that each kernel is evenly coated and that the coating stays intact during handling.
Use a Fine-Mesh Strainer for Extra Smoothness
If you prefer an ultra-smooth coating, run the syrup through a fine‑mesh strainer before pouring it over the popcorn. This removes any sugar crystals that haven’t dissolved, resulting in a flawless glaze. The strainer also helps distribute the coating more evenly, preventing clumps of sweetness on some kernels while leaving others bare.
Keep the Coating Warm While Tossing
The syrup should be warm but not boiling when you pour it over the popcorn. If it’s too hot, the popcorn will steam and lose its crunch; if it’s too cool, the coating will harden too quickly and stick together. Aim for a temperature around 180°F (82°C), which is warm enough to coat but cool enough to maintain texture. A quick test: dip a spoon into the syrup; if it feels pleasantly warm but not scalding, you’re in the sweet spot.
Store in an Airtight Container
After the popcorn has cooled completely, transfer it to a resealable plastic bag or a jar with a tight seal. The airtight environment prevents moisture from seeping in, which would otherwise soften the coating. If you’re storing for more than a day, keep the container in a cool, dry place away from direct sunlight. This ensures that the popcorn remains crisp and ready for the next movie night.
Creative Twists and Variations
This recipe is a playground. Here are some of my favorite ways to switch things up:
Chocolate‑Infused Pink Popcorn
Add a tablespoon of cocoa powder to the syrup for a subtle chocolate undertone that pairs beautifully with the raspberry. The chocolate will deepen the flavor profile, making it a richer treat. This variation is perfect for chocolate lovers who still want that pink aesthetic.
Spicy Berry Popcorn
Mix in a pinch of cayenne pepper or red pepper flakes to the syrup for a surprising heat that balances the sweetness. The spicy kick gives the popcorn a bold flavor that’s great for parties. The pink color remains vibrant, making it both visually and tastefully exciting.
Nutty Crunch Edition
Stir in toasted almonds or chopped pecans into the coated popcorn for a nutty crunch that adds texture and flavor depth. The nuts’ natural oils help the coating adhere better, creating a more cohesive bite. This version is ideal for those who love a mix of sweet and savory.
Salted Caramel Popcorn
Replace the raspberry extract with a splash of vanilla extract and sprinkle sea salt on top after the coating sets. The salty sweetness is a classic combination that never fails to impress. The pink hue adds a fun twist to the traditional salted caramel.
Vegan Pink Popcorn
Swap the unsalted butter for coconut oil and use a plant‑based butter alternative to keep the coating silky. This vegan version maintains the same sweet, glossy coating while catering to dairy‑free diets. The flavor remains unchanged, proving that dairy isn’t a necessity.
Holiday‑Themed Popcorn
For a festive touch, add edible gold dust or silver glitter to the coating and serve in holiday‑colored bowls. The glitter adds sparkle, making the snack perfect for Christmas or Halloween. Pair it with a hot cocoa or mulled wine for a seasonal treat.
Storing and Bringing It Back to Life
Fridge Storage
Place the cooled popcorn in an airtight container and refrigerate for up to three days. The cold environment helps preserve the crispness, but the coating may soften slightly. Before serving, let it sit at room temperature for a few minutes to restore its crunch.
Freezer Friendly
For longer storage, freeze the popcorn in a sealed bag or container for up to two weeks. The freezing process locks in flavor and texture, preventing the coating from becoming sticky. Thaw at room temperature for an hour before serving to regain the original crispness.
Best Reheating Method
To revive the popcorn, place it in a preheated oven at 300°F (149°C) for five minutes. The gentle heat will restore the coating’s snap without melting it. A tiny splash of water before reheating steams the popcorn back to perfection, re‑introducing that delightful crunch.
Storing and reheating are simple, but the real magic happens when you pull the popcorn out of the fridge or freezer and watch the aroma hit your nose. The scent of caramelized sugar and buttery sweetness will instantly transport you back to that movie‑night moment.