I remember the night I almost turned my kitchen into a smoky art studio. I was craving something sweet, savory, and utterly comforting, so I grabbed a bottle of honey, a handful of olives, and a couple of lemons from the fridge. The plan was simple: roast chicken with a honey glaze and a splash of white wine. I didn't anticipate the drama that followed when the honey started caramelizing too quickly and the oven temperature spiked. The result? A golden, caramelized crust that crackled like a tiny fireworks display, and a sauce that clung to the meat like velvet.
That disastrous yet delicious experiment was the spark that lit my obsession with this dish. I spent the next week tweaking the balance of sweet and acidic, the timing of the glaze, and the seasoning of the chicken. By the end, I had a version that was hands down the best honey‑glazed chicken anyone could make at home. It’s the kind of recipe that turns a simple dinner into a moment worth savoring, and I’m ready to spill every secret. I dare you to taste this and not go back for seconds.
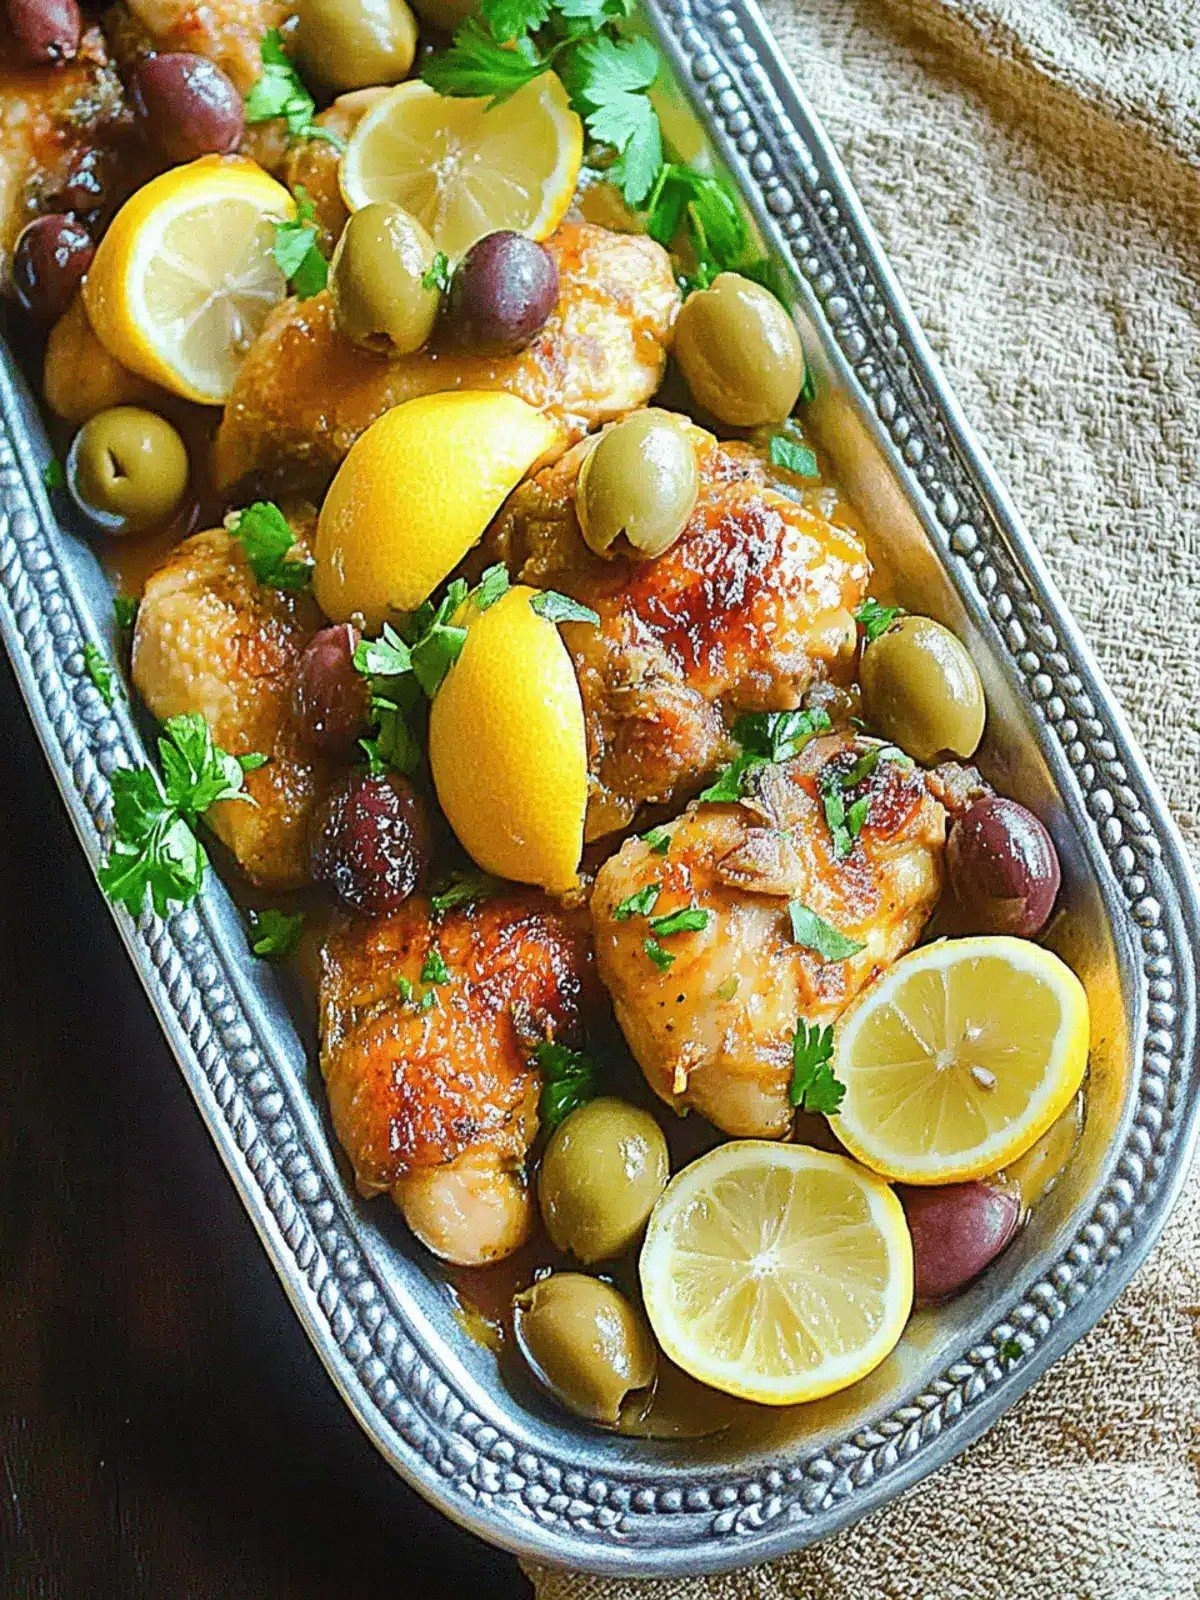
The moment you lift the lid, the kitchen fills with a scent that feels like a warm hug—honey, citrus, and the faintest hint of olive brine. The sound is a gentle sizzle, the visual is a glossy, amber glaze that shimmers against the skin. The texture is a contrast: crispy edges that shatter like thin ice, and a tender interior that melts in your mouth. The flavor is a complex dance of sweet, tart, and salty, with a peppery finish that lingers. I’ll be honest—I ate half the batch before anyone else got to try it.
Most recipes get this completely wrong, but here’s what actually works: the right ratio of honey to wine, the precise timing of the glaze, and the secret ingredient—olive oil—helps the skin crisp without drying the meat. Picture yourself pulling this out of the oven, the whole kitchen smelling incredible, and the family gathering around the table in anticipation. Stay with me here—this is worth it. Let me walk you through every single step—by the end, you’ll wonder how you ever made it any other way.
What Makes This Version Stand Out
- Flavor: The honey and lemon create a bright, caramelized glaze that balances sweetness with acidity, while the olives add a briny depth that lifts the dish.
- Texture: The skin crisps to a golden, crackling perfection, and the meat remains juicy thanks to the protective glaze.
- Simplicity: With just ten ingredients and a single pan, this recipe feels like a weekend hack, not a culinary marathon.
- Uniqueness: The unexpected addition of white wine gives the sauce a subtle complexity, turning a basic honey glaze into a gourmet experience.
- Crowd Reaction: Friends who’ve tried other honey‑glazed chicken dishes rave about how this one delivers on both taste and presentation.
- Ingredient Quality: Using fresh lemons, high‑quality olive oil, and authentic Nicoise olives elevates the entire flavor profile.
- Cooking Method: The pan‑searing technique locks in juices before finishing in the oven, ensuring consistent results every time.
- Make‑Ahead Potential: The glaze can be pre‑made, and the chicken can be roasted a day ahead, making it perfect for busy weeknights.
Alright, let's break down exactly what goes into this masterpiece…
Inside the Ingredient List
The Flavor Base
The honey is the heart of this dish, providing a natural sweetness that caramelizes beautifully. When you pour it into the pan, it starts to sizzle and create a glossy coating that protects the chicken from drying out. If you skip honey, you lose that signature amber finish and the dish becomes a plain, dry roast. For a slightly different flavor profile, you can swap honey for maple syrup, but the color will be lighter and the taste sweeter.
The Texture Crew
The olive oil is essential for crisping the skin. It raises the pan’s temperature and creates a barrier that keeps the meat juicy. If you replace olive oil with butter, the skin will still crisp, but the flavor will shift toward a richer, buttery note. Choosing a good quality extra‑virgin olive oil adds a peppery finish that complements the honey.
The Unexpected Star
White wine is the secret weapon that elevates the glaze. It adds acidity to cut through the honey’s sweetness and imparts subtle fruity undertones. If you’re avoiding alcohol, a splash of apple cider vinegar or lemon juice can mimic the acidity, though the flavor will be less complex. The wine also helps loosen the glaze, making it easier to coat the chicken evenly.
The Final Flourish
Fresh herbs like cilantro or parsley finish the dish with a burst of green freshness that cuts through the richness. They also add a subtle peppery aroma that balances the sweet glaze. If you’re looking for a different herb, basil or mint can provide a sweeter, more aromatic finish. The herbs should be added at the very end to preserve their bright flavor.
Everything’s prepped? Good. Let’s get into the real action…
The Method — Step by Step
- Preheat the oven to 400°F (200°C). While the oven heats, pat the chicken pieces dry with paper towels. Dry skin is key to crispness; moisture will steam the skin instead of browning it. Let the chicken rest at room temperature for 10 minutes to reduce the temperature shock when it hits the hot pan.
- Season the chicken. In a small bowl, mix the salt, pepper, and paprika. Sprinkle the seasoning liberally over all sides of the chicken, pressing it into the skin. This layer will form a flavorful crust that holds the glaze in place. I usually coat each piece with a light dusting of flour just to help the spices adhere.
- Heat the olive oil. Place a large, oven‑proof skillet over medium‑high heat and pour in the olive oil. Wait until the oil shimmers but isn’t smoking. This indicates the right temperature for searing. I love the sound of the oil; it’s a cue that the pan is ready.
- Brown the chicken. Add the chicken skin side down into the skillet. Let it sear undisturbed for 5–6 minutes until the skin turns a deep golden brown. Flip the pieces and sear the other side for 3–4 minutes. The goal is a caramelized crust that will hold the glaze.
- Deglaze the pan. Remove the chicken and set aside on a plate. Pour the white wine into the skillet, swirling to loosen the browned bits from the bottom. Scrape the pan with a wooden spoon to incorporate the fond into the sauce. This adds depth to the glaze.
- Add the honey and onions. Stir in the honey and the sliced onion. The onions will soften and add a subtle sweetness that complements the glaze. Allow the mixture to bubble for 2–3 minutes until it thickens slightly. The aroma at this point is intoxicating.
- Return the chicken to the skillet. Nestle the chicken back into the pan, skin side up. Spoon some of the glaze over the top to coat each piece. Add the lemon slices and olives to the pan. The lemon juice will start to reduce, creating a bright, acidic counterpoint to the honey.
- Bake to perfection. Transfer the skillet to the preheated oven. Roast for 20–25 minutes, or until the internal temperature reaches 165°F (74°C). The glaze should be thick, shiny, and slightly caramelized on the edges. Keep an eye on it; if it starts to brown too quickly, tent it loosely with foil.
- Rest before serving. Remove the skillet from the oven and let the chicken rest for 5 minutes. This allows the juices to redistribute, keeping the meat moist. While resting, stir the glaze one last time to ensure it’s evenly distributed.
- Finish with fresh herbs. Sprinkle chopped cilantro or parsley over the top before serving. The herbs add a burst of color and a fresh, peppery finish that brightens the dish. Plate the chicken with a drizzle of the remaining glaze for a glossy, appetizing look.
That’s it—you did it. But hold on, I’ve got a few more tricks that will take this to another level. These insider tips will ensure your dish is flawless every time.
Insider Tricks for Flawless Results
The Temperature Rule Nobody Follows
Many cooks assume that a lower oven temperature is safer for chicken, but a higher heat (400°F) is actually essential for crisp skin. The rapid sear locks in juices, while the oven finishes the cooking without drying the meat. If you’re using a convection oven, reduce the temperature by 25°F to avoid over‑browning. I’ve seen people get a perfect crust by simply turning the oven off after the glaze starts to bubble.
Why Your Nose Knows Best
The scent of honey caramelizing is a reliable indicator of progress. When the aroma turns nutty and slightly smoky, you’re close to the ideal glaze. If it smells overly sweet, lower the heat. Trust your nose; it’s a seasoned chef’s secret weapon.
The 5-Minute Rest That Changes Everything
Resting the chicken after roasting is not just a courtesy; it redistributes the juices throughout the meat. A 5-minute rest is enough to maintain moisture without letting the chicken cool too much. If you’re serving immediately, keep the rest time short to avoid overcooking.
The Onion’s Hidden Role
Onions don’t just add sweetness; they also help balance the acidity of the lemon and the saltiness of the olives. Sautéing them in the glaze before adding the chicken creates a layered flavor profile. If you prefer a milder taste, use pearl onions or skip them entirely.
The Olive Oil’s Secret
The quality of olive oil dramatically affects the final taste. Extra‑virgin oil brings a peppery finish that complements the honey, while a neutral oil may leave the dish flat. I use a small bottle of high‑grade extra‑virgin olive oil to ensure each bite is full of character.
Creative Twists and Variations
This recipe is a playground. Here are some of my favorite ways to switch things up:
Smoky Chipotle Honey
Add a teaspoon of chipotle powder to the glaze for a smoky heat that pairs beautifully with the honey. The result is a bold, slightly spicy version that’s great for grill lovers.
Herb‑Infused Citrus
Swap the lemon with a mix of orange and grapefruit zest. Add thyme or rosemary for a fragrant, herbaceous twist. This variation is perfect for spring or summer evenings.
Mediterranean Twist
Replace the white wine with a splash of dry sherry and add chopped sun‑dried tomatoes. The dish becomes a richer, more complex Mediterranean feast that pairs well with crusty bread.
Spicy Ginger Honey
Stir in minced fresh ginger and a pinch of red pepper flakes. The ginger’s warmth balances the honey’s sweetness, creating a comforting, spicy profile.
Vegetarian Version
Use thick-cut tofu or seitan in place of chicken. Follow the same searing and glazing steps; the result is a plant‑based dish that still delivers that signature honey glaze.
Breakfast Bonanza
Serve the glazed chicken over a bed of fluffy scrambled eggs and toasted English muffins. The sweet glaze pairs surprisingly well with savory breakfast staples, creating a brunch that feels indulgent.
Storing and Bringing It Back to Life
Fridge Storage
Cool the chicken completely, then store it in an airtight container for up to 4 days. The glaze will thicken slightly, so reheat gently to maintain moisture.
Freezer Friendly
Wrap the chicken tightly in foil and place it in a freezer bag. It stays good for up to 3 months. When ready, thaw overnight in the fridge before reheating.
Best Reheating Method
Reheat in a 350°F oven for 10–12 minutes, or until the internal temperature reaches 165°F. Add a splash of water or broth before reheating to keep the glaze from drying out. The tiny amount of steam will restore the glossy finish.