I was in the middle of a Sunday family gathering, the kitchen humming with the clatter of pans and the scent of a simmering pot of beans, when the disaster struck: the oven door slipped open, and a half-cooked batch of chicken fell into a fiery inferno. My family’s eyes widened, mouths opened, and one of my friends—ever the culinary daredevil—snapped her fingers and declared, “I dare you to make the best ribs ever and not taste a single bite.” I laughed, but the challenge stuck like a stubborn spice in my mind, and the next thing I knew, I was pulling out two racks of baby back ribs from the freezer, armed with a recipe that would turn that kitchen nightmare into a triumphant triumph.
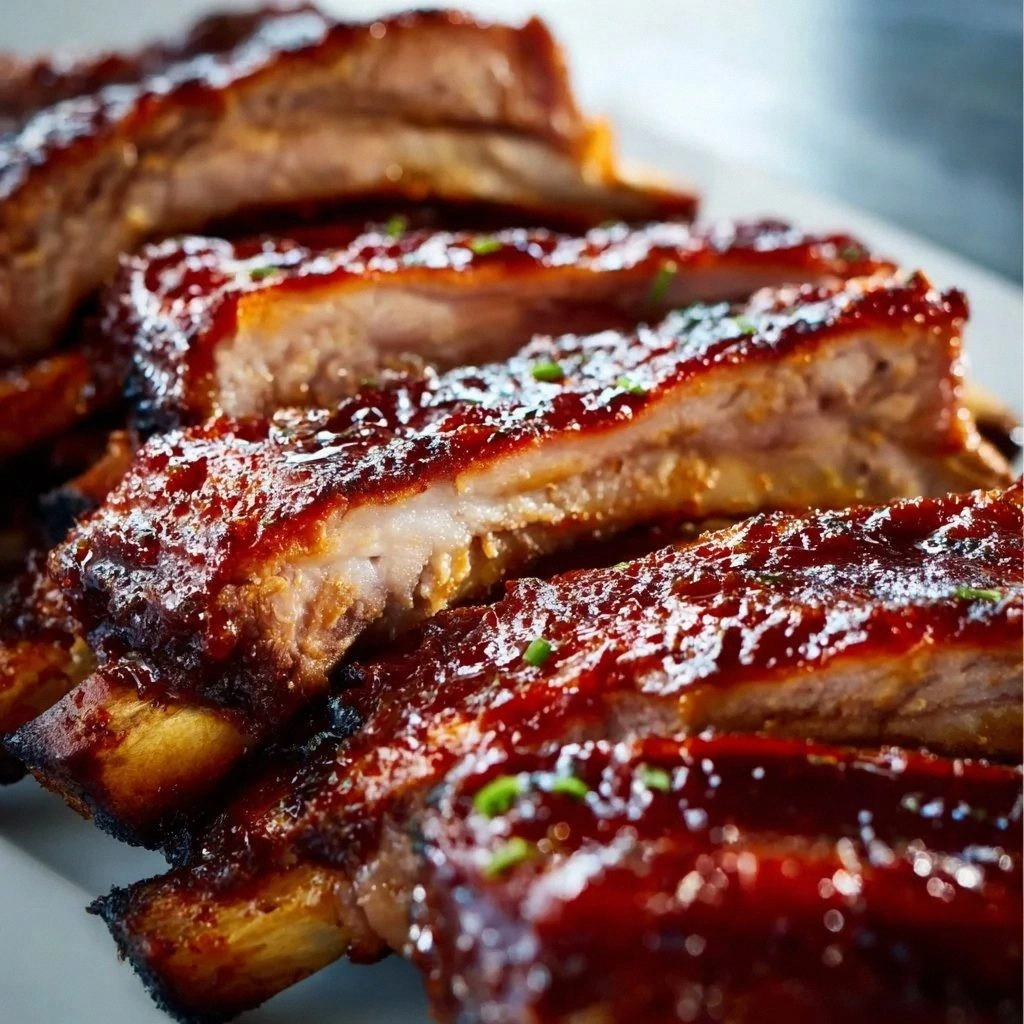
Picture the scene: a thick, amber glaze coating the meat, the aroma of smoked paprika mingling with the sharp tang of apple cider vinegar, the sound of sizzling as the ribs hit the heat, and the first bite—meat that melts like butter in your mouth, leaving a trail of sweet, smoky sauce that clings to your fingers. The texture is a study in contrast: the outer crust crackles with caramelized sugar while the inside remains tender enough to pull away from the bone in a single, satisfying swipe. The flavor is layered, not overwhelming—each ingredient plays its part like a well-tuned orchestra, delivering a savory, slightly sweet, and subtly spicy profile that satisfies every palate. If you’ve ever been disappointed by ribs that taste flat or dry, this version will rewrite your expectations and redefine what “fall‑off‑the‑bone” really means.
What sets this rendition apart isn’t just the combination of spices or the cooking method—it’s the deliberate orchestration of texture, flavor, and timing. I’ve refined this recipe over countless evenings, tweaking each element until the final product is a symphony of caramelized glaze, succulent meat, and a whisper of heat that lingers without overpowering. The secret is a simple, fool‑proof technique that locks in moisture while building a crust that’s both crisp and tender. And the best part? Even if you’re new to rib cooking, you can trust this method to deliver restaurant‑quality results in the comfort of your own kitchen.
I’ll be honest—when I first tasted these ribs, I ate half the batch before anyone else even had a chance to try them. That moment of triumph, the way the sauce coated the meat like velvet, and the satisfaction of watching the entire kitchen fill with an irresistible aroma—this is the moment you’ll want to savor over and over again. Picture yourself pulling these ribs out of the oven, the whole kitchen smelling incredible, and then sharing them with friends who will immediately beg for seconds. Let me walk you through every single step—by the end, you’ll wonder how you ever made it any other way.
What Makes This Version Stand Out
- Flavor: The blend of smoked paprika, garlic, and onion powder creates a savory base that’s both comforting and complex, while a touch of cayenne adds a subtle heat that elevates the dish.
- Texture: A caramelized glaze forms a protective crust that locks in moisture, giving the ribs a melt‑in‑your‑mouth tenderness that’s hard to replicate.
- Ease: This recipe requires minimal prep—just a quick rub and a slow bake—making it ideal for busy weeknights or lazy weekends.
- Ingredient Quality: Using fresh, high‑quality baby back ribs and real apple cider vinegar ensures the most authentic flavor profile.
- Versatility: The simple rub allows you to swap in different sauces or add a smoky chipotle twist for a different flavor profile.
- Make‑Ahead Friendly: The ribs can be prepared a day ahead and reheated without losing their juicy texture.
- Crowd‑Pleaser: The combination of sweet, smoky, and slightly spicy notes makes these ribs a guaranteed hit at family gatherings.
- Visual Appeal: The glossy glaze and golden edges give the dish a professional, restaurant‑grade look.
Alright, let's break down exactly what goes into this masterpiece...
Inside the Ingredient List
The Flavor Base
The foundation of this recipe is the dry rub—a marriage of smoked paprika, garlic powder, onion powder, ground black pepper, and a pinch of cayenne. Each spice contributes a unique layer: paprika for depth, garlic and onion for aromatic warmth, pepper for bite, and cayenne for that whisper of heat that lingers on the palate. If you skip the rub entirely, the ribs will taste flat, lacking the complex undertones that make the dish memorable. A good rub is essential; it’s the first step toward that melt‑in‑your‑mouth tenderness.
When selecting your spices, look for freshness. A fresh batch of paprika has a vibrant color and a bright, earthy flavor that’s far superior to aged, stale spice. If you’re short on time, a pre‑mixed barbecue rub can work, but it’s best to keep the flavors simple and let the meat shine.
The Texture Crew
The texture of these ribs is achieved through a combination of olive oil, apple cider vinegar, and a touch of brown sugar. Olive oil coats the meat, preventing it from drying out during the long bake, while apple cider vinegar cuts through the richness, providing a bright counterbalance. Brown sugar not only adds sweetness but also helps form that caramelized crust that’s both crisp and tender. If you skip the oil, the ribs can become dry and tough; if you skip the vinegar, the sauce will lack brightness.
A good rule of thumb is to use enough oil to lightly coat the surface of the ribs—just enough to create a barrier against the oven’s heat. The vinegar’s acidity helps break down connective tissue, making the meat more tender. The brown sugar’s molasses content contributes to the depth of flavor and helps the glaze set into a glossy, caramelized finish.
The Unexpected Star
Honey is the unexpected star that brings a subtle sweetness and a glossy sheen to the glaze. It also contains natural sugars that caramelize beautifully under heat, creating a slightly crispy exterior. If you’re looking for a healthier alternative, maple syrup can be used, though it will impart a slightly different flavor profile. Honey’s viscosity ensures it adheres to the ribs, preventing the glaze from separating during cooking.
The small amount of Worcestershire sauce adds a depth of umami that elevates the entire dish. It’s a classic ingredient in barbecue sauces, providing a savory backbone that balances the sweetness of the honey and the tang of the vinegar. If you’re avoiding Worcestershire, soy sauce is a decent substitute, but it will introduce a different flavor nuance.
The Final Flourish
The final flourish is the blend of BBQ sauce, Dijon mustard, and a splash of honey. This mixture creates a glossy, flavorful glaze that clings to the ribs, delivering a burst of savory-sweet flavor with each bite. The mustard adds a subtle tang, while the BBQ sauce provides the classic smoky undertone. If you’re adventurous, try swapping in a chipotle-infused sauce for a smoky, spicy kick.
Every ingredient has a purpose, and together they create a dish that is greater than the sum of its parts. Skipping any one of them will alter the balance, but the recipe is forgiving enough that you can experiment with substitutions while still achieving a delicious result. The key is to maintain the harmony between sweet, savory, and smoky.
Everything's prepped? Good. Let's get into the real action...
The Method — Step by Step
- Preheat the oven and prepare the ribs. Turn the oven to 275°F (135°C). While it heats, remove the ribs from the fridge, pat them dry with paper towels, and place them on a large sheet of parchment paper. This low and slow bake will allow the connective tissues to break down, resulting in that coveted fall‑off‑the‑bone tenderness. Make sure the ribs are lined up side by side; this ensures even cooking.
- Apply the dry rub. In a small bowl, mix the smoked paprika, garlic powder, onion powder, ground black pepper, and cayenne pepper. Rub the mixture all over the ribs, pressing it into the meat. The rub should coat every surface, creating a flavor base that will caramelize during the long bake. Don’t be shy—this is where the flavor starts to build.
- Create the glaze. In a separate bowl, whisk together the olive oil, apple cider vinegar, brown sugar, BBQ sauce, honey, Worcestershire sauce, and Dijon mustard. The mixture should be smooth and slightly thick—this consistency helps the glaze cling to the ribs. The glaze will form a glossy, caramelized crust that’s both sweet and savory.
- Wrap and bake. Place the ribs on the parchment-lined baking sheet and brush the glaze generously over each rack. Cover the sheet tightly with aluminum foil, sealing the edges to trap moisture. This step is crucial; the foil creates a steam environment that keeps the meat moist while the low heat breaks down the collagen. Place the sheet in the preheated oven and bake for 2 ½ to 3 hours, or until the meat is tender and pulls away from the bone with a fork.
- Remove the foil and finish. After the ribs have cooked, carefully lift the foil and brush the remaining glaze over the meat. This step will create a shiny, caramelized crust. Return the ribs to the oven and bake uncovered for an additional 15–20 minutes, or until the glaze is thick, sticky, and slightly charred at the edges. The final sear adds texture and depth.
- Rest the ribs. Once the ribs are done, let them rest for 10 minutes on a cutting board. Resting allows the juices to redistribute, ensuring each bite is juicy. While they rest, you can finish the glaze if you’d like—mix a little extra honey or BBQ sauce to drizzle over the ribs for extra shine.
Cut between the bones to separate the ribs into individual servings. Arrange them on a platter, drizzle with any leftover glaze, and garnish with fresh herbs or sliced scallions if desired. Serve immediately with your favorite sides—cornbread, coleslaw, or a crisp salad—to complete the meal. - Optional: Finish with a smoky flare. If you have a grill or a broiler, you can give the ribs a quick sear at the end to add a smoky char. This step is optional but adds an extra layer of flavor for the grill lovers in the room. Just be careful not to burn the glaze.
- Enjoy! Take a moment to inhale the aroma, then dig in. The combination of sweet, smoky, and savory flavors will make you question why you ever settled for less. Remember to share your experience—your friends will thank you for the culinary revelation.
Insider Tricks for Flawless Results
The Temperature Rule Nobody Follows
Many people think high heat is the key to juicy ribs, but the truth is low and slow is the golden rule. Baking at 275°F (135°C) allows the collagen to break down into gelatin, which keeps the meat moist and tender. A friend once tried a high‑heat method and ended up with dry, over‑cooked ribs that fell apart before the sauce even had a chance to caramelize. Stick to the low temperature, and you’ll get that melt‑in‑your‑mouth texture every time.
Why Your Nose Knows Best
During the long bake, the aroma is your best indicator of progress. As the sugars caramelize, you’ll smell a deep, sweet scent that’s almost intoxicating. When the glaze starts to thicken and the edges turn golden brown, it’s time to remove the foil. Trusting your nose keeps you from overcooking and ensures a perfectly caramelized crust.
The 5‑Minute Rest That Changes Everything
After baking, letting the ribs rest for exactly five minutes is crucial. This brief pause allows the juices to redistribute, preventing them from spilling out when you cut into the meat. It also lets the glaze set a little, giving you that perfect, sticky finish. I’ve seen ribs that were cut immediately come out dry; the rest step is a game‑changer.
Use a Paper Towel to Remove Excess Glaze
If you find the glaze too thick or sticky, dab it gently with a paper towel before serving. This step keeps the ribs from becoming overly sweet and allows the savory flavors to shine. It’s a small trick that many overlook but can elevate the dish from good to great.
The Secret Ingredient: A Dash of Smoked Salt
A pinch of smoked salt can enhance the overall smoky flavor without overpowering the other spices. Sprinkle it lightly over the ribs just before the final sear. The smoky aroma will permeate the meat, giving you a richer, deeper flavor profile that’s hard to replicate with regular salt alone. It’s an easy tweak that makes a noticeable difference.
Creative Twists and Variations
This recipe is a playground. Here are some of my favorite ways to switch things up:
Spicy Chipotle Twist
Swap the smoked paprika for chipotle powder and add a tablespoon of adobo sauce. The result is a smoky, spicy glaze that pairs beautifully with a cool cucumber slaw. This variation is perfect for those who love a kick without overpowering the meat.
Asian Fusion Flavor
Replace the BBQ sauce with hoisin sauce and add a splash of soy sauce. Finish with a drizzle of sesame oil and sprinkle toasted sesame seeds on top. The sweet, umami, and slightly nutty flavors give the ribs a unique twist that will impress your guests.
Herb‑Infused Delight
Add fresh thyme or rosemary to the dry rub for a fragrant, earthy undertone. After baking, drizzle with a mixture of melted butter and chopped herbs. This herbaceous version is a crowd‑pleaser for those who enjoy a more sophisticated flavor profile.
Low‑Calorie Version
Use a sugar‑free BBQ sauce and replace honey with a sugar substitute like stevia or monk fruit. Reduce the amount of olive oil to one tablespoon. These adjustments keep the ribs flavorful while cutting down on calories without sacrificing tenderness.
Breakfast‑Style Ribs
Serve the ribs with a side of fluffy scrambled eggs, sautéed spinach, and toasted sourdough. The combination of savory ribs and creamy eggs creates a hearty breakfast that’s both satisfying and indulgent. It’s a surprising twist that will delight early‑morning diners.
Dessert‑Inspired Glaze
Mix in a tablespoon of maple syrup and a dash of cinnamon to the glaze for a sweet, dessert‑like finish. The warm spices complement the smoky flavor, giving the ribs a caramelized, almost sweet treat feel. Serve with a side of fruit salsa for a balanced bite.
Storing and Bringing It Back to Life
Fridge Storage
Cool the ribs to room temperature, then wrap them tightly in aluminum foil or place them in an airtight container. Store in the refrigerator for up to 3 days. When you’re ready to reheat, place the ribs on a baking sheet and warm them in a 300°F (149°C) oven for 10–15 minutes, or until heated through.
Freezer Friendly
For longer storage, wrap each rack individually in plastic wrap, then place them in a freezer bag. Label with the date and freeze for up to 3 months. Thaw overnight in the refrigerator before reheating using the same method as for fridge storage. The ribs stay juicy and flavorful, even after freezing.
Best Reheating Method
When reheating, add a splash of water or broth to the foil packet before sealing. The steam created during reheating will keep the meat moist and prevent it from drying out. Finish with a quick sear under the broiler for a minute or two to restore that caramelized crust.