Love this? Pin it for later! 📌
One particularly exhausting Tuesday, with a newborn attached to my hip and my husband working late, I stared into my nearly empty freezer and spotted a forgotten bag of frozen shrimp tucked behind the ice cream. Twenty minutes later, I was sitting at my kitchen table, savoring what would become our family's most requested weeknight dinner. The best part? This honey soy glazed shrimp costs less than $3 per serving and uses pantry staples you probably already have.
What makes this recipe truly special is how it transforms humble ingredients into something that tastes like it came from your favorite Asian bistro. The sauce caramelizes into a glossy glaze that clings to each plump shrimp, while garlic and ginger add layers of flavor that belie the dish's simplicity. Whether you're cooking for picky kids, meal prepping for busy weeks, or simply craving something delicious without the fuss, this recipe delivers restaurant-quality results with minimal effort.
Why This Recipe Works
- Budget-Friendly: Uses frozen shrimp and pantry staples, keeping costs under $3 per serving without sacrificing flavor
- Lightning Fast: Ready in just 15 minutes from start to finish - perfect for those "what's for dinner?" panic moments
- One-Pan Wonder: Everything cooks in a single skillet, meaning minimal cleanup on busy weeknights
- Meal Prep Marvel: Doubles beautifully and reheats like a dream for effortless lunches throughout the week
- Customizable: Sweet, salty, spicy - adjust the sauce to match your family's preferences perfectly
- Protein Powerhouse: Each serving packs 23 grams of lean protein, keeping you satisfied and energized
- Kid-Approved: The naturally sweet glaze wins over even the pickiest eaters without any complaints
Ingredients You'll Need
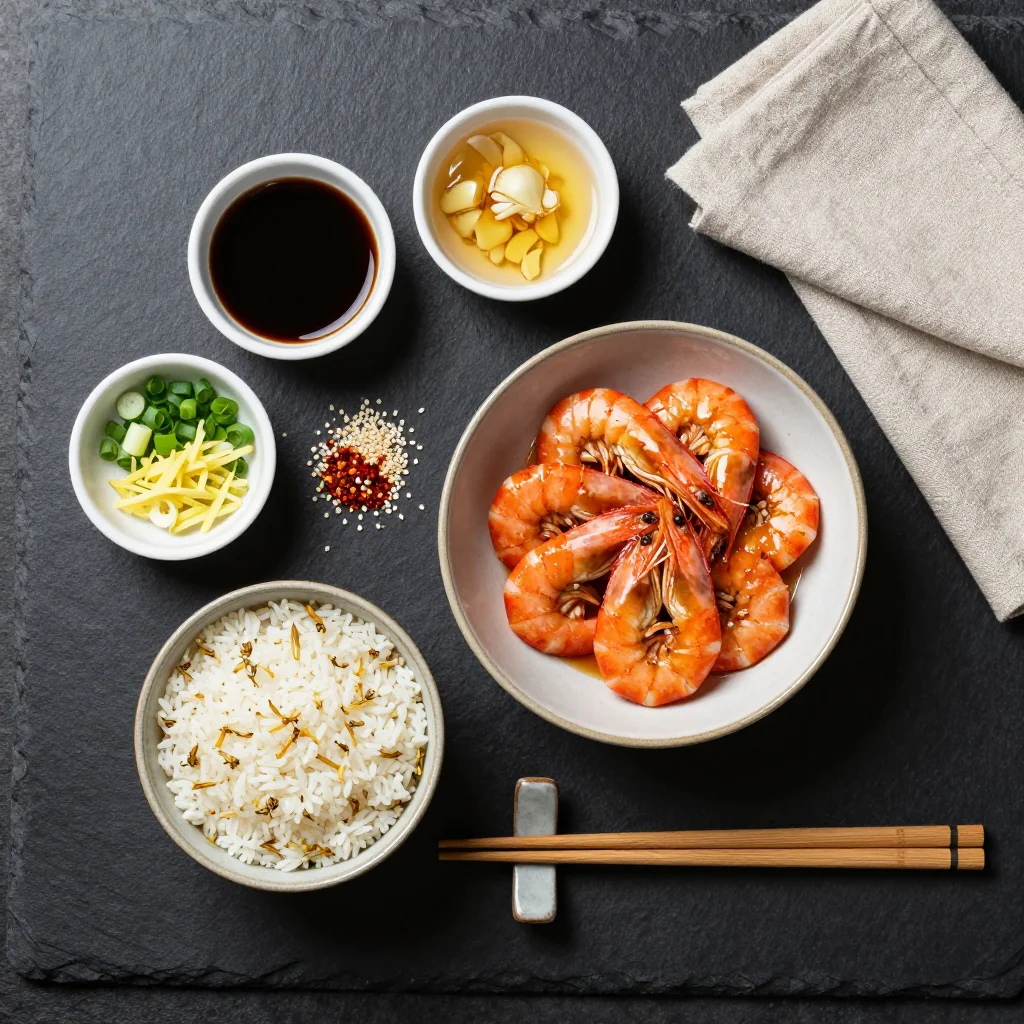
Let's talk about the star players in this budget-friendly masterpiece. Each ingredient has been carefully selected for maximum flavor impact without breaking the bank. Understanding what to buy and why makes all the difference between a good dish and an unforgettable one.
Raw Shrimp (31-40 count): I always keep a bag of frozen raw shrimp in my freezer - it's like having a secret weapon for quick dinners. The 31-40 count size is perfect here; they're substantial enough to feel satisfying but small enough to cook quickly and evenly. Look for shrimp that's already peeled and deveined to save precious time. If you can only find larger shrimp, simply adjust the cooking time by an extra minute or two.
Honey: The natural sweetness of honey balances beautifully with the salty soy sauce, creating that addictive sweet-savory combination. Any honey works here - from the fancy local stuff to the bear-shaped bottle from the grocery store. In fact, this is a perfect recipe for using up honey that's starting to crystallize. Just warm it slightly and stir until smooth.
Low-Sodium Soy Sauce: Using low-sodium soy sauce is crucial because the sauce reduces down, concentrating the saltiness. Regular soy sauce can make the final dish overpoweringly salty. If you only have regular soy sauce, reduce the amount to 2 tablespoons and add 1 tablespoon of water to maintain the right consistency.
Fresh Garlic and Ginger: These aromatics are non-negotiable for authentic flavor. Fresh ginger adds brightness and warmth that powdered ginger simply can't replicate. Store fresh ginger in your freezer and grate it directly into dishes - it grates more easily when frozen and keeps for months. The same goes for garlic; fresh cloves deliver a punchy flavor that jarred minced garlic can't match.
Rice Vinegar: This adds a subtle tang that brightens the entire dish. If you don't have rice vinegar, apple cider vinegar or white wine vinegar work in a pinch, but reduce the amount slightly as they're more acidic.
Cornstarch: Our secret weapon for creating that gorgeous, glossy sauce that clings to every shrimp. It thickens the sauce just enough without making it gloopy. Make sure to whisk it with cold water first to prevent lumps.
How to Make Honey Soy Glazed Shrimp for a Budget Weeknight Meal
Thaw and Prep Your Shrimp
If using frozen shrimp, place them in a colander and run cold water over them for 3-4 minutes, tossing occasionally, until completely thawed. This quick-thaw method is much faster than overnight refrigeration and ensures your shrimp stay firm. Once thawed, pat the shrimp very dry with paper towels - this crucial step helps them sear rather than steam. Damp shrimp will release water and prevent that beautiful caramelization we're after. Season with just a pinch of salt and pepper.
Create Your Sauce Base
In a small bowl, whisk together 3 tablespoons honey, 3 tablespoons low-sodium soy sauce, 1 tablespoon rice vinegar, 2 cloves minced garlic, and 1 teaspoon grated fresh ginger. The honey should dissolve completely into the soy sauce, creating a smooth, amber-colored mixture. This sauce is where the magic happens - the honey provides sweetness and helps create that gorgeous glaze, while the soy sauce adds umami depth. The rice vinegar brightens everything, and the aromatics infuse the sauce with complex flavors.
Prepare the Cornstarch Slurry
In a separate small bowl, whisk together 1 teaspoon cornstarch with 2 teaspoons cold water until completely smooth and no lumps remain. This slurry is your thickening agent, but it needs to be added at the right moment. The cold water prevents the cornstarch from clumping when it hits the hot pan. Set this aside near your stove - you'll need it quickly once your shrimp are cooked.
Sear the Shrimp to Perfection
Heat 1 tablespoon vegetable oil in a large skillet over medium-high heat until shimmering hot. You'll know it's ready when a drop of water sizzles immediately. Add the shrimp in a single layer - don't crowd them or they'll steam instead of sear. Let them cook undisturbed for 2 minutes. Resist the urge to move them around; this undisturbed time creates that beautiful golden crust. The shrimp should be pink and opaque halfway up the sides.
Flip and Finish Cooking
Using tongs, quickly flip each shrimp and cook for another 1-2 minutes on the second side. The shrimp are done when they're completely pink and form a loose "C" shape. If they curl into a tight "O," they're overcooked. Overcooked shrimp become rubbery, so better to err on the side of slightly underdone - they'll continue cooking in the sauce. Transfer the perfectly seared shrimp to a plate and tent loosely with foil to keep warm while you work on the sauce.
Create the Glossy Glaze
In the same skillet (don't wipe it out - those browned bits add flavor!), add the honey-soy mixture. Bring it to a gentle simmer over medium heat, scraping up any flavorful bits from the bottom. Let it bubble for about 30 seconds - this cooks off the raw taste of the garlic and ginger. Give your cornstarch slurry another quick stir (it can settle) and pour it into the simmering sauce. Stir constantly as the sauce thickens and becomes glossy, about 30-45 seconds.
Coat and Finish
Return the shrimp to the skillet and toss gently to coat every piece in that gorgeous, glossy sauce. Cook for just 30-45 seconds more - enough to warm the shrimp through and let the sauce cling to them. The sauce should coat the back of a spoon and have a beautiful, shiny appearance. If it seems too thick, add a splash of water. Too thin? Let it bubble for another 15-20 seconds. Taste and adjust seasoning - you might want a crack of black pepper or a tiny pinch more honey if you like it sweeter.
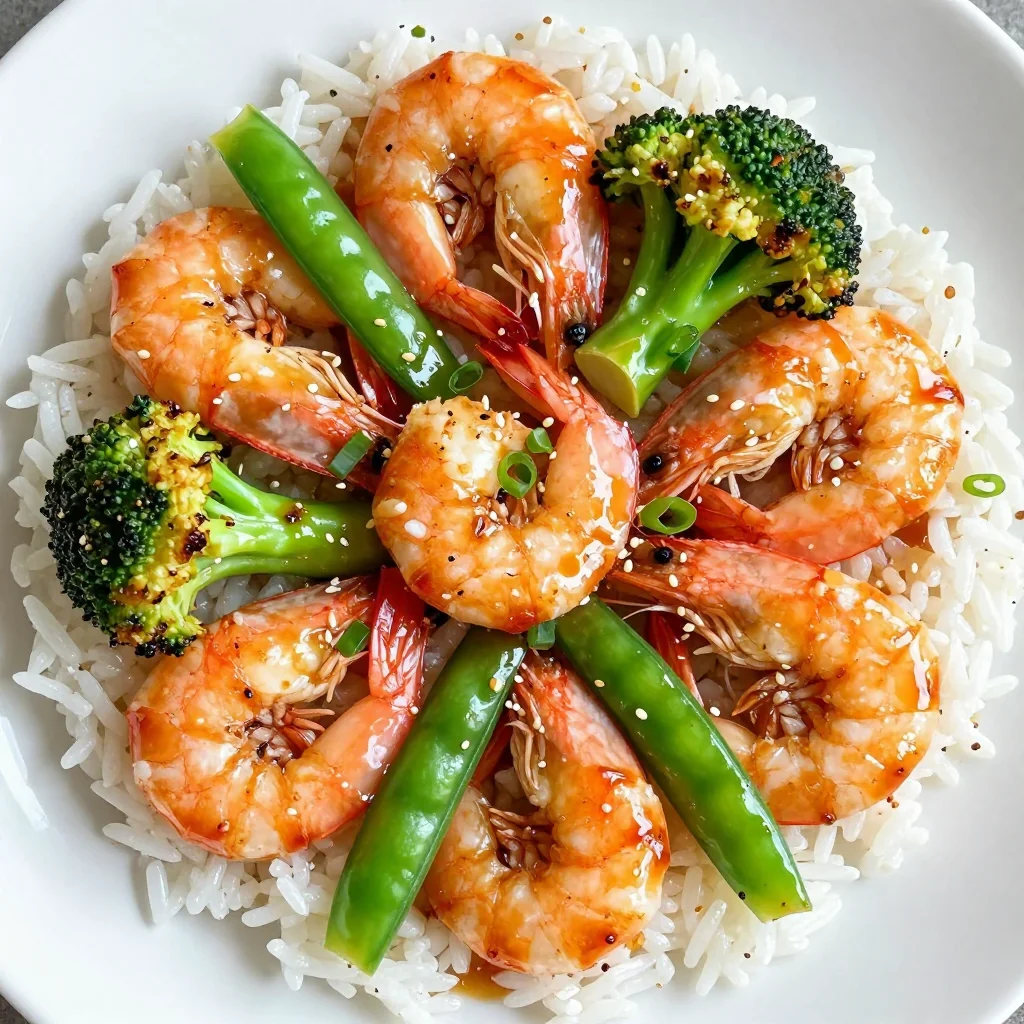
Serve Immediately
Transfer to serving plates immediately - the sauce will continue to thicken as it cools. Garnish with sliced green onions and a sprinkle of sesame seeds if you have them. I love serving this over a bed of hot jasmine rice to soak up all that incredible sauce, but it's equally delicious over noodles, cauliflower rice, or even a simple green salad. The whole dish comes together so quickly that you want to have your sides ready before you start cooking the shrimp.
Expert Tips
Perfect Temperature Control
Medium-high heat is crucial for searing shrimp properly. Too low and they'll release water and steam; too high and they'll burn before cooking through. If your shrimp are browning too quickly, reduce heat slightly. If they're not getting any color after 2 minutes, increase the heat.
Pat Dry for Success
I can't stress enough how important it is to pat your shrimp completely dry. Even a little moisture will prevent proper searing and result in rubbery, steamed shrimp. Use paper towels and press firmly - your shrimp should feel almost tacky to the touch before they hit the pan.
Timing is Everything
Have all your ingredients prepped and measured before you start cooking. This dish comes together so quickly that you won't have time to mince garlic while your shrimp cook. Professional cooks call this "mise en place" - everything in its place - and it's the secret to stress-free cooking.
Don't Overcook
Shrimp cook incredibly fast and continue cooking even after you remove them from heat. They're done when they form a loose "C" shape. If they curl into a tight "O," they're overcooked and will be rubbery. Better to slightly undercook them - they'll finish cooking in the hot sauce.
Fresh vs. Frozen Shrimp
Don't be fooled by the "fresh" shrimp at most seafood counters - it's usually just thawed frozen shrimp. Frozen shrimp are often fresher than "fresh" because they're frozen immediately after catching. Keep a bag in your freezer for instant meals, and you'll never be caught dinner-less again.
Adjust to Taste
The beauty of this recipe is how easily it adapts to your preferences. Like it sweeter? Add an extra tablespoon of honey. Prefer it saltier? Add a splash more soy sauce. Want some heat? Stir in a pinch of red pepper flakes with the garlic and ginger.
Variations to Try
Spicy Sriracha Version
Add 1 tablespoon of sriracha to the sauce mixture for a sweet-and-spicy kick that pairs beautifully with the honey. This version is especially good served over cold sesame noodles for a refreshing contrast.
Great for spice lovers who still want the sweet glazeTropical Pineapple Twist
Add 1/2 cup of fresh pineapple chunks during the last minute of cooking. The pineapple caramelizes slightly and adds a tropical note that makes this feel like a special occasion dish without extra cost.
Perfect for summer meals or when you need a mood boostVegetable-Loaded Version
Stir in 1 cup of snap peas and 1 sliced bell pepper during the last 2 minutes of cooking. The vegetables stay crisp and add color, nutrients, and bulk to stretch the meal further on a tight budget.
A complete meal in one pan - no side dishes neededStorage Tips
Refrigerator Storage
Store leftover honey soy glazed shrimp in an airtight container in the refrigerator for up to 3 days. The sauce may thicken when cold, but it will loosen when reheated. For best results, store the shrimp and any sauce separately from rice or noodles to prevent everything from becoming soggy.
Freezer Instructions
While cooked shrimp can be frozen, the texture changes significantly upon thawing. If you must freeze, let the dish cool completely, then store in freezer-safe containers for up to 1 month. Thaw overnight in the refrigerator and reheat gently. For best results, I recommend freezing only the sauce and cooking fresh shrimp when ready to serve.
Make-Ahead Components
You can prep the sauce up to 5 days ahead and store it in the refrigerator. The garlic and ginger will actually infuse more flavor over time. You can also thaw and dry your shrimp the night before, storing them in a paper towel-lined container. This way, dinner comes together in under 10 minutes on busy weeknights.
Frequently Asked Questions
I don't recommend using pre-cooked shrimp because they become rubbery when reheated. Raw shrimp gives you much better texture and absorbs the sauce more effectively. If pre-cooked is all you have, reduce the cooking time to just 30-60 seconds per side, heating them through without overcooking.
You can substitute with white wine vinegar or apple cider vinegar using a 1:1 ratio, but add just a tiny pinch of sugar to balance the stronger acidity. Lemon juice works too, but use only 2 teaspoons since it's more acidic than rice vinegar. Avoid balsamic vinegar as its strong flavor will overpower the delicate balance.
The recipe as written is gluten-free if you use gluten-free soy sauce (often labeled tamari). Regular soy sauce contains wheat, so be sure to check your bottle. The cornstarch is naturally gluten-free, and all other ingredients are safe for those with gluten sensitivities.
Perfectly cooked shrimp form a loose "C" shape and are pink with no gray areas. They should feel firm but still have a slight give when pressed. If they curl into a tight "O" or feel hard, they're overcooked. The cooking time varies slightly based on size, but 2-3 minutes per side is typical for medium shrimp.
Absolutely! You can easily double or triple this recipe, but cook the shrimp in batches to avoid overcrowding the pan. Overcrowded shrimp will steam rather than sear. Keep cooked shrimp warm on a plate while you work on subsequent batches, then combine everything in the sauce at the end. The sauce ingredients scale up perfectly without any adjustments needed.
The 31-40 count size (meaning 31-40 shrimp per pound) is ideal for this recipe. They're substantial enough to feel satisfying but small enough to cook quickly and evenly. Larger shrimp work too - just add an extra minute of cooking time. Avoid the tiny salad shrimp as they'll overcook before developing any caramelization.
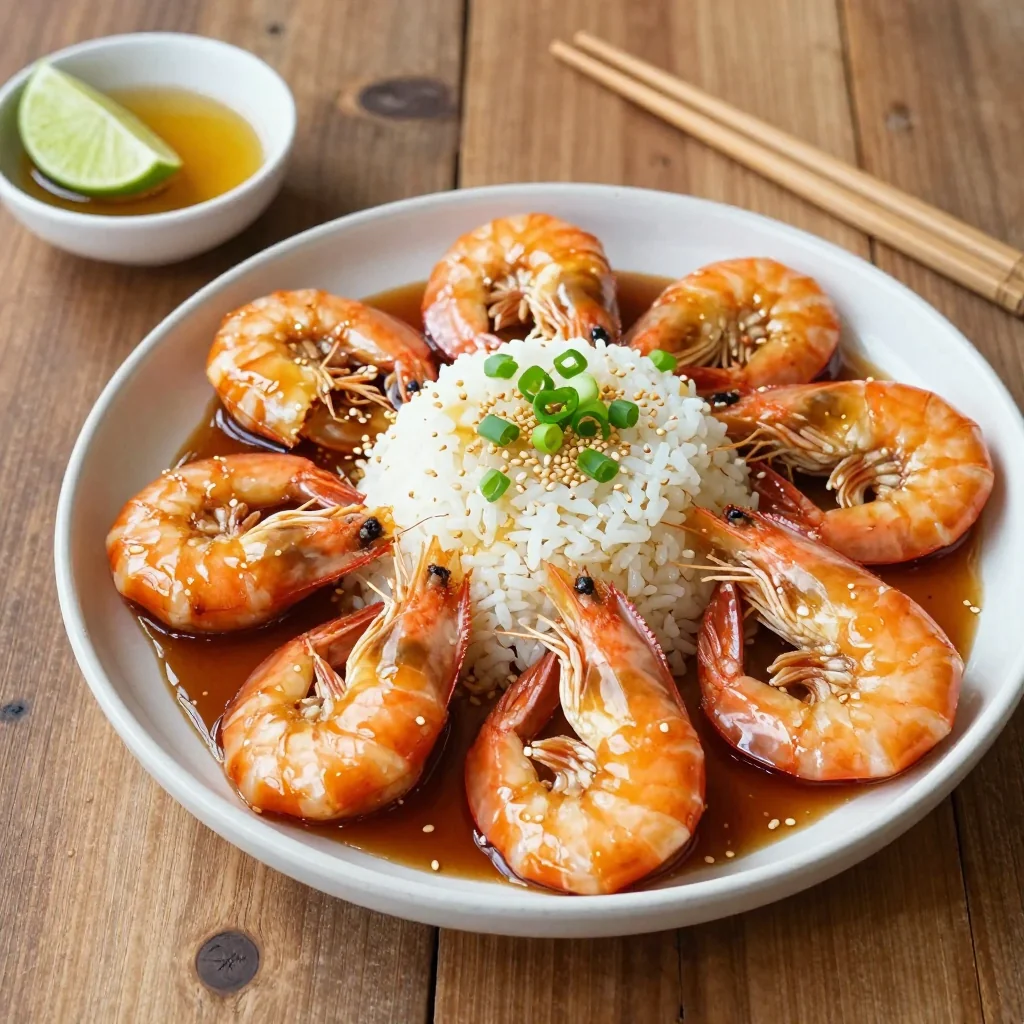
Honey Soy Glazed Shrimp for a Budget Weeknight Meal
Ingredients
Instructions
- Thaw and prep: If using frozen shrimp, thaw under cold running water for 3-4 minutes. Pat completely dry with paper towels.
- Make the sauce: In a small bowl, whisk together honey, soy sauce, rice vinegar, garlic, and ginger until smooth.
- Prepare thickener: In a separate bowl, whisk cornstarch with 2 teaspoons cold water until no lumps remain.
- Sear shrimp: Heat oil in a large skillet over medium-high heat. Add shrimp in a single layer and cook 2 minutes without moving.
- Flip and finish: Flip shrimp and cook 1-2 minutes more until pink and opaque. Transfer to a plate.
- Create glaze: Pour sauce into the same skillet and simmer 30 seconds. Stir in cornstarch mixture and cook until glossy.
- Combine and serve: Return shrimp to the pan, toss to coat in sauce, and cook 30-45 seconds more. Serve immediately over rice.
Recipe Notes
For extra caramelization, let the sauce bubble for an additional 30-60 seconds before adding the cornstarch. This creates a deeper, more complex flavor. Don't skip patting the shrimp dry - it's the key to perfect searing!